The Christmas tree is up. The lights are blinking festively. The house is heavy with the smell of spiced cider and there is a trace of smoke from the fireplace dancing in the air. It is the holiday season. Whether you are celebrating the Miracle of the Oil, the Birth of the Savior, or just loving the spirit of giving and dedication – it is a time for reflection and love. It is also a great time to flex your creativity and add some home designed flair to your holidays.
Today is the last day of Hanukkah. If you celebrated, we hope it was wonderful!
We have free beaded ornament ideas that are sure to wake your creative muse. These lovely ornaments are great for the tree, great for an interfaith family, great for a Hanukkah Bush, and perfect as a cute topper on a wrapped gift. We wanted to include something for everybody.
Don't miss our other holiday jewelry ideas. Follow our blog and check out our Free Beading Project Ideas. Subscribe to our YouTube channel for more tips. Visit our Facebook page if you want to catch our live shows and sales. And join our Facebook group – VIB, if you want to join a friendly community or jewelry designers and all around creative people. We would love to see your holiday creations. Post pictures on our VIB group!
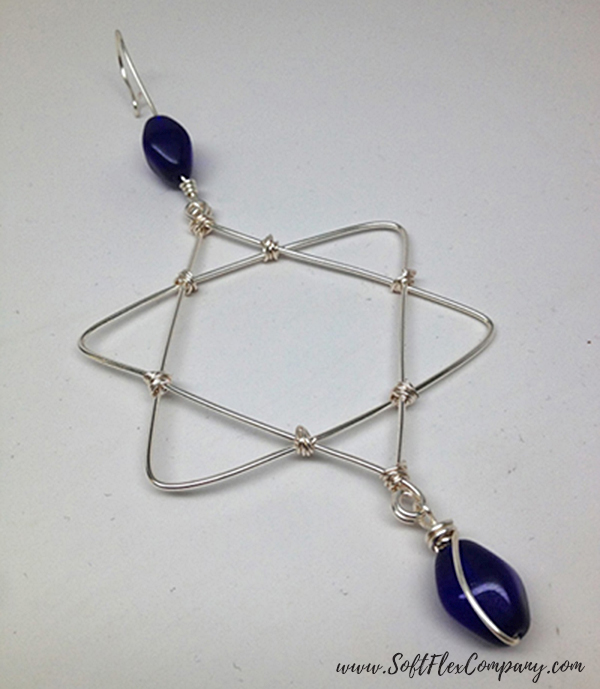
Star Of David Ornament
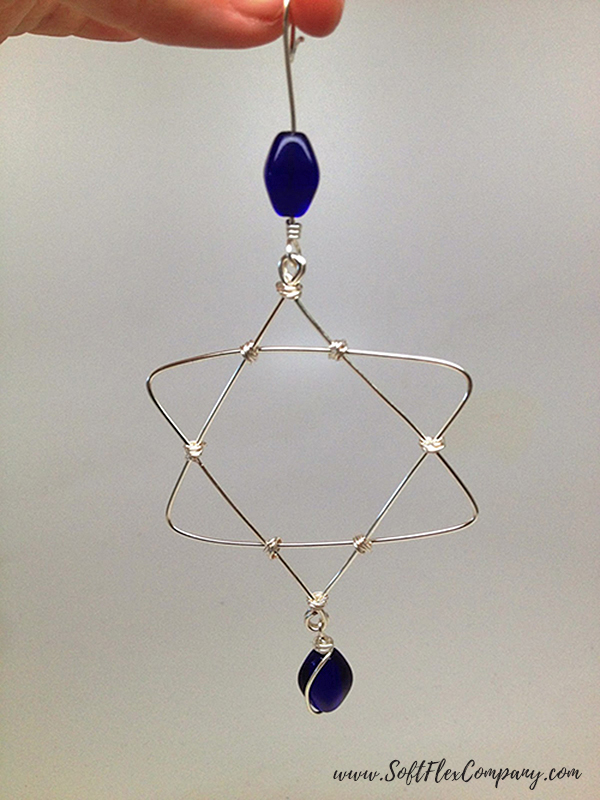
Designer Sara Oehler
Materials
18ga Non-Tarnish Silver Plated Soft Flex Craft Wire
24ga Non-Tarnish Silver Plated Soft Flex Craft Wire
Blue Beads - 2 pcs
Tools
WigJig Olympus-Lite
WigJig Olympus Super Peg
Round Nose Pliers
Chain Nose Pliers
Cutters
Nylon Tipped Hammer
Nylon Jaw Pliers
Instructions
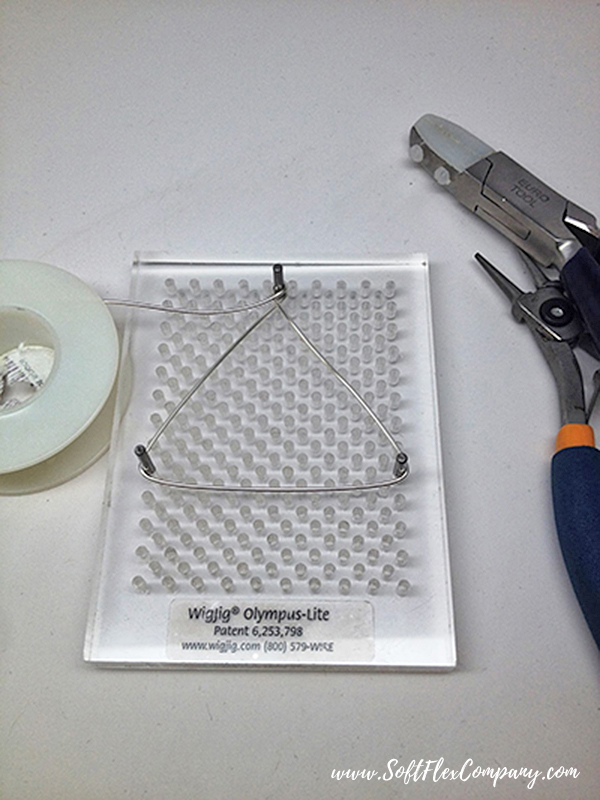
Step 1:When using a WigJig, you will make your first loop with your round nose pliers. Place the loop on the small metal peg at the top of the triangle. Guide the wire around the other two pegs to form a triangle. Make two triangles.
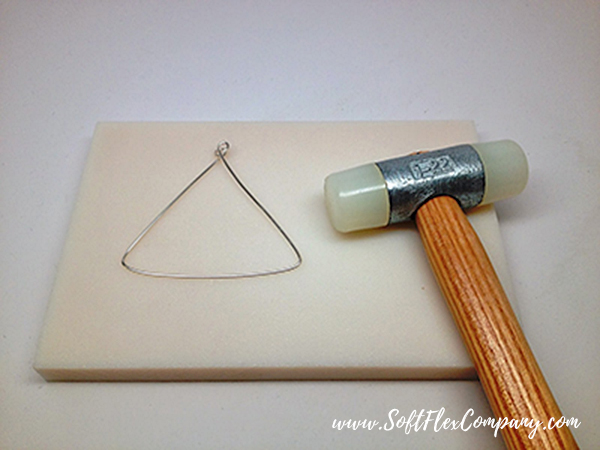
Step 2: Work harden the two triangles after you pop them off of the WigJig. Work hardening your wire actually changes the molecular structure inside the wire. It is the process of manipulating the wire to lock in the design and stiffen the wire so that your design will stay in place. Also, I straightened the wire with the nylon jaw pliers each time I made a turn on the WigJig. This offered straighter lines and extra work hardening.
Step 3: Fit the two triangles together in opposite directions to create your star shape. Use the 24g craft wire to bind each connection in place.
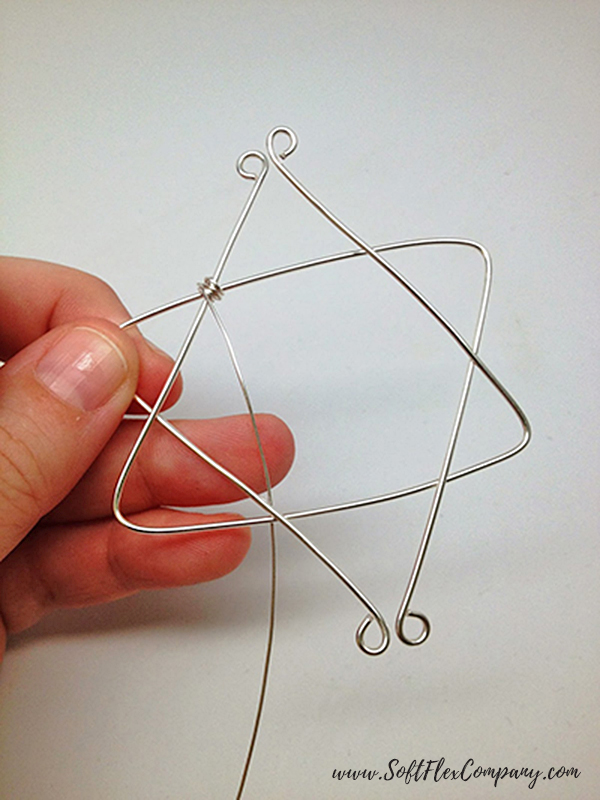
Step 4: Also wrap wire around the top and bottom loops to finish connecting the two pieces into one.
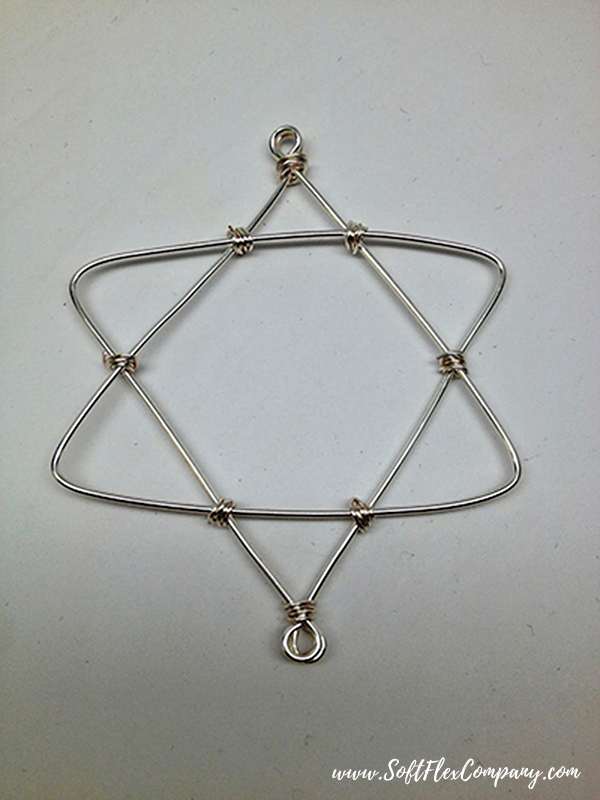
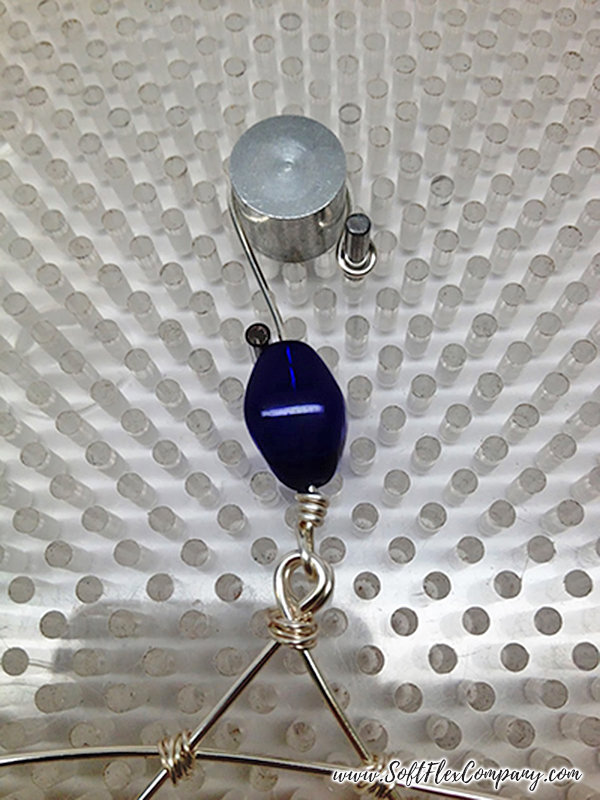
Step 5: Next, use the 18g craft wire to create an ornament hanger. In this case, I used a wire wrap loop to connect to the star, strung a bead and then made my hanger on the WigJig using a 7/16 in. super peg. This hanger should be work hardened too.
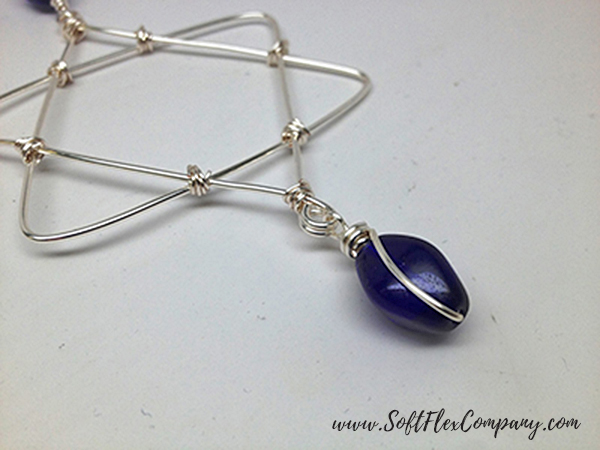
Step 6: Finally, add a bead to the bottom using a wire wrap loop to connect to the star. Bend the wire back up to the top and double wrap above the bead. Cut off the excess wire. This would look cute on a Hanukkah package as part of the wrapping.
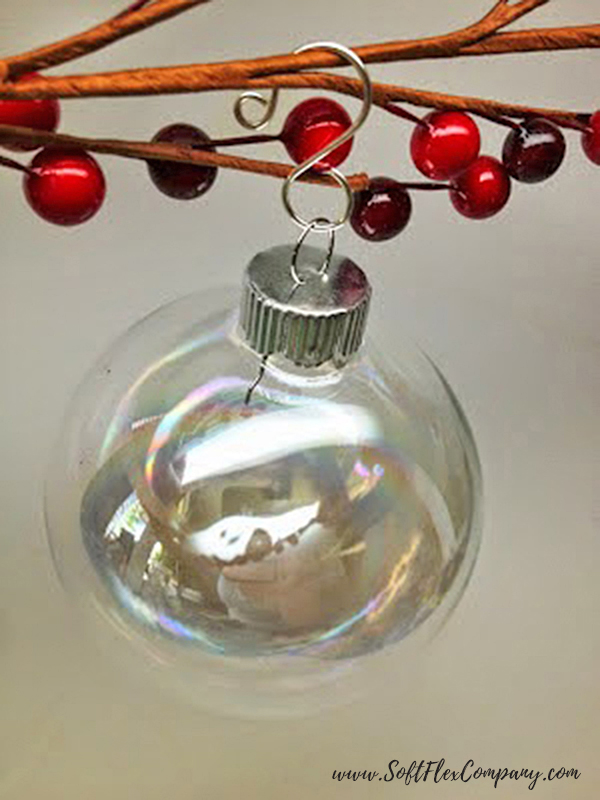
Ornament Hanger
Designer Sara Oehler
Materials
18ga Soft Flex Craft Wire
Tools
Olympus-Lite WigJig
Olympus Super Pegs
Nylon Jaw Pliers
Round Nose Pliers
Nylon Tipped Hammer
Cutters
Instructions
Step 1: If you've never used a WigJig before, you are about to fall in love. The WigJig offers the opportunity to form your craft wire into almost any shape that your heart may desire. In this case, I used one skinny metal peg (comes with the jig) and two super pegs(5/16" and 7/16").
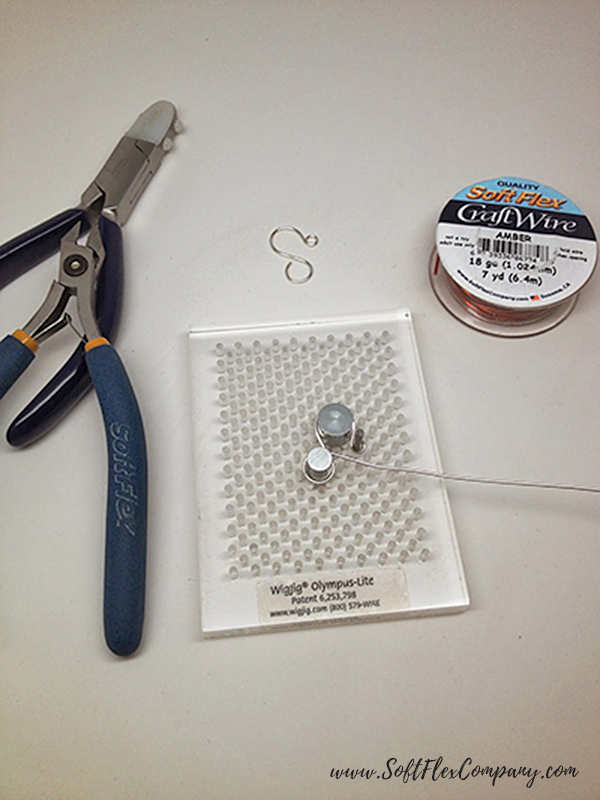
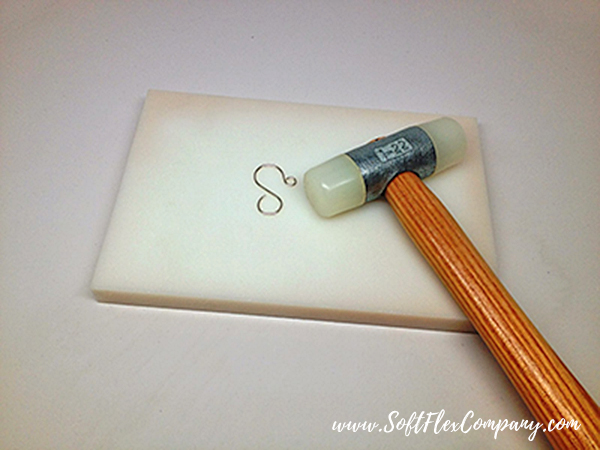
Step 2: When using a WigJig, you will make your first loop with your round nose pliers. Place the loop on the small metal peg. Guide the wire around the larger pegs in an "S" shape as you spin the WigJig. When you turn the jig and guide the wire, the jig will make lovely and fluid lines that can be repeated time and time again.
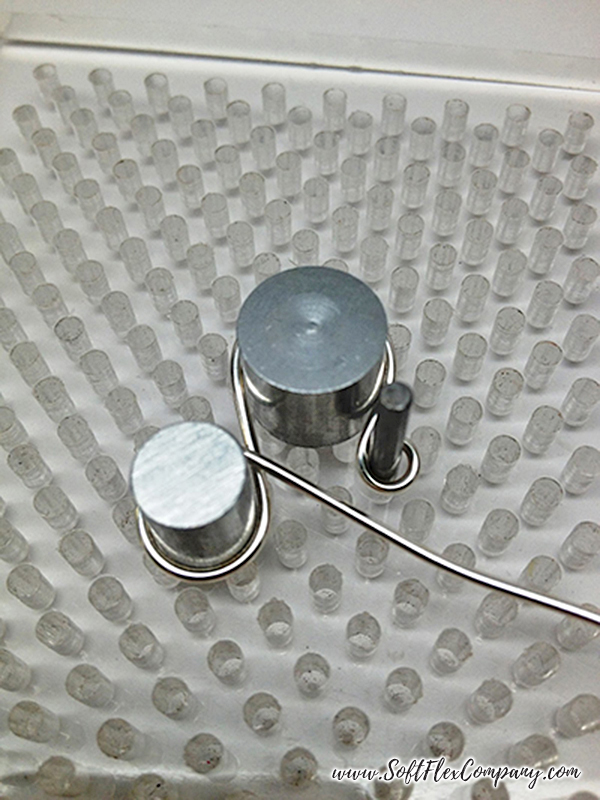
Step 3: Don't forget the importance of work hardening a design after you pop it off of the WigJig. Work hardening your wire actually changes the molecular structure inside the wire. It is the process of manipulating the wire to lock in the design and stiffen the wire so that your design will stay in place.
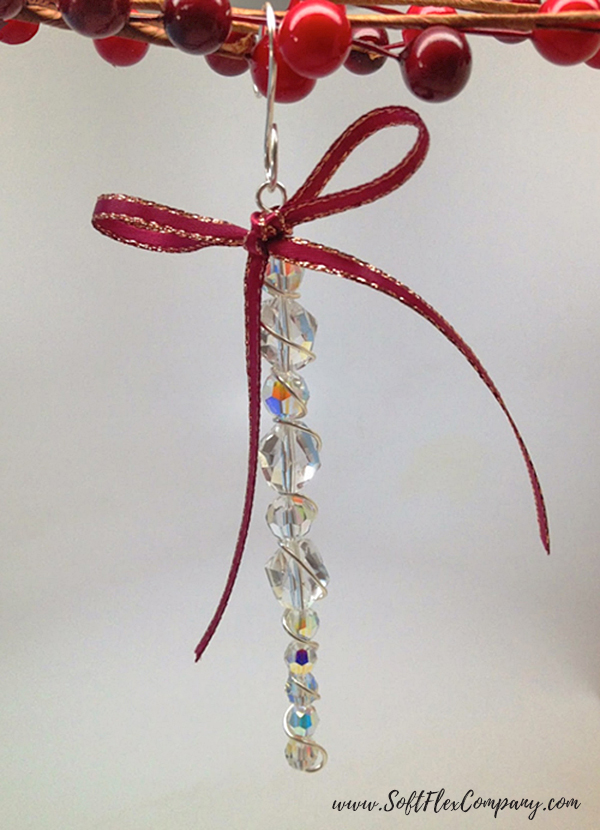
Crystal Beaded Icicle Ornament
Designer Sara Oehler
Materials
20ga Non-Tarnish Silver Plated Soft Flex Craft Wire
8mm Clear Crystal Round
Beads - 3 pcs
6mm Clear Crystal Round Beads - 5 pcs
10mm Clear Crystal Helix Beads - 3 pcs
Ribbon
Tools
Round Nose Pliers
Chain Nose Pliers
Cutters
Nylon Jaw Pliers
Instructions
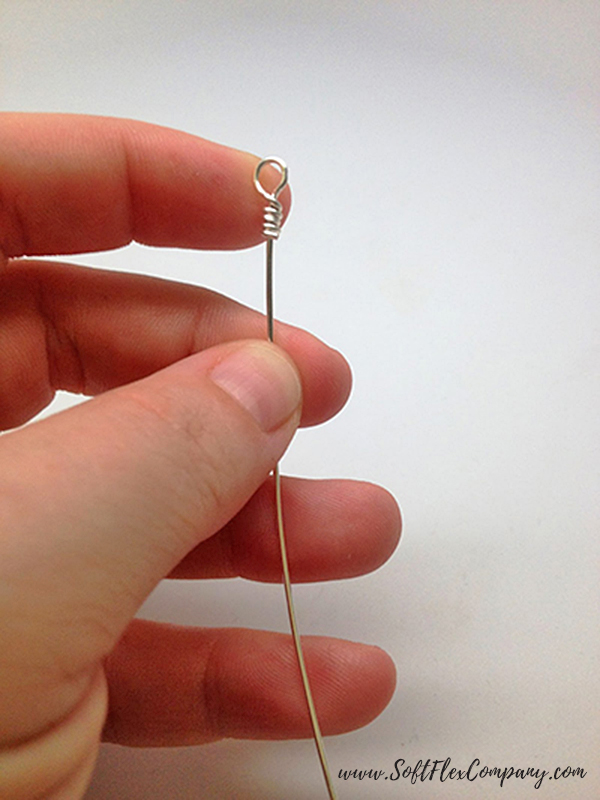
Step 1: Using about 15 inches of craft wire, create a wire wrap loop on one end.
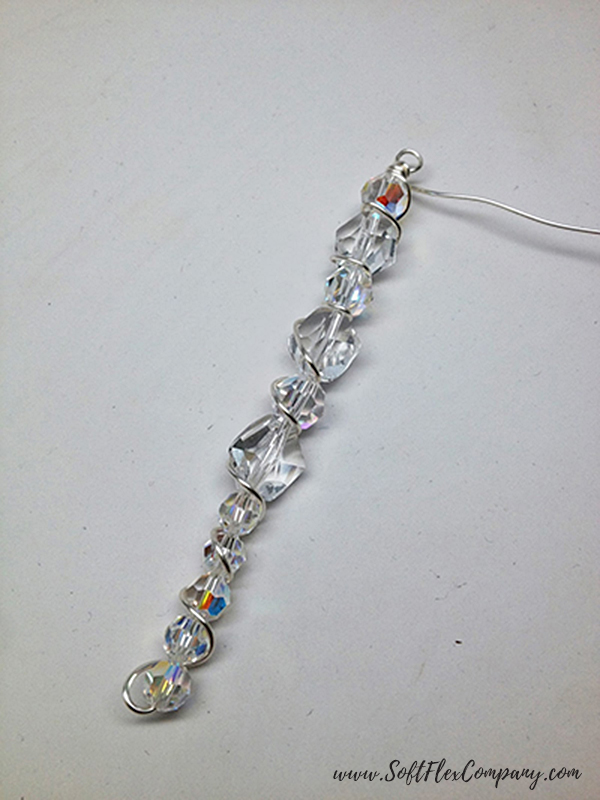
Step 2: String an 8mm round, helix, 8mm round, helix, 8mm round, helix and five 6mm rounds. Bend the wire at the bottom.
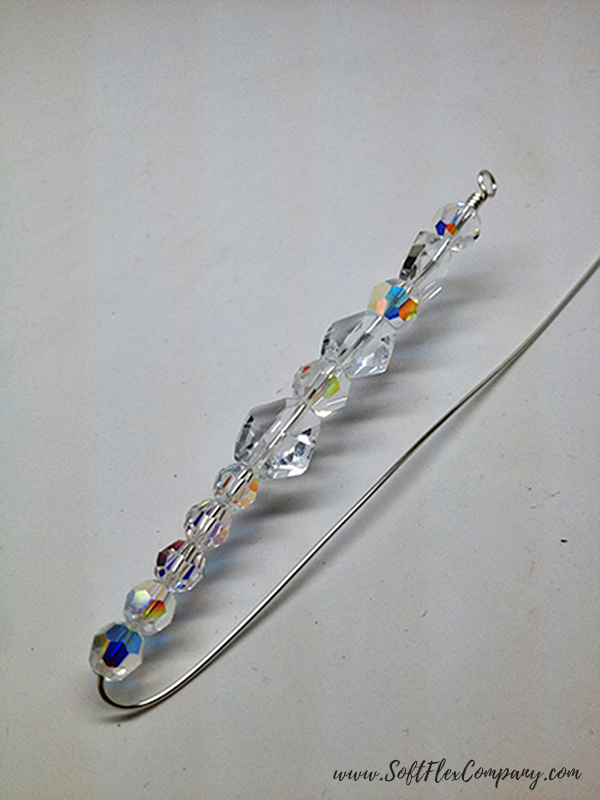
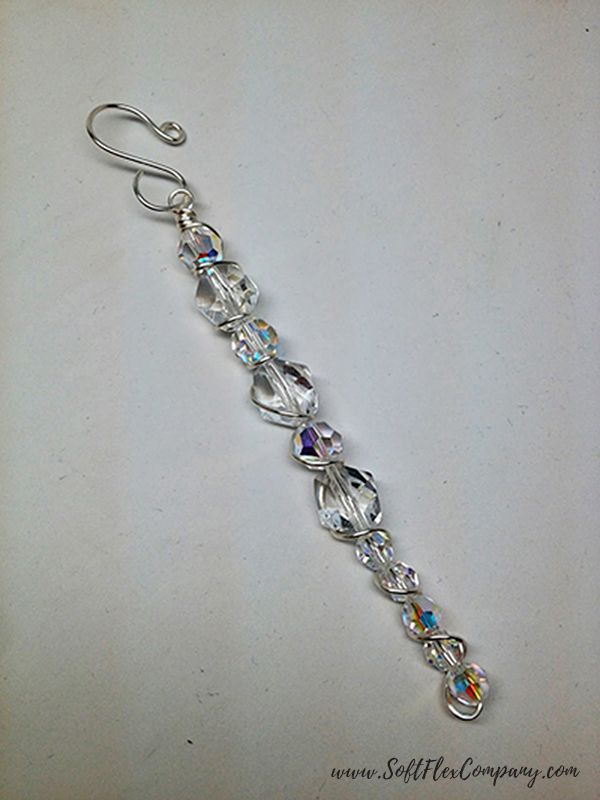
Step 3: Wrap the wire around the beads and back up to the wire wrapped loop. Trim the excess wire.
Step 4: Add an ornament hanger and tie a ribbon onto the ornament if you want to add a little color to your sparkle.
Beaded Holiday Wire Tree Ornament
Designer Sara Oehler
Materials
Soft Flex Extreme 925 Sterling Silver Plated, .024 Diameter - 8"
18ga Soft Flex Craft Wire - 4"
2x2mm Silver Filled Crimp Tubes - 3 pcs
3mm Silver Filled Crimp Covers - 3 pcs
15/0 Transparent Mint AB Round Japanese Seed Beads - 60 pcs
4mm Chrysolite Opal Swarovski Crystal Beads - 2 pcs
6mm Chrysolite Opal Swarovski Crystal Beads - 6 pcs
8mm Chrysolite Opal Swarovski Crystal Beads - 2 pcs
Tools
WigJig Olympus-Lite
WigJig Olympus Super Peg
Nylon Jaw Pliers
Cutters
Crimping Pliers
Round Nose Pliers
Chain Nose Pliers
Wire Whacker
Instructions
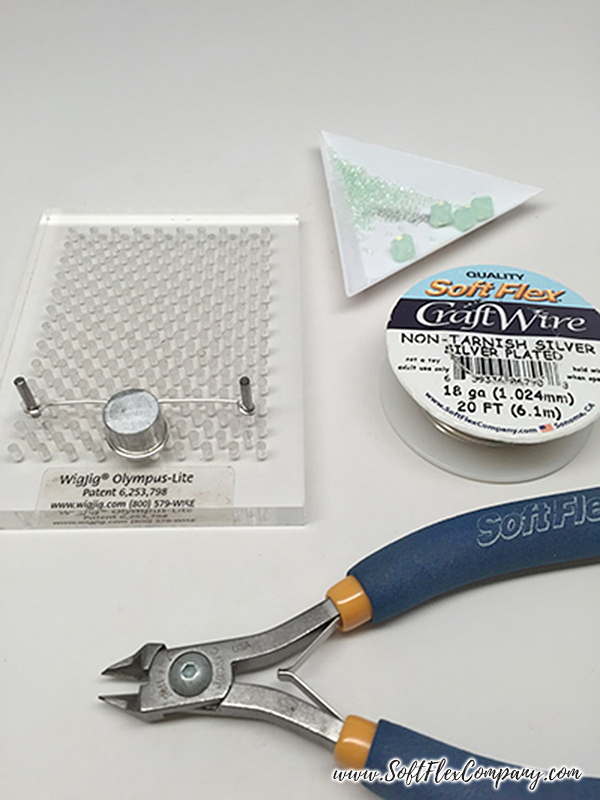
Step 1: First, I like to run my nylon jaw pliers over the craft wire to start working the wire to make it more stiff but also to get rid of any bends or kinks as it comes off of the spool. Place the pegs in your WigJig as shown above. Using 4 inches of craft wire, make a loop with round nose pliers. Place the loop on a small metal peg. Guide the wire around the super peg as you spin the WigJig. When you turn the jig and guide the wire, the jig will make lovely and fluid lines that can be repeated time and time again. Finish the shape by guiding the wire around the other small metal peg
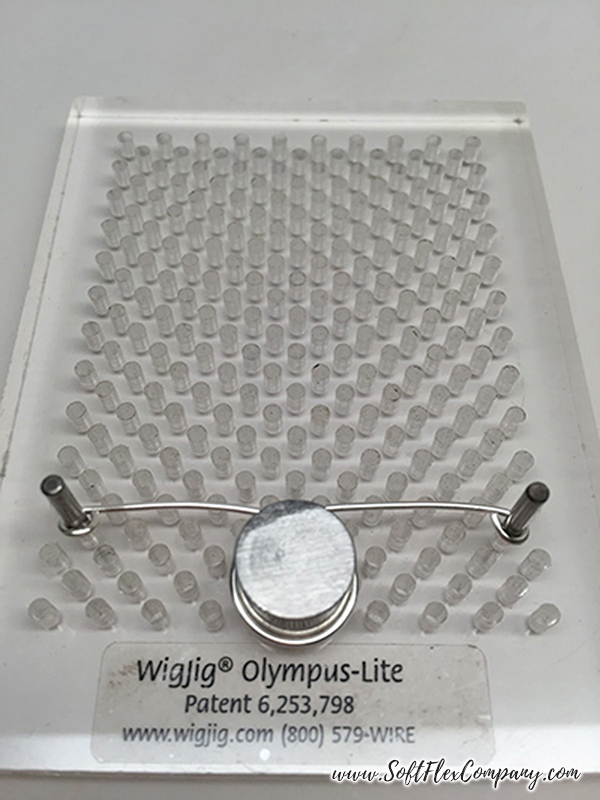
Step 2: Don't forget the importance of work hardening a design after you pop it off of the WigJig. Work hardening your wire actually changes the molecular structure inside the wire. It is the process of manipulating the wire to lock in the design and stiffen the wire so that your design will stay in place. To use the wire whacker, lay your design flat on one of the nylon slabs. Use the other to whack the design 3-4 times. Sound silly? It totally works and makes work hardening quick and easy!
Step 3: Using 8 inches of beading wire, string one crimp tube. Pass the wire back through the tube and snug it to the middle of the wire to create a small loop. Crimp the tube and cover it with a crimp cover. Click here for crimping instructions.
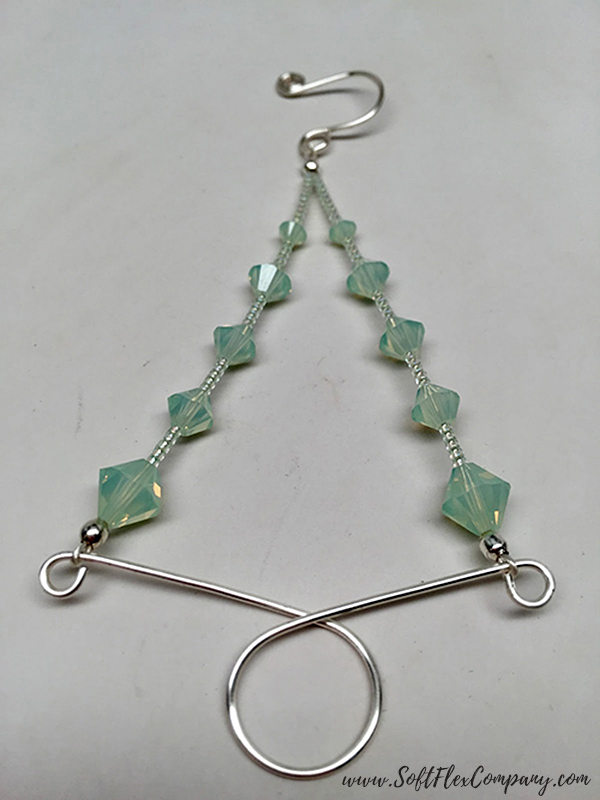
Step 4: Using one wire, string ten seed beads, a 4mm bead, five seed beads, a 6mm bead, five seed beads, a 6mm bead, five seed beads, a 6mm bead, five seed beads, an 8mm bead, a crimp tube and one ring on the WigJig component. Pass the wire back through the tube and crimp. Cover it with a crimp cover.
Step 5: Using the second wire to repeat Step 4.
Step 6: Attach an ornament hanger to the top. You can make that yourself too.
Craft Wire Star Ornament
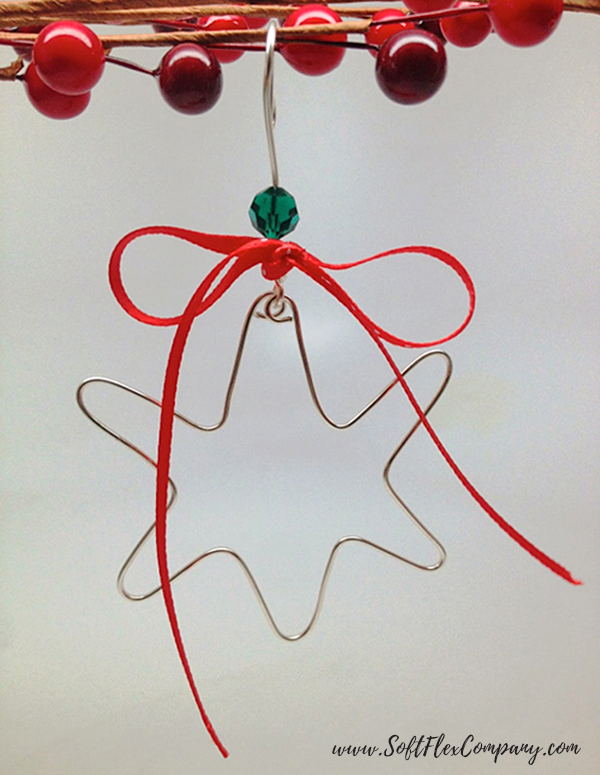
Designer Sara Oehler
Materials
18ga Non-Tarnish Silver Plated Soft Flex Craft Wire
8mm Green Crystal Bead - 1 pc
Red Ribbon
Tools
Olympus-Lite WigJig
Olympus Super Peg
Nylon Jaw Pliers
Round Nose Pliers
Chain Nose Pliers
Nylon Tipped Hammer
Cutters
Instructions
Step 1: When using a WigJig, you will make your first loop with your round nose pliers. Place the loop on the small metal peg. Guide the wire around the pegs in your chosen pattern as you spin the WigJig. When you turn the jig and guide the wire, the jig will make lovely and fluid lines that can be repeated time and time again.
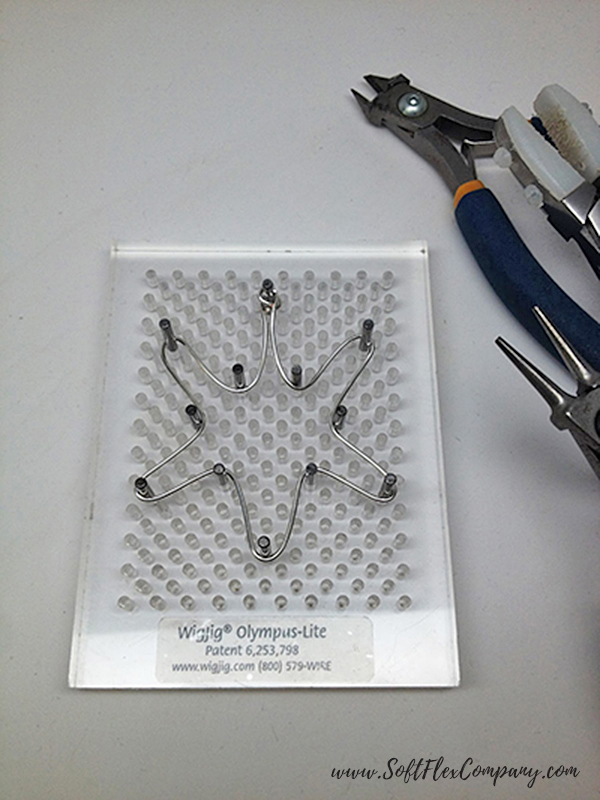
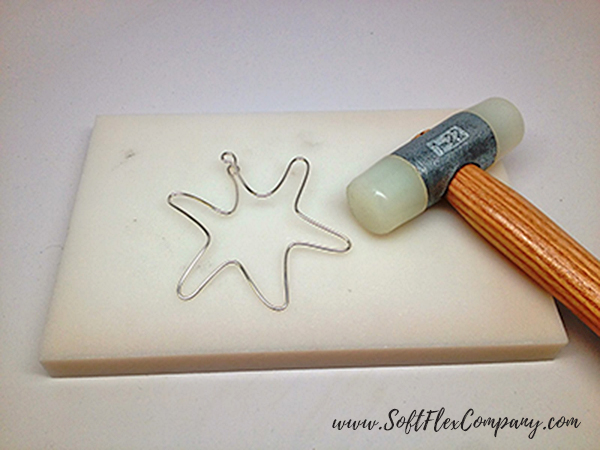
Step 2: Work harden the design after you pop it off of the WigJig. Work hardening your wire actually changes the molecular structure inside the wire. It is the process of manipulating the wire to lock in the design and stiffen the wire so that your design will stay in place. Also, I straightened the wire with the nylon jaw pliers each time I made a turn on the WigJig. This offered straighter lines and extra work hardening.
Step 3: Next, use the craft wire to create an ornament hanger. In this case, I used a wire wrap loop to connect to the star, strung a bead and then made my hook on the WigJig using a 7/16 in. super peg.
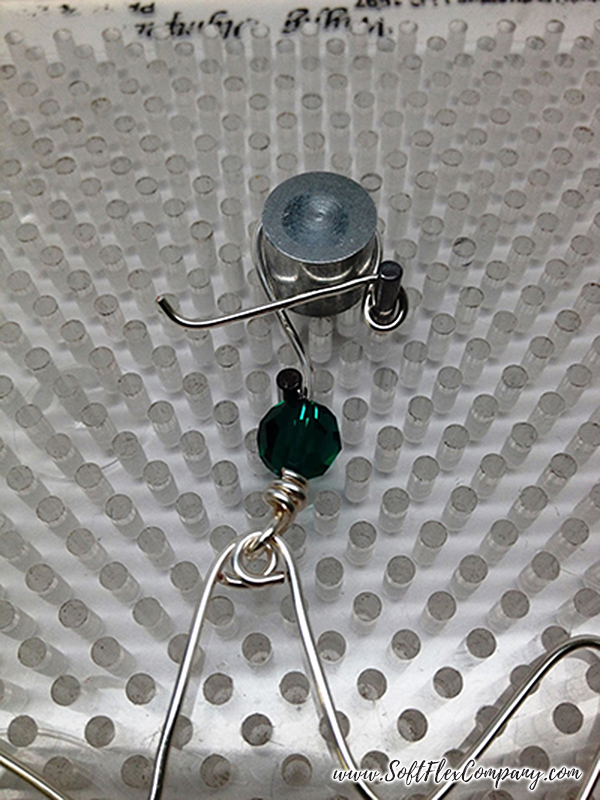
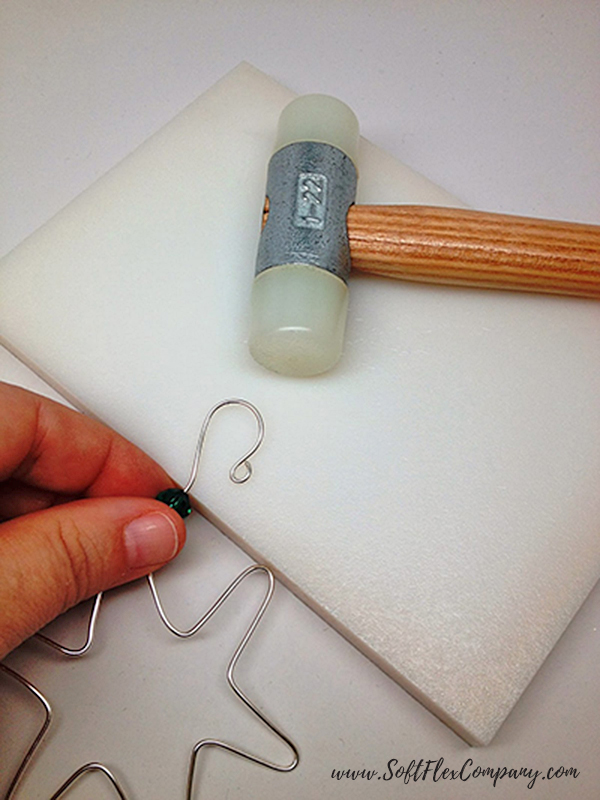
Step 4: The hanger should be work hardened too. This is a little trickier when there are beads to avoid. Hold the bead off of the surface in order to avoid it and pound the hanger with your nylon tipped hammer.
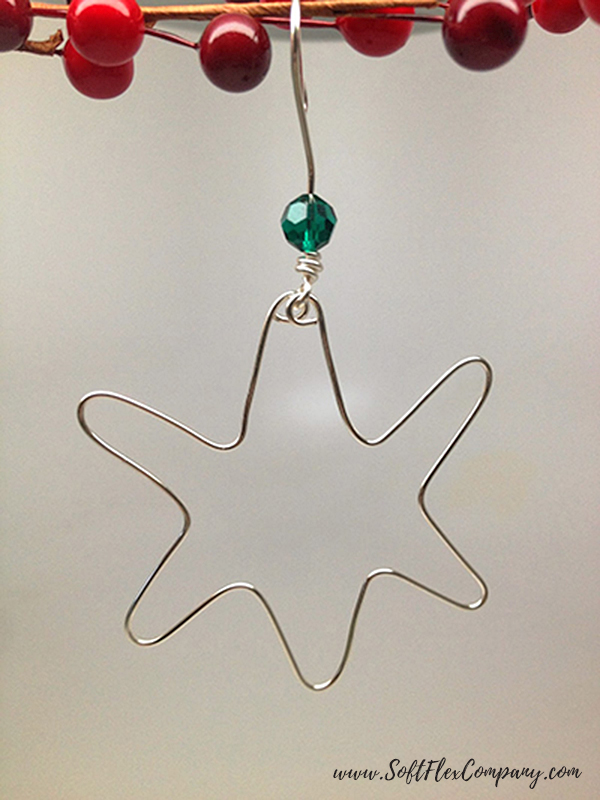
Step 5: If you like the ornament as is, you won't need any ribbon. I happened to have a little polka-dot red ribbon that I added to make it a little more decorative.
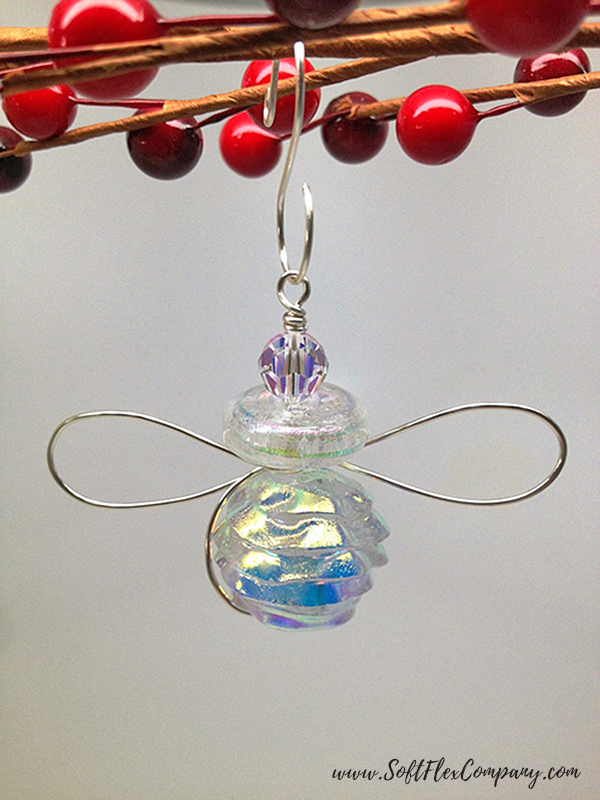
Beaded and Wire Snow Angel Ornament
Designer Sara Oehler
Materials
20ga Non-Tarnish Silver Plated Soft Flex Craft Wire
8mm Clear Crystal Bead
2 Clear Dichroic Glass Beads
Tools
Round Nose Pliers
Chain Nose Pliers
Cutters
Nylon Jaw Pliers
Instructions
Step 1: Using about 15 inches of craft wire, create a wire wrap loop on one end.
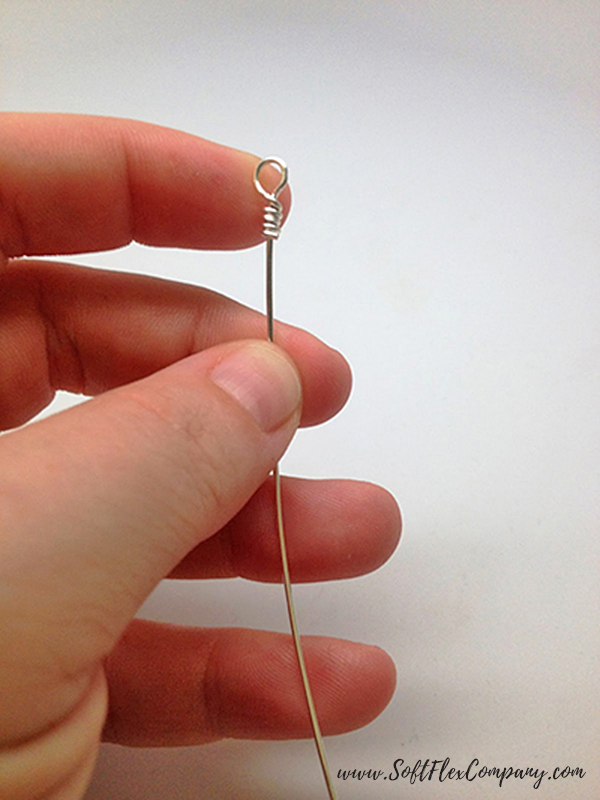
Step 2: String the smallest bead first, the middle sized bead next and the largest bead last. Bend the wire at the bottom.
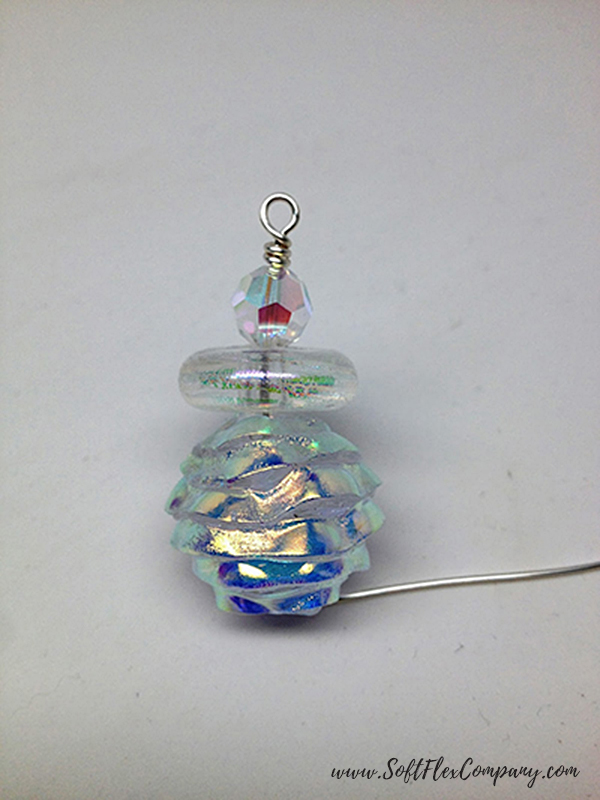
Step 3: Wrap the wire around the bottom bead and the base of the wire once.
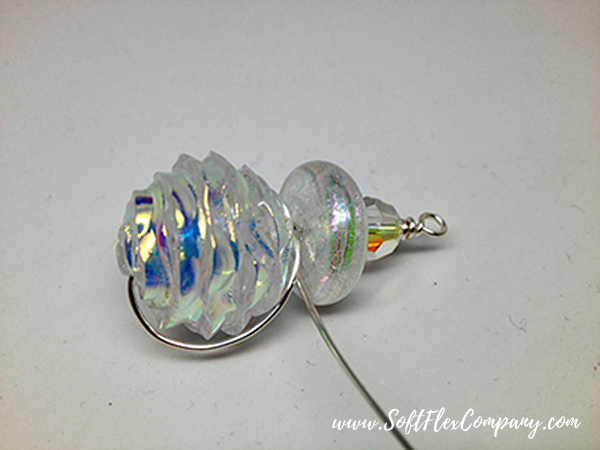
Step 4: Make a wide loop for your first angel wing. Wrap the wire around the base of the wire.
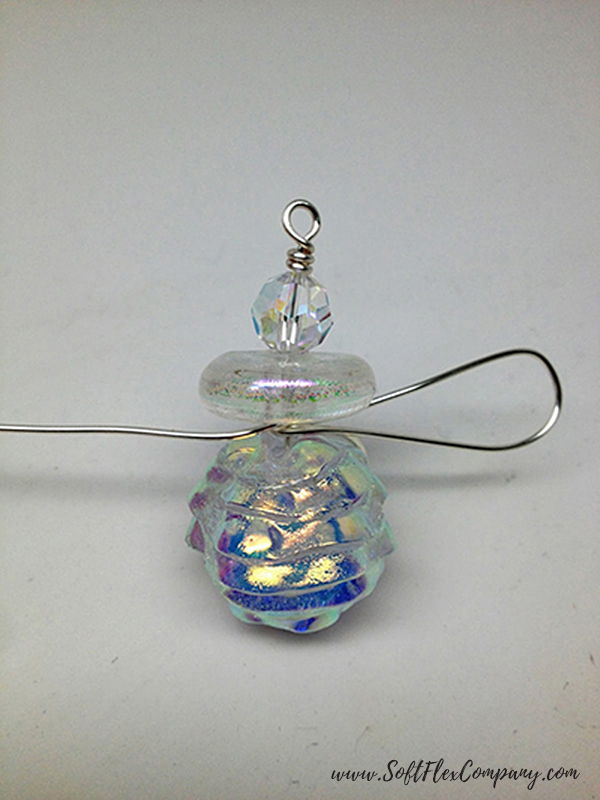
Step 5: Make a matching wide loop on the other side for the second wing. Wrap the wire around the base of the wire. Trim excess wire.
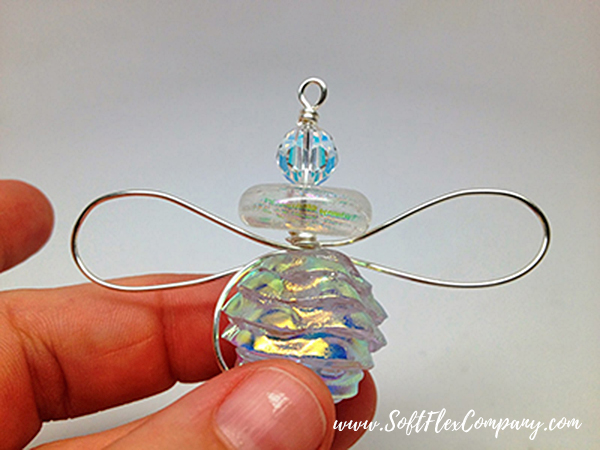
Step 6: Create an ornament hanger. Don't forget to work harden that hanger!
Join the fun in our VIB Facebook Group today! Stay in the know. Stay up to date. From our bead shows to our video shows and sales, you can stay in touch with us. The community is full of artistic and helpful beaders and crafty people. Inspire and be inspired. Share your pictures and get the beading bug from others!
Visit the Soft Flex Company YouTube Channel!

Sara Oehler (pronounced Ay-ler) is a well-known jewelry designer living in the Bay Area. Sara is the author of several beading books, including her latest title, written with Kristen Fagan, Seed Bead Revolution. She has designed and written for numerous publications including: BeadStyle, Bead&Button, Bead Trends, Stringing, Jewelry in Fashion Trends, Simply Beads, The Flow and Today's Creative Home Arts. Currently, Sara is the Sales and Marketing Manager for Soft Flex Company.
Ask Sara Bead Expert
Blog:
softflexcompany.com/beading-blog
Email: Sara@SoftFlexCompany.com


