

Here comes Santa Claus! Here comes Santa Claus! It is nearly time to go out and find a wonderful tree. We are so excited for that blissful smell of pine in the house. We love the warmth that Christmas lights bring to the living room. We are also eager to get creative and create some Christmas ornaments and make our tree even more special.
This tree ornament will enhance any tree. You can create any color variation of it that you see fit. We have included three color variations so you can see just how wonderful working with color is. We love braids, but you can hang the ornament from any design. Kumihimo and macramé may take a little longer, but the finished piece would be absolutely stunning.

Don't miss our other holiday jewelry and ornament ideas. Follow our blog and check out our Free Beading Project Ideas. Subscribe to our YouTube channel for more tips. Visit our Facebook page if you want to catch our live shows and sales. And join our Facebook group – VIB, if you want to join a friendly community or jewelry designers and all around creative people. We would love to see your holiday creations. Post pictures on our VIB group!
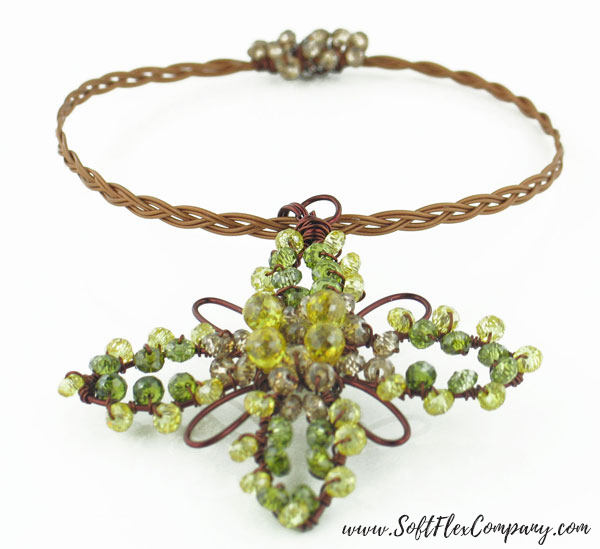
Tree Bling Ornaments
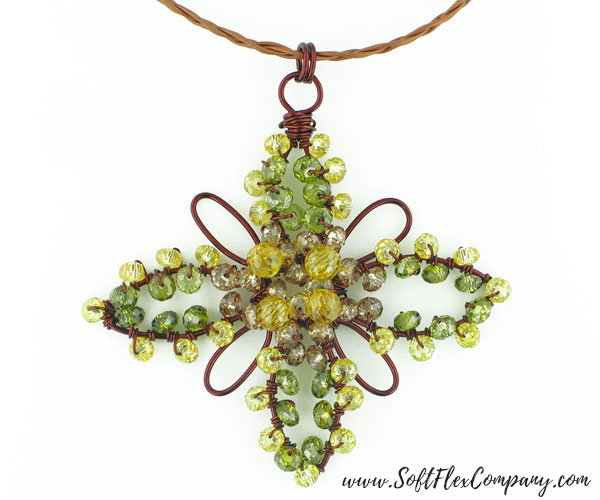
Green Option
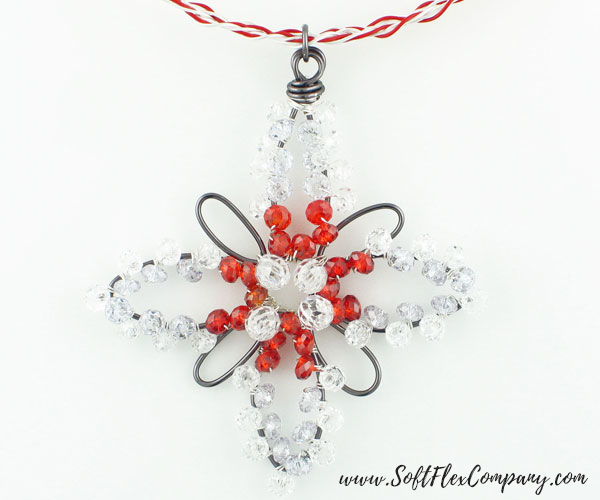
Orange Option
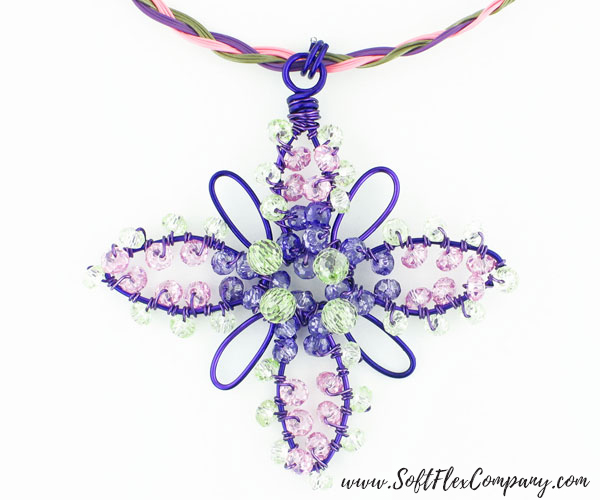
Purple Option
Designer Jamie Hogsett
Skill Level Beginner
Materials
Soft Flex Beading Wire .019 diameter (one to three colors) - 99" each
20 gauge Soft Flex Craft Wire (one color) - 20"
28 gauge Soft Flex Craft Wire (same or coordinating color as 20 ga) - Approx. 36"
3x3mm Soft Flex Sterling Silver Crimp Tubes - 3 pcs
4mm CZ Rondelles (in three colors) - 31 to 41 in color A, 20 to 24 in color B, and 22 to 27 in color C
7x5mm CZ Briolettes - 4 pcs
Tools
Cutters
WigJig Olympus-Lite plus extra Olympus Metal Pegs
Fine Step Jaw Pliers
Chain Nose Pliers
Nylon Jaw Pliers
Wire Whacker
Mighty Crimping Pliers
Bead Stoppers
Instructions
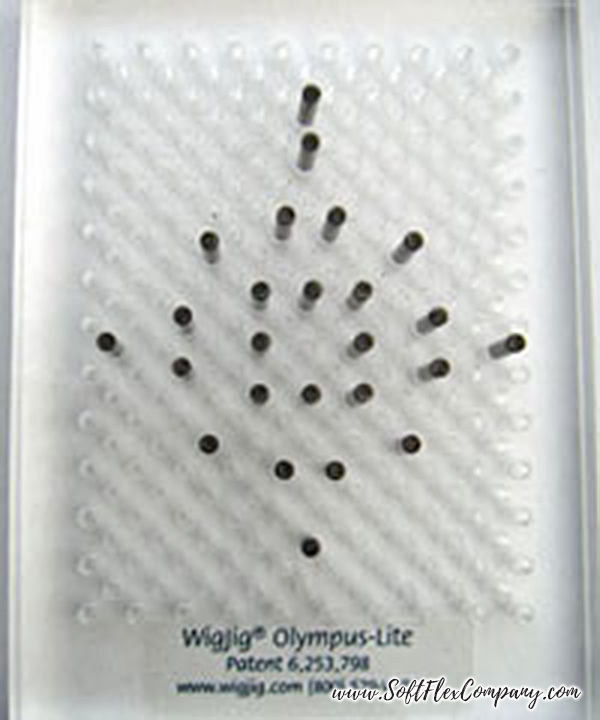
Step 1: Prep the WigJig by placing pegs in the following holes: e4, e6, E9, F9, c10, g10, d12, e12, f12, C13, H13, a14, d14, f14, i14, C15, H15, d16, e16, f16, c18, g18, E19, F19, and e22.
Step 2: Use the Fine Step Jaw Pliers to form a starter loop on one end of about 20" of 20-gauge Soft Flex® Craft Wire. Place the starter loop on the peg in e4. Wrap the wire as shown in the photos below. End by wrapping around peg e4 to form a loop.
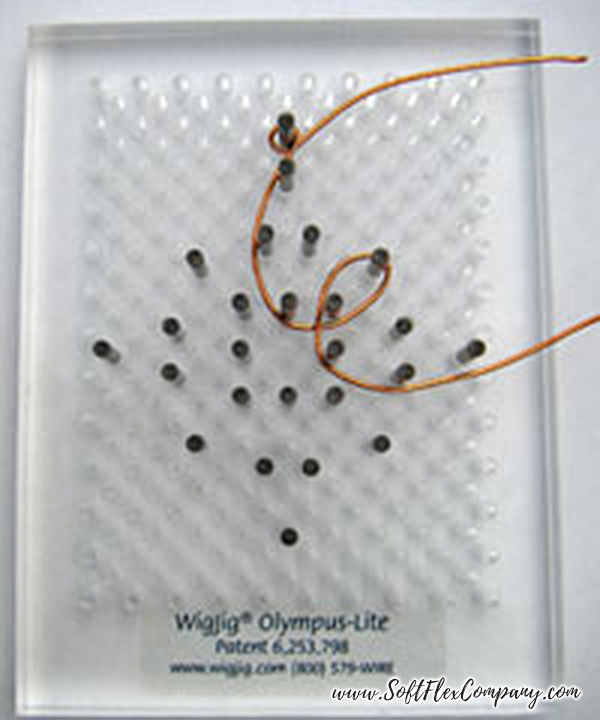

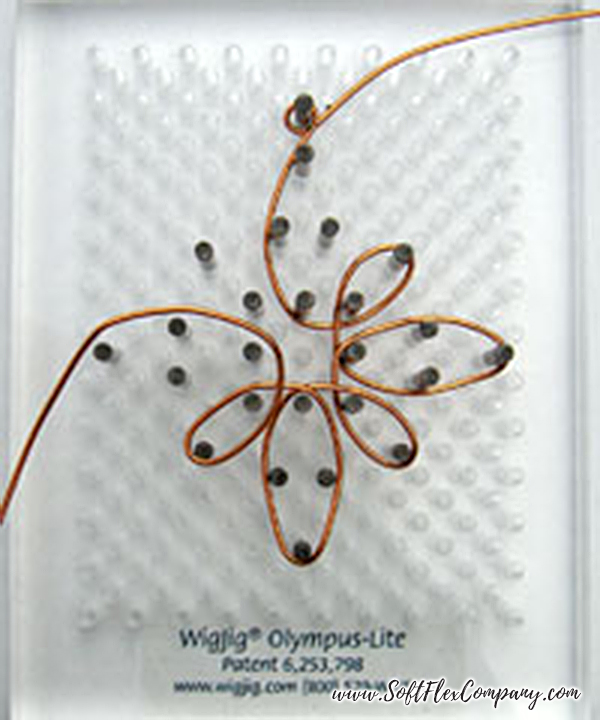
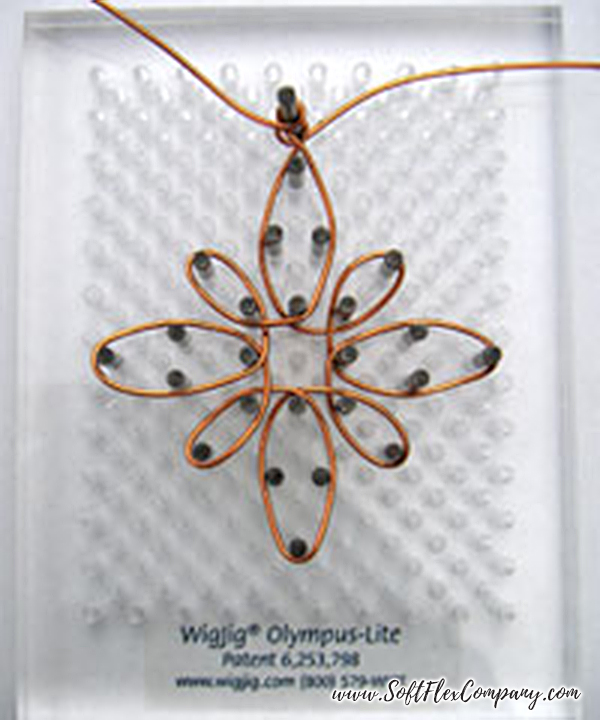
Step 3: Remove pegs from the WigJig to release the wire piece. Place the starter loop and the final loop on the Fine Step Jaw Pliers. Use the remaining tail wire to form a wrapped loop around the base of the starter and final loops (the bail). Trim tail wires.
Step 4: Use Nylon Jaw Pliers and/or the Wire Whacker to wire harden the pendant.
Step 5: Use about 18" of 28-gauge wire to form three coils around base of the petal just below the bail, leaving a 1 1/2" tail wire, and securing the 28-gauge wire to the 20-gauge wire flower. String 1 CZ in color C and, working counterclockwise, wrap the 28-gauge wire twice around the 20-gauge wire.
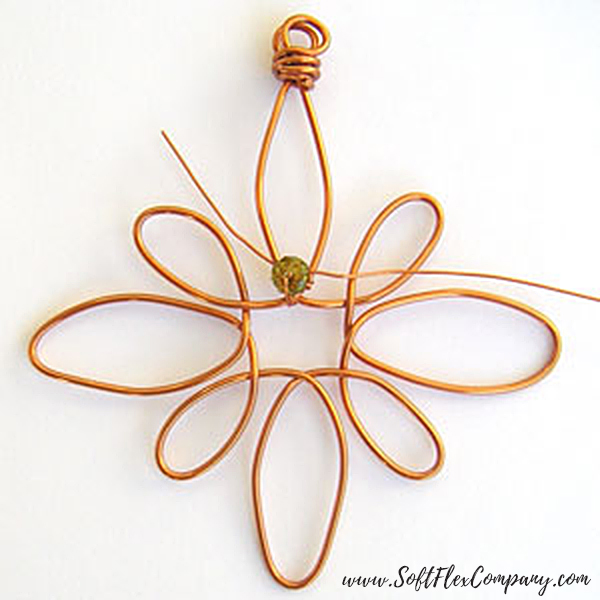
Step 6: String 1 CZ in color C and wrap the 28-gauge wire twice around the 20-gauge wire. Repeat adding 1 CZ and two wraps in the following order: C, A, B, A, B, A, B, and A. Wrap the 28-gauge wire around the wrapped 20-gauge wire at the bail, then move down the other side of the petal, adding CZs (with two wraps between each) in the following color order: A, B, A, B, A, B, A, C, and C.
Step 7: Wrap the wire clockwise around the flower, passing the wire through the base of the small petal, then through the base of the next large petal. Wrap the 28-gauge wire around the base of the large petal three times. String 1 CZ in color C and, working counterclockwise, wrap the 28-gauge wire twice around the 20-gauge wire. Move counterclockwise around the petal, adding CZs (with two wraps between each) in the following color order: C, C, A, B, A, B, A, B, A, B, A, B, A, B, A, C, and C.
Step 8: Repeat Step 7 twice more to cover the remaining two large petals and adding more 28-gauge wire as needed.
Step 9: Wrap the 28-gauge wire twice around the base of one small petal. String 1 CZ briolette and wrap around the base of the petal two or three times to secure. Continue, moving clockwise around the flower, to add 1 CZ briolette to each small petal.
Step 10: Trim wire and tuck any tail wires into the back of the pedant.
Step 11: Use about 3" of 20-gauge wire and the wire looping pliers to form a jump ring or split ring to attach to the bail: wrap the wire around the largest section of the Fine Step Jaw Pliers. Wrap the wire one complete time to form a jump ring or two times for a split ring. Use flush cutters to trim the ends, and attach the ring to the bail.
Step 12: Use one to three colors of Soft Flex® Medium .019 diameter wire to make the ornament hanger. Cut nine wires to 11" each (Note: to make a necklace instead of an ornament, simply extend the length of the wires). Use a bead stopper to hold the ends of three wires and braid the wires together. Repeat twice more. Use a Bead Stopper to hold all nine ends of wire (from the three braids) and braid the three braids together.
Step 13: Use all nine wires to string one 3mm x 3mm crimp tube. Crimp the tube. Trim the tail ends of five of the wires, leaving the remaining wires intact. Remove any remaining Bead Stoppers and repeat step for the other ends of the wires.
Step 14: Use one end of the wires to string one 3mm x 3mm crimp tube. Use the other end of the wires to string the ring on the pendant's bail. Pass the other end of the wires back through the crimp tube to form a ring of wire. Crimp the tube and trim all tail ends.
Step 15: Use about 12" of 28-gauge wire to wrap a few times around the cluster of crimp tubes to secure. String 1 CZ in color A and wrap twice around the crimp tubes. Repeat to add 10 to 12 CZs, covering up the crimp tubes with sparkle.

Join the fun in our VIB Facebook Group today! Stay in the know. Stay up to date. From our bead shows to our video shows and sales, you can stay in touch with us. The community is full of artistic and helpful beaders and crafty people. Inspire and be inspired. Share your pictures and get the beading bug from others!
Visit the Soft Flex Company YouTube Channel!


Jamie Hogsett is a bead lover, jewelry designer, beading instructor, freelance editor, and the co-author of Show Your Colors. She is the author of Stringing Style and co-author of the Create Jewelry series: Pearls, Crystals, Stones, and Glass. Jamie's work has been published numerous times in Stringing and Beadwork magazines as well as in Beadwork Creates Beaded Rings, Beadwork Creates Beaded Bags, Beadwork Creates Beaded Earrings and other books and magazines from Interweave Press.