

Getting started on a new hobby or craft can be as frustrating as it can be rewarding. There is so much to learn. You need to find your footing before you can move forward. Today, we are looking at some helpful hints. We have basic information for you so you can avoid traps later. We have common sense answers to questions you did not know you had. You are going to learn how to cut your beading wire, how to practice like a pro, why you need the right tools, and more.

Do you cut your beading wire at the crimp or do you like to double back through some beads before you cut it? Find out which way we prefer and why. Do you know that too much tension on a bracelet can end up in a broken jewelry design? We will let you know why this happens and how to avoid a broken bracelet. Do you finish your crimps with a pair of regular pliers? Learn why it is better to invest in a set of tools that have a purpose. We have some great tips for you today. Learn how to be a better beader!


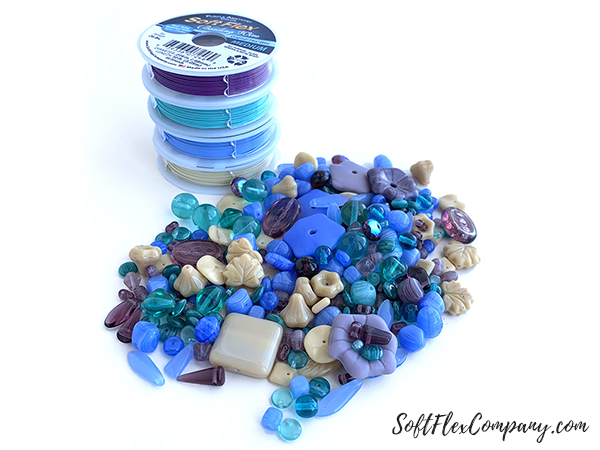
The perfect kit for jewelry designers of all ages and skills to get started in beading and jewelry-making. This kit is exactly what you need to make your own DIY necklaces and bracelets.
This Bead Stringing Starter Kit includes a Bead Mat, 2 red tip Bead Stoppers, Regular Crimping Pliers, Bead Nipper, 20 count package of 2x2mm Crimp Tubes, Ear Wires, Lobster Clasps, a 10ft spool of Soft Flex .019 Medium Beading Wire in your choice of color and a FREE package of beads. (Bead colors vary and will be based on your wire color choice).
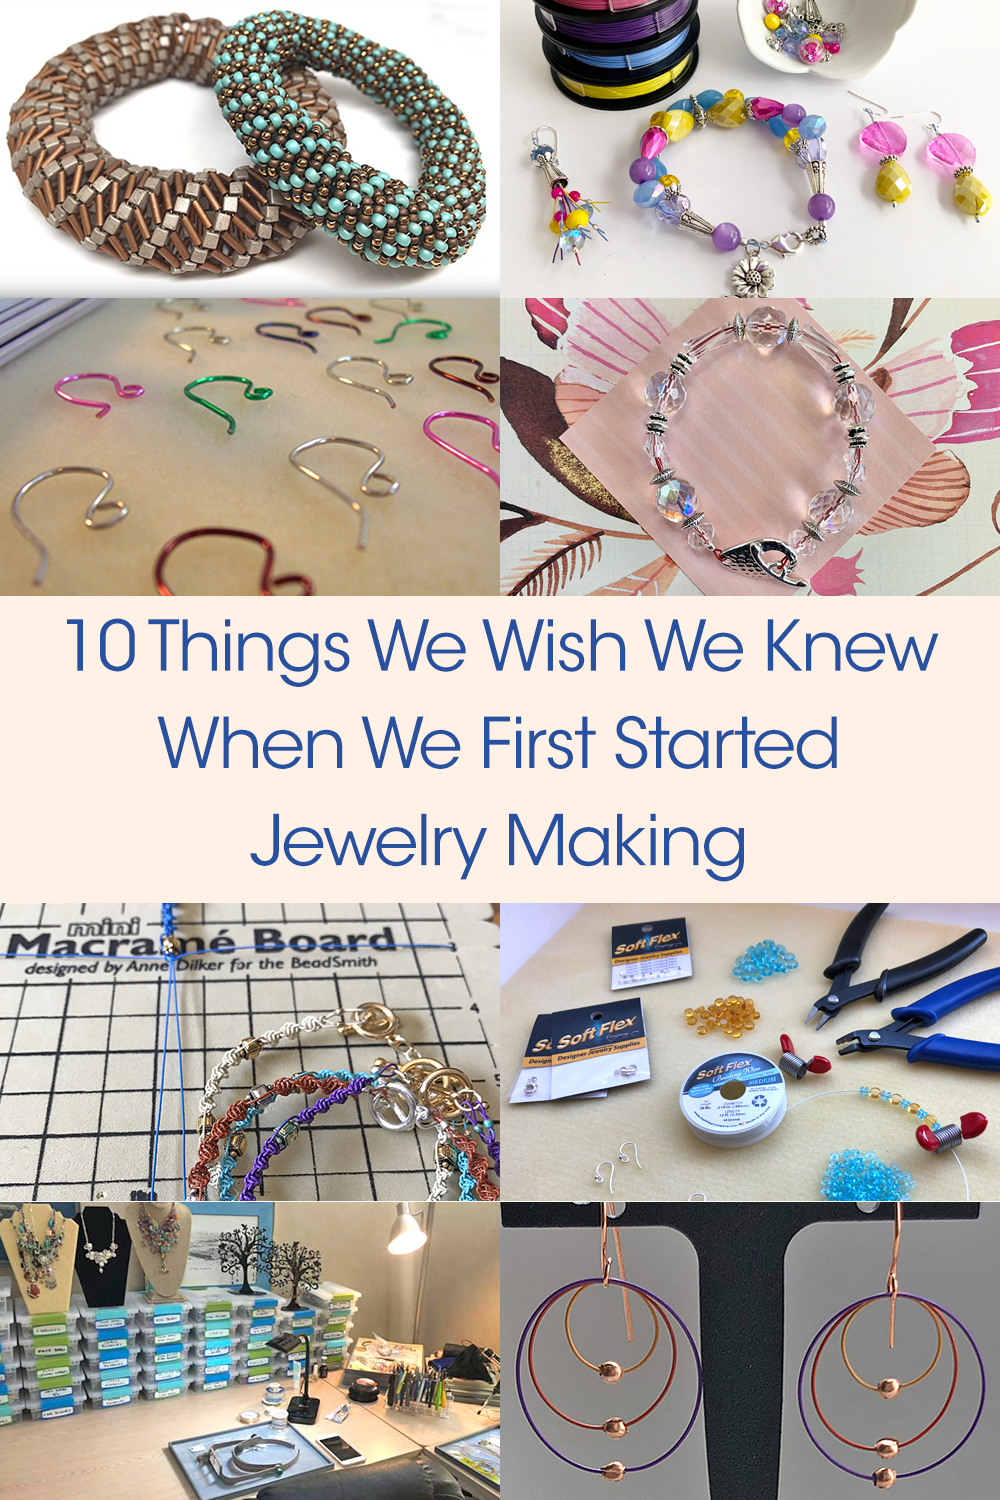
10 Things We Wish We Knew When We First Started Jewelry Making
Organize Your Beading Supplies Early And You Will Not Be Overwhelmed Later

Start strong and organize. If you make a point to keep your beading supplies organized early, you will not be overwhelmed later. Hobbies and crafts have a way of overtaking everything. You might start with a simple strand of beads. But soon, you will need beading wire. And then you will need findings. And then tools. Everything can snowball early. You have a hobby that you adore, but it has overtaken swaths of your house. Organize early, buy a container or designate shelf space. Catalog beads and supplies so you are able to locate them later. This will reduce mess and stop a simple search from destroying everything. As your collection expands, you can add more shelves or bins. If you keep up on your storage it will never be too tough to tame. If you don't respect your growing collection, it may end up ruining the fun and you will no longer enjoy your hobby.

If you have the means and room., consider creating a workspace. Having a dedicated area where you design jewelry is great for eliminating distractions and keeping organized. It is hard to be creative when you are busy shooing the cat away. A dedicated area is a place of zen. Your workspace, your beading cave, your she shed - a place where you are alone with your thoughts and ideas is a magnificent thing. Your workspace can be full of displays or full of containment. Create the space to suit your needs.
Check out our blog for more workspace solutions:
40+ Tips To Help You Clean, Organize, And Solve Your Beading Storage Problems

Do you have a beautiful beading space? Make sure you share it with us on our VIB Facebook group. We would love to see how you set your crafty nook up.
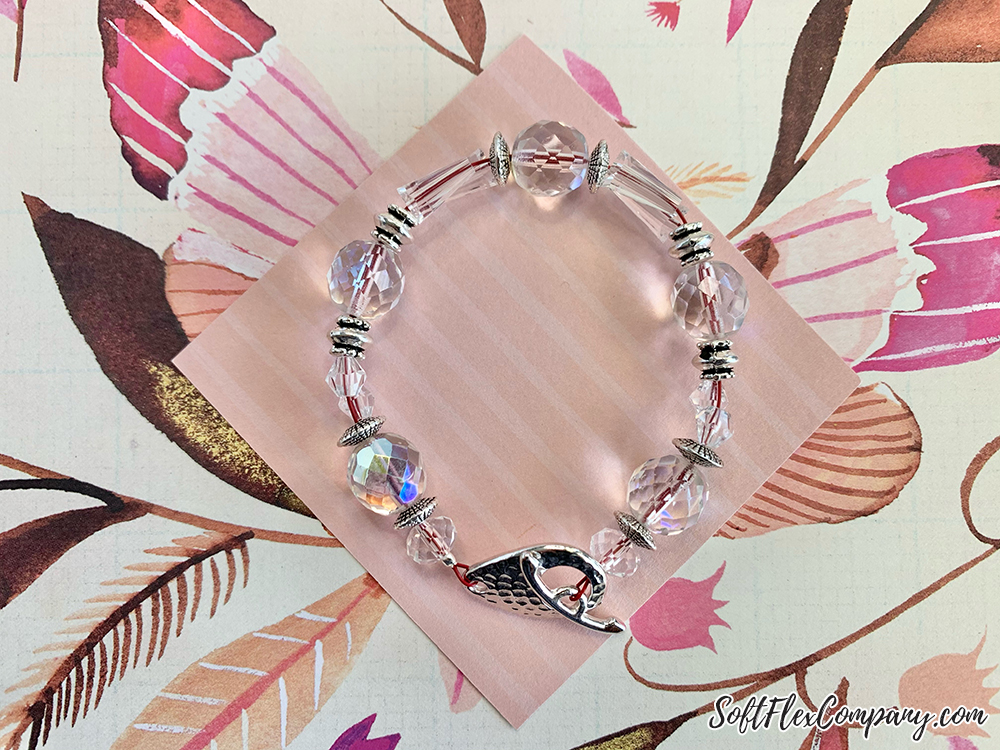
Just Chill, Too Much Tension On Your Jewelry Design Will Only End In Tears
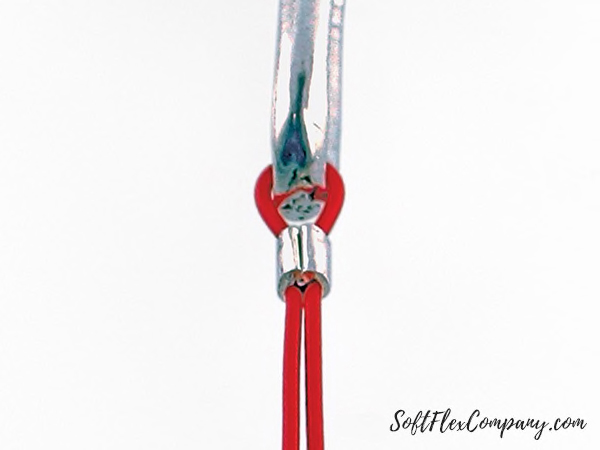
Don't make a necklace that is full of tension. Leave some room between your beads and finished crimps.
Crimping is one of the first tasks you must master before you become a proficient jewelry designer. You need to finish your crimps securely to ensure your handcrafted pieces last for years. It can be frustrating to finally conquer your crimping only to have a necklace break later. You may not even realize why your jewelry is failing at first. You know the crimp was finished correctly. You used the right tools for the job. So why are your beads rolling across the floor?
One reason DIY jewelry can break is because there is too much tension at the crimps. A lot of beginners and some seasoned jewelry designers do not like the look of beading wire. They want to conceal every inch of the wire beneath the beautiful beads they are stringing. The problem begins when a designer leaves no room at the crimps. If crimp as close to the beads as possible and you have no breathing room on the wire, the entire piece is going to be full of tension - especially if you crimped the design laid flat and straight. Once you put that jewelry around your wrist or neck, the beads are going to be pressed into each crimp and unable to wiggle.
Bracelets like to move back and forth on a wrist. Necklaces like to swing and sway. Your jewelry needs to breath and move. It is as active as you are. Inside each bead, there can be course spots in the channels. If you have a design that is full of tension, rubbing a rough spot over and over is eventually going to lead to a design failure. The next time you string your jewelry, leave some wiggle room. Make sure the beads can move back and forth. It does not have to be a lot. Just make sure there is slack.
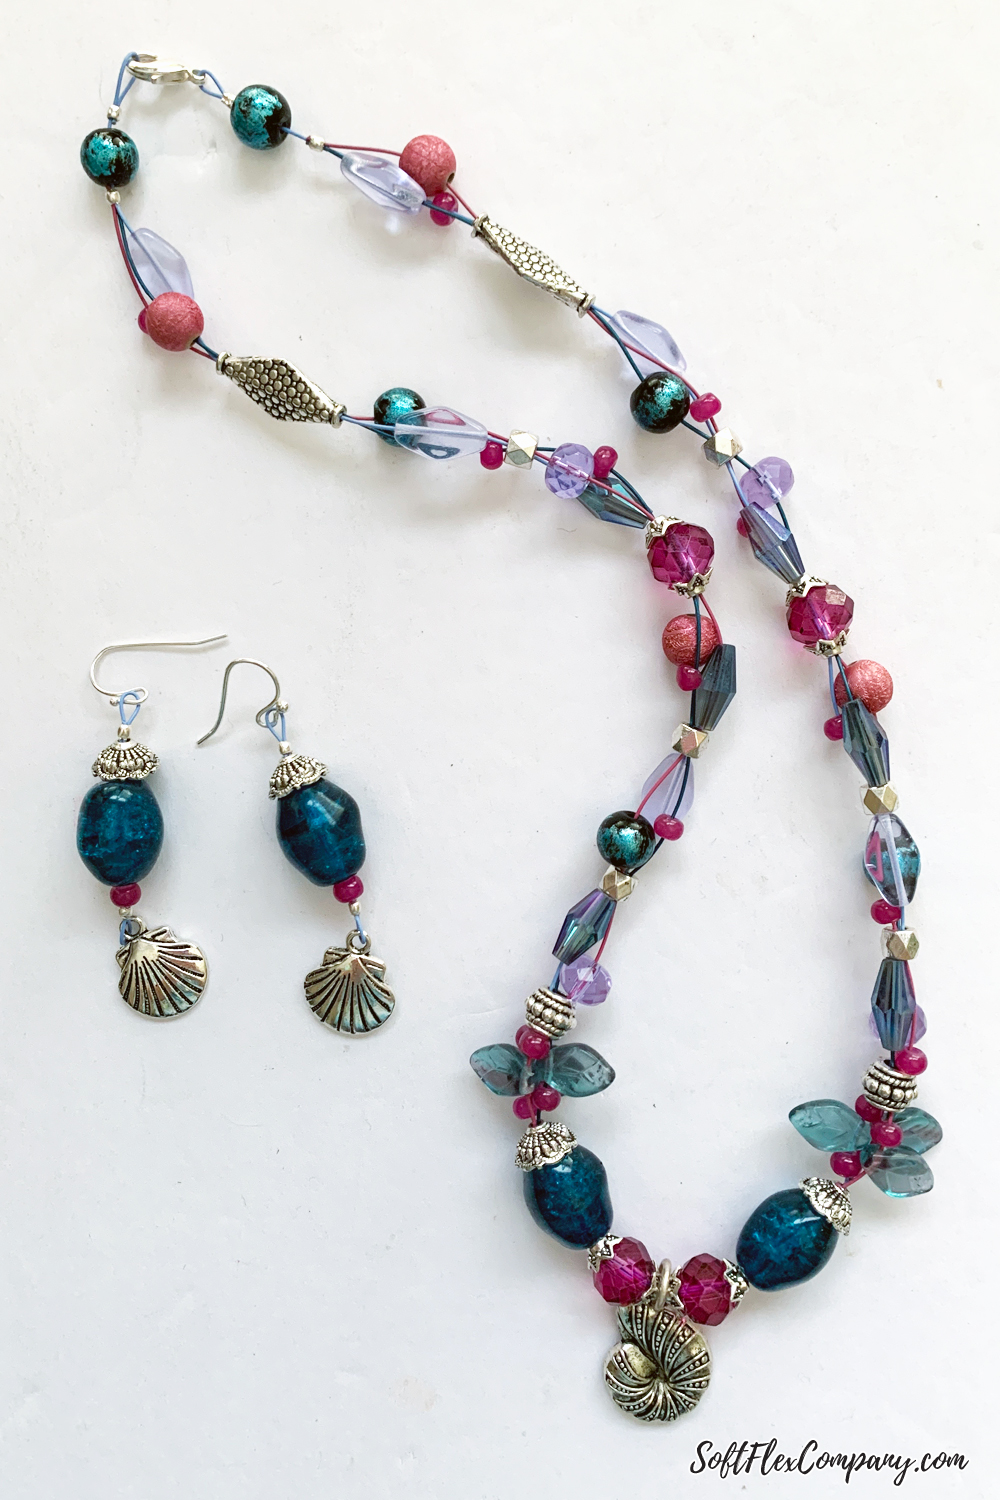
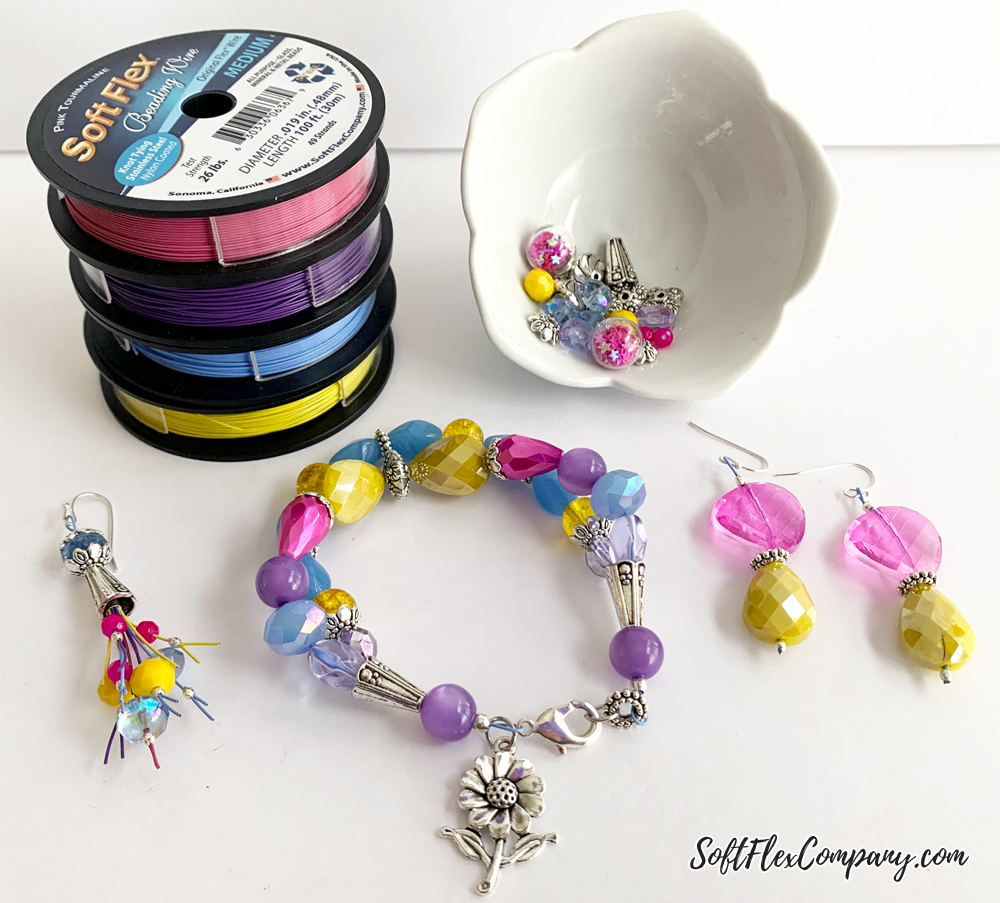
Quit Trying To Conceal Your Beading Wire, String Your Beads On A Complementary Color - Show Your Colors!
Not everybody likes the look of beading wire. Understandable, to some extent. You have glorious beads. They are so vivid and wonderful. So why do you want to showcase them on some ugly beading wire? Well, all beading wire is not created equally. If you only string with a drab and boring wire, you are probably going to want to make sure as little of that humdrum wire is visible.
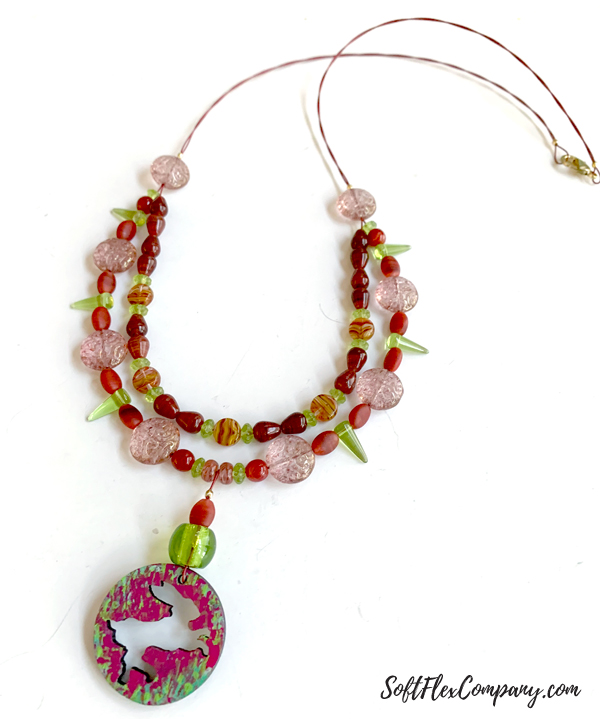
Soft Flex Beading Wire is available in a brilliant rainbow of colors. Our wire is meant to be shown. We think that every part of a design must be considered before stringing your jewelry. Why pair a dime store beading wire with stunning Lapis or Rose Quartz? Invest in a beading wire that complements your beads! Consider every part of your design as an element that makes the unified whole look amazing. Choose beads that you adore, findings that look amazing, and a beading wire that ties everything together nicely.
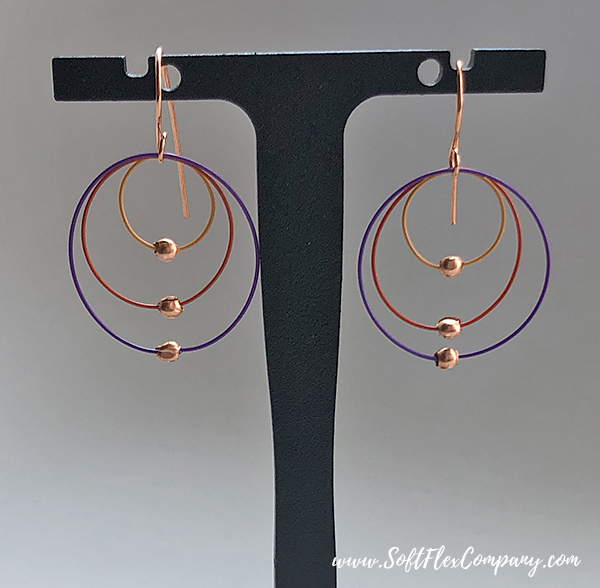
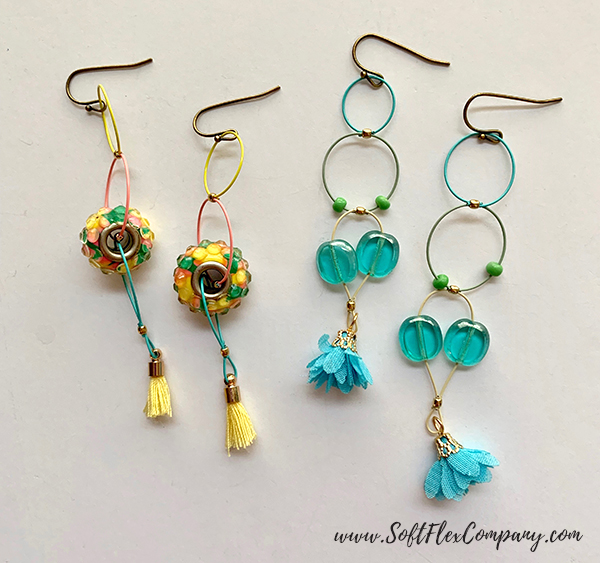
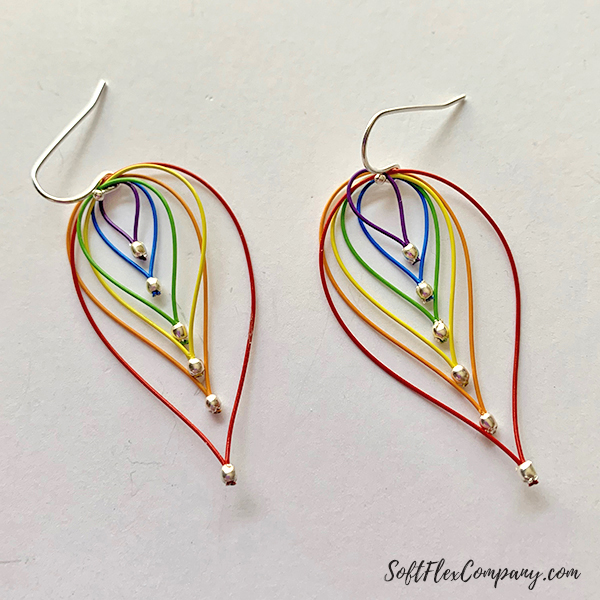
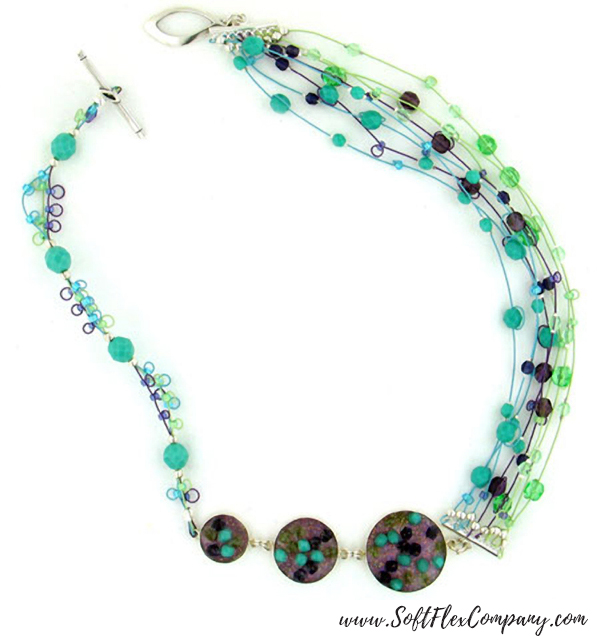
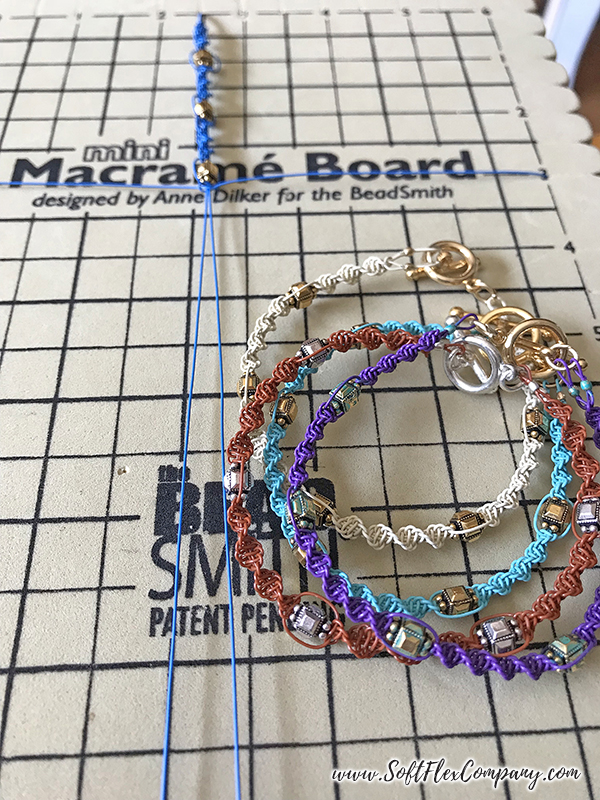
Soft Flex wire is not just for beginner beading. Our wire is flexible enough that you can braid with it on a kumihimo disk. You can knot and macrame our wire for a lovely finish. You can even braid multiple wires on a single strand design style to give your jewelry texture and a unique look. Our colorful wire is ideal for illusion necklaces (jewelry where they beads appear to float on beading wire). We often string jewelry with long lengths of wire exposed and showcase the color with a beaded focal design. Having the option of colorful wire in your beading supplies open up so many possibilities. If all of your beading wire is a lifeless grey, make sure you give color a chance!


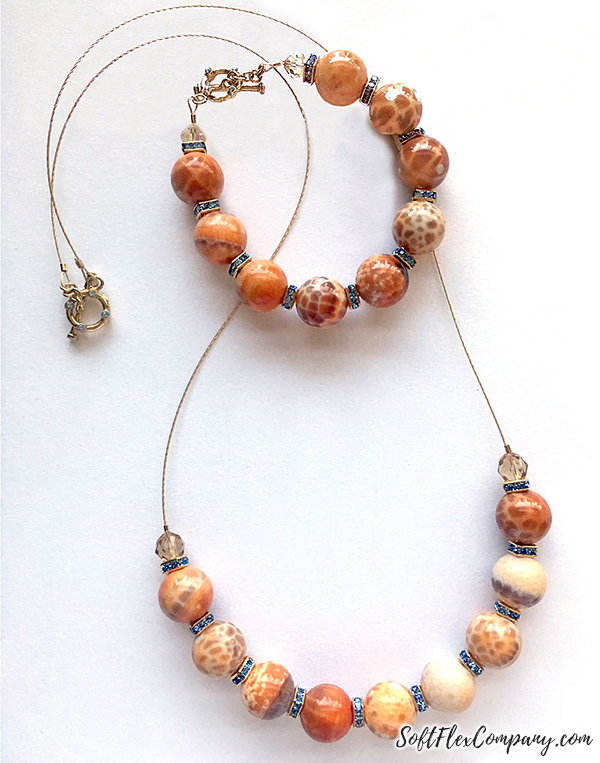
Choose a colorful beading wire for every design or style. Color match your gemstones to our complementary color selection. Select a copper color wire for your next Southwestern flavored necklace. Choose an eyecatching tone that draws attention to your vivid Czech Glass. Bet on black for a timeless and classic look that never goes out of style. Stop settling for lifeless beading wire!
Should You Cut Your Wire At The Crimp Or Double Back Through The Last Beads?
You may have just launched into a new journey on a bead stringing hobby. Or, you may have been stringing beads for decades. Regardless, you are likely to fall into one of two camps: those that cut their beading wire at the crimp or those that double back through a couple of their beads before cutting the wire. While we think both camps are founded on solid design theory, we feel it is better to finish your jewelry with the wire cut at the crimp. Let us tell you why we think this is a good idea.
First, let's look at doubling back through your final beads on a piece before cutting the wire. The idea here is that you are allowing yourself some extra security. The wire is long enough that it is not going to slip out of the crimp and you are not going to lose a bunch of prized goodies on the floor or in the wild. You may even notice a failure as it begins and have time to remove the jewelry before it falls apart.
This was a great rule of thumb when beading supplies were a little more crude or high quality tools and findings may not have been abundant. With the availability of high quality jewelry making supplies online, there is no reason to work with subpar tools. Beading wire and components are no longer hit or miss purchases - you get what you pay for. If you buy quality beading wire, work with quality tools, and know how to crimp - there is no reason to double back. In fact, doubling back may actually put your jewelry at risk for breaking, at this point. If your wire is small enough to double back through beads, that wire is not the strongest that you could be stringing your jewelry with, a new rule of thumb is use a diameter that will fit through your beads once. We will elaborate on that later in this blog.
What is the benefit of cutting the wire at the crimp? Well, there is strength to be concerned about. Stringing with a thicker diameter is always best. This ensures your jewelry is strong and durable and will last for years. There is the aesthetic - do you want a wild tail of wire going through your last beads when everything else looks so calculated and stunning? A tail looks messy. It looks like an errant thread on a beautiful gown. There is also the fact that the option of leaving a tail only works if you are stringing jewelry that is covered in beads. We think showing the wire is a beautiful option. We don't think you need to cover every millimeter of wire to make a beautiful design. Show your color. Cut your wire at the crimp.
Use The Right Tools For The Right Jobs
There is a reason you can find so many beading tools. Each tool has a specific job. When you are making jewelry, you need the right tool for the right job or you are going to have broken jewelry sooner than later. Jewelry tools are the best bet for finishing your work securely - the first time. Tools are quality of life enhancers, you can speed up a slow process by using a specialized tool that does the job twice as quick. This is no reason to struggle when an affordable tool is one click away.
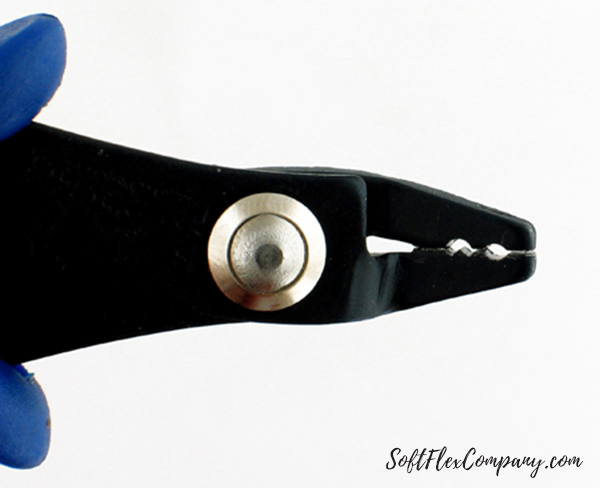
One argument for using a proper tool is crimping. Beginners might not know that crimping pliers are invaluable aids to better finished crimps. They might use a pair of common pliers to smash the crimp. This will give the finished crimp irregular edges that can irritate skin and catch on clothes. A smashed crimp is also much weaker than one finished properly. If you are simply crushing your crimps with pliers, you are going to be restringing your designs soon. Lastly, every crushed crimp is going to have its own shape. If you want a professional finish, you want a finished crimp that always looks the same.

There are two holes on the head of regular crimping pliers.
One hole is a crimping hole. It looks like a crescent moon. This hole will put a divot in the crimp. This divot will divide the individual wires on your design and cradle them securely. This will be a strong way to keep your crimp from slipping. Make sure these wires are parallel and not criss-crossed. Crimp once with this hole and move it to the next hole.
The second hole is the rounding hole. This hole will give your crimp a finished look. We suggest crimping once with this hole, turning the crimp slightly and crimping again. Repeat this four or six times until you have a pleasant shape. We suggest you apply as much pressure as you would if you were shaking your grandmother's hand. You do not need to smash your crimps. Just a firm pressure will do.
Every tool has a job. If you ever design jewelry with Memory Wire, you would know that this wire is a beast on cutters. Memory Wire will destroy a pair of regular cutters since the metal is so hard. Use the right tool for the right job! Memory Wire Cutters are tailor made to remedy this situation. If you have any questions about tools or would like to know what tool works best for what situation, please join our VIB Facebook group and we can answer all of your questions!
Invest in High Quality Tools And You Will Finally Be Able To Quit Replacing Yours
Buy high quality tools and you will not need to keep updating your toolkit. Cheap tools are made from cheap materials. You get what you pay for. The problem is that once you buy a cheap tool and break it, you need to replace it. If you replace it with another cheap tool, you are in a cycle where your cheap tools are becoming progressively more expensive to keep purchasing. If you start out with a set of high quality tools, you will only need to replace them in unusual circumstances. Quality tools are made to last. That first purchase might hurt the wallet, but you will not be stuck in a cycle of replacing. Not only that, high quality tools do the job better.
Below are just some examples of how high quality means buying a tool for life.

If you have gotten sick of replacing your cutters every couple of months, you need to step up your game. Cheap cutters are fine and handy dandy for a beginner or a casual beader that does not do a lot of stringing. Cheap cutters are more than efficient for the occasional restring or weekend craft. Once you are designing more than a couple of necklaces a month, you need to consider getting a better tool. Economy cutters are designed with a soft metal (Rockwell Hardness). Premium cutters have a harder steel. Harder metals hold an edge longer. Buying a pair of quality cutters also allows you to get a better flush cut on your designs.

All jig boards are not created equal. WigJig is a premium line of wire jig boards. They are made of the same material that is used to create windows on aircraft. This is a strong and durable jig board. If you purchase an economy jig board from a department store, it is going to be made of cheap plastic. Cheap plastic is not suited for long term use on a jig board. The pegs used will widen the holes on a cheap plastic board, this will render the jig useless. You could also find cheap metal jigs. Metal jigs do not have an issue with the holes widening with use. However, metal jigs are not translucent. You can see through a WigJig - this allows you to place patterns beneath the jig and replicate them with wire. If you have a pattern, you can always replicate that pattern. This allows for consistent designs. This is a great choice for somebody that likes to make homemade ear wires. Every ear wire created will be the same shape if a pattern is used.

Professional tools are made of quality metals. They are meant to last for years. They are precision made and suited for detail work. Don't keep replacing your budget tools. Buy a set of dependable tools and never worry about replacing your supplies. The initial purchase may sting a little. But it is better than opening your wallet every couple of months. Professional tools also give you confidence. You know they are going to do a job right.
Use the Correct Diameter And Your Jewelry Will Always Be Reliable
The best rule of thumb regarding beading wire is to use the largest wire that will fit through your beads once. This will ensure that all of your jewelry is strong and durable and built to last. As mentioned above, some people like to string their beading wire back through the last beads on their design. This means that instead of selecting the strongest wire possible, they are taking it down a notch and making their design less strong as a whole for the supposed security at the end. We think it is best to string with the largest wire that fits once. This will be a much heartier design that will last for years. And thicker beading wire does not mean stiffer - our wire has the strength of steel and the grace of silk. Even our thicker wires have a beautiful drape that feels more threadlike than any other wire on the market.
Very Fine (.010) – this is a wire we designed as a substitute for thread. It is much stronger than thread. Perfect for weaving, knitting, stitching and embellishing. We do not suggest using this wire for stringing single strand necklaces. It can be used if you have very tiny beads and no other wire fits through the bead channel (black diamonds can have very small channels). If you want to string anything bigger than the smallest beads, select a larger diameter.

Fine (.014) – this is a great option for smaller beads. Seed beads and pearls look great on Fine wire. This wire is much sturdier than our Very Fine wire. If you work with a lot of smaller beads with smooth channels, you want this diameter on hand.
Medium (.019) – this is our ‘go to’ wire. This is our all purpose diameter. Medium is strong enough to handle nearly every task. String chunky beads on a necklace with tiny spacer beads, this diameter can fit through tiny holes and withstand the weight and abrasion of most beads. This diameter has the largest range of color. We want you to use Medium when you want your designs to be durable. Despite the fact that this wire is stainless steel, it is incredibly flexible. This diameter is great for macramé, knitting spools, and Kumihimo Boards. If you string with finer diameters and work with a wide variety of stones and beads, consider getting this diameter.
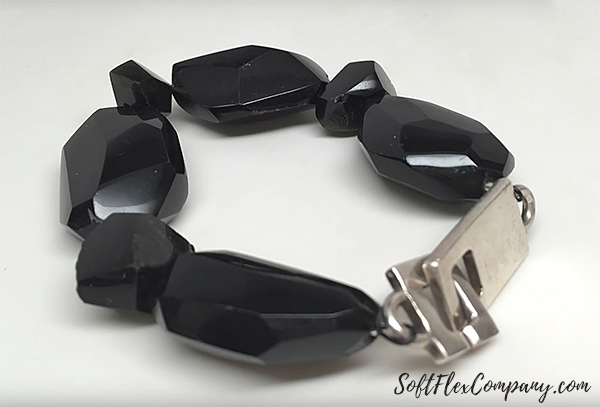
Heavy (.024) – this is our largest diameter. Heavy is great for chunky stones with abrasive channels. Heavy has a 40 pound test strength, that means it takes 40 pounds of snapping strength to break it. It can withstand the torture of abrasive beads like glass, coral, and Turquoise. It is perfect for bracelets. Bracelets take a lot of abuse as they rock back and forth on the wrist.
All beading wires are not alike - buy the best
There are plenty of cheap options out there. If you opt for the most affordable options, you are going to get what you pay for. Just like tools. Premium beading wire is going to cost more at purchase. But, like tools, restringing and replacing poorly made wire or beading cord is going to cost you money in the long run.
Soft Flex Beading Wire follows trends and fashion. We color match our wire with Pantone favorites. We offer Quad Packs of Beading Wire to color match the Color of the Year. We want our wire to make a statement. Stringing your jewelry with brilliant wire will make your designs stand out. You can make gallery quality jewelry at home.
Our wire is marine quality stainless steel. Despite the fact that it is constructed out of steel, it is incredibly flexible. Our wire has the drape of thread. Other wire on the market will have a flat wire drape or feel stiff. You can knot every diameter of our wire. This makes it a powerful tool for weaving, knitting, braiding, macrame, and more. This is your chance to explore a deeper level of beading. Forget the simple single strand necklace. You have the ability to braid your wire for more color. You can weave your wire in and out of beads. There is no reason to conceal this incredible wire. Unleash your creativity!
Simple Money Saving Technique: Practice With Budget Beading Supplies
If you are just starting out, you will have techniques that you need to master. Crimping is one of the first hurdles. If you do not understand how to crimp, your designs will always be at risk for failing. Rather than spending money on professional quality beading wire and crimps, this is a time when searching for budget materials is going to help you save money and not be a factor in a jewelry design you plan to wear.
You can still use professional tools in this case. But plan on using budget supplies for the basics. A simple beading wire will suffice. Basic crimps are fine. You are not going to be stringing anything. Cut your wire into a small length, enough to loop back for a crimp. Loop back through your basic crimp. This is the part where you practice. Watch some YouTube videos to get instructions. Now crimp your bead. It is not going to be perfect the first time. It may not even look good five or six times in. Watch crimping videos. Read crimping Tips and Tricks. Keep practicing. Cut the finished crimp off your wire and keep repeating until you get the hang of it. Once you are comfortable, string your first design and use the good stuff. Apply what you have learned. This is the best way to learn a technique without breaking the bank. Crimping, for some, is the hardest part about stringing jewelry. Don't get frustrated. It will get easier!
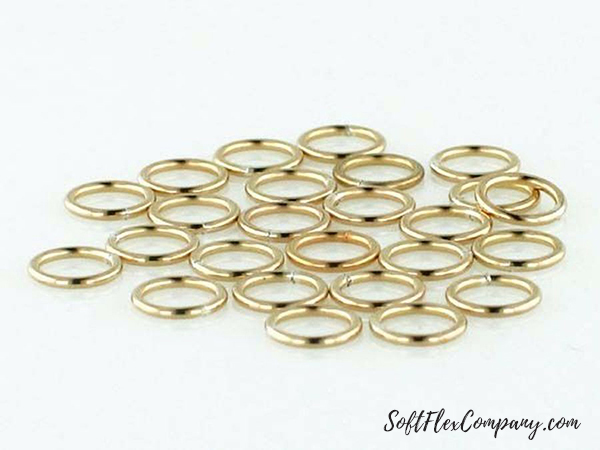
Jump rings are not an essential tool but they offer fun new ways to evolve and enhance your jewelry designs. You can use jump rings to lengthen a design. You can use them to connect pieces of your design. You can also use them as spacer beads and focal pieces. If you want to take your jewelry to the next level, it is good to learn how to use jump rings. Jump rings are not as expensive as other components, but you can still practice opening and closing them with lower quality jump rings.

Starting out, wire wrapping and wire working is going to feel foreign and difficult. This is another chance to use less than professional supplies. Finding a cheaper wire to practice with is a great way to get a feel for how your wire working tools work. A cheaper wire will allow you to practice shaping the wire and looping the wire. You will get a sense of how the wire retains its shape after it is work hardened. If you are using a basic wire you might also get a sense of how over working the wire can turn it brittle. Once you get a better understanding on how to manipulate and move the wire, you can step up to a professional wire like Soft Flex Craft Wire. Make sure you take advantage of all of the instructional videos on YouTube.
Craft Wire is a fantastic addition to your beading supplies. Make your own jump rings and ear wires. Learn how to work with eye pins and head pins. Not every bead stringer works with Craft Wire, but if you want to elevate your jewelry designs, it is definitely a medium worth looking into.
Embrace Your Flaws! DIY Jewelry Is Not Supposed To Be Perfect
One of the best things about making your own DIY jewelry is that you are allowed to make mistakes. You are allowed to make designs that are asymmetrical. DIY necklaces are not meant to be perfect. That flawless Tiffany bracelet and that Kate Spade necklace from Nordstrom are great for occasions and outfits. But your handcrafted designs are not expected to be compared to an unobtainable goal. Homemade jewelry is meant to have kinks and bumps. Make Boho chic designs that are casual but as on point as any jewelry shop. You do not have to strive to make your jewelry immaculate for it to be fashion forward.
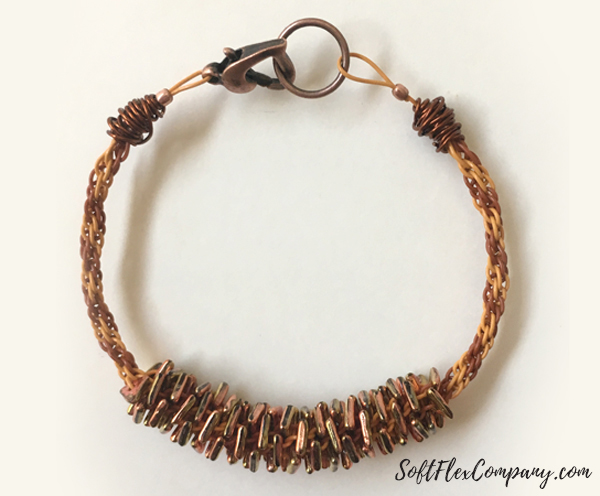
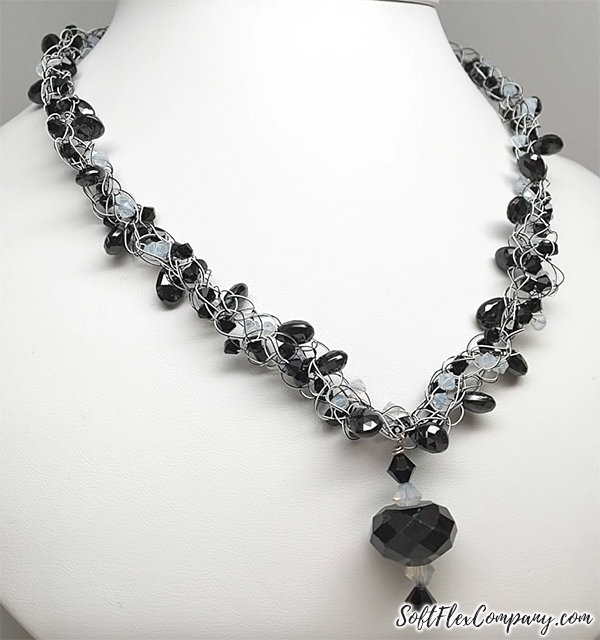
One fun way to finsh a multi-strand jewelry design is to make your own messy wrap, instead of using a cone. The is a delightful way to add an organic highlight to a jewelry design. Messy wrap gives character. It embraces flaws and turns a flaw into a thing of beautfy. Don't be afraid to break the rules. Don't be afraid to design a necklace that is not perfect. Don't be afraid to add a unique messy wrap to your next bracelet.
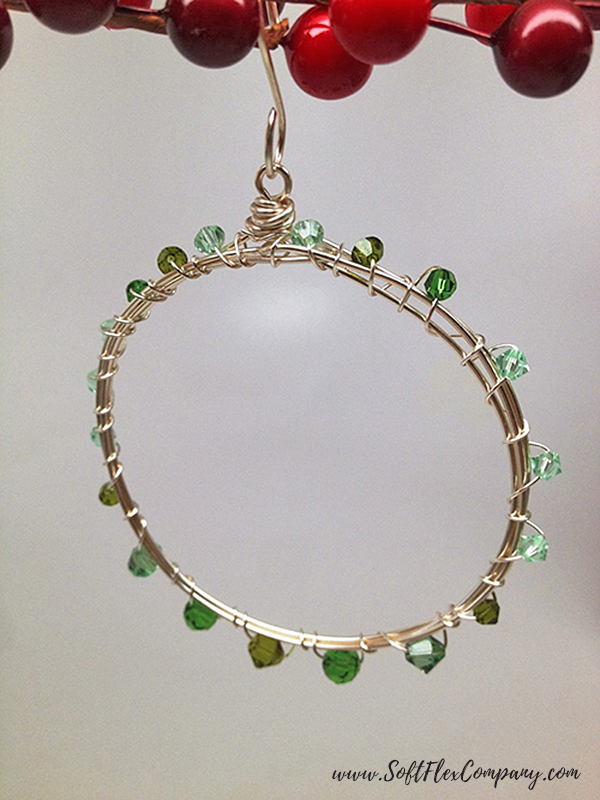
Holidays are perfect for handmade crafts. Not one person in your family is expecting you to design something perfect. Flaws and imperfections give crafts character. One day your handcrafted ornaments will change hands. You children or grandchildren will end up with them. They will cherish the flaws. They will see the love you put into your crafts. Each flaw will tell a story and they will think of you and wonder what you were like or what you were thinking as you made your holiday ornaments and gifts. Handmade holiday gifts are expected to have character and they will likely become heirlooms. Embrace the flaws!
Join our Facebook group – VIB. Stay in the know. Stay up to date. From our bead shows to our video shows and sales, you can stay in touch with us. The community is full of artistic and helpful beaders and crafty people. Inspire and be inspired. Share your pictures and get the beading bug from others!
Visit the Soft Flex Company YouTube Channel!


Blog contributor Thomas Soles loves Jazz Age writers and crunchy french fries. His favorite gemstones are Lapis and Pietersite. His favorite hobby is day dreaming. And his favorite mustache is Freddie Mercury's. As you can see, he has a healthy (or possibly unhealthy) sense of humor. You can write to him at Thomas@SoftFlexCompany.com