

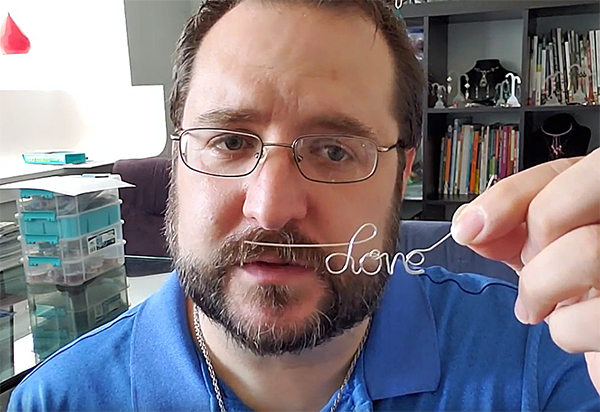
James is back for another YouTube episode of Conversations in Wire. This time, he is creating words with Craft Wire. He is going to take you through the process of wrapping wire into letters. Imagine the fun applications for this. You could make a focal bead with your loved one’s name on it. You could craft a gift tag for a holiday present with the recipient’s name on it. You could simply create letters to place on a work desk. James is a talented wire artist. He is also a gifted teacher.

James’ YouTube series is called Conversations in Wire. He uploads his videos to YouTube every other Thursday. He explores his passion for Craft Wire jewelry. His videos are easy to follow. He shows you how wonderfully malleable Craft Wire is – you can make a mistake and still move forward. James believes if you have patience, you will go far. He has shown us how to create wire wrapped rings, charms, wrap stones, and more. If you have any questions for James, you can post them in the comments field on his videos or email him.
James starts the video with an introduction. James says this will be a fairly quick and simple video showing how to create lettering with Craft Wire. This will be easy with tools, a little know-how, and an imagination.
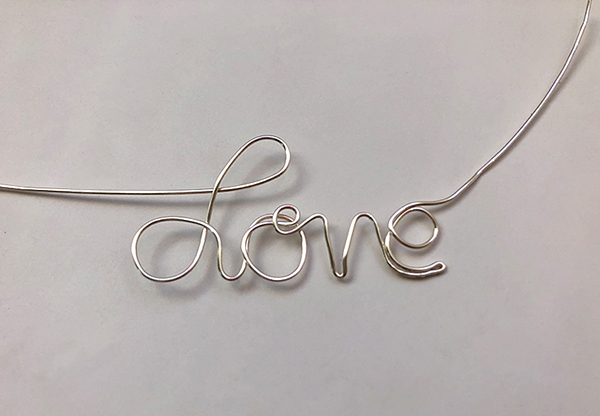
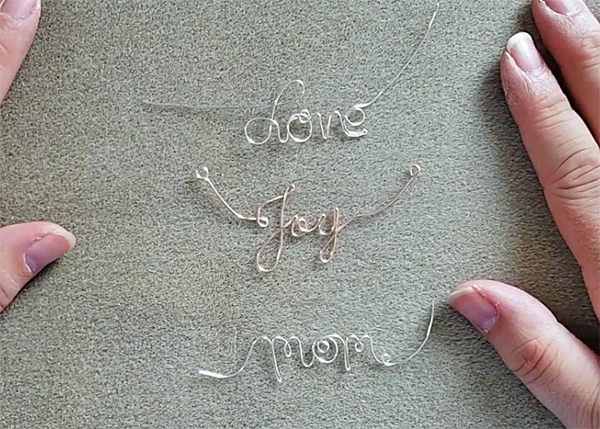
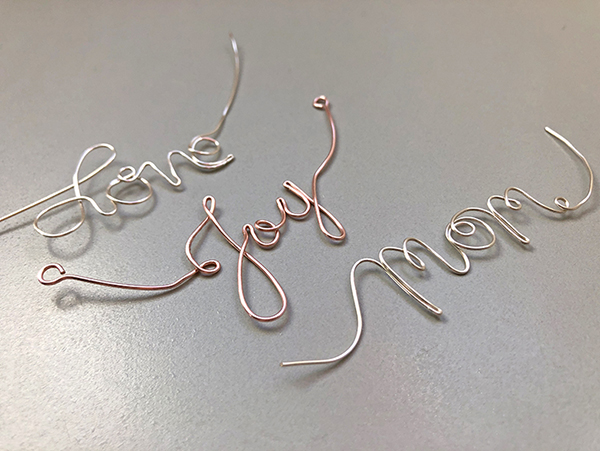
James shows a couple of words he created freehand. For the video, he is going to show us how to use a printed word as a template. Using a template will ensure the words you make are all uniform and precise. That is great for creating a professional finish. Freehand words are awesome too. Freehand designs can be more playful and imaginative. Go with what suits you.

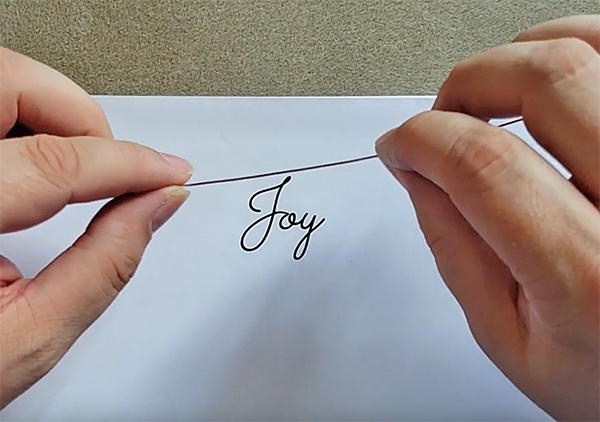
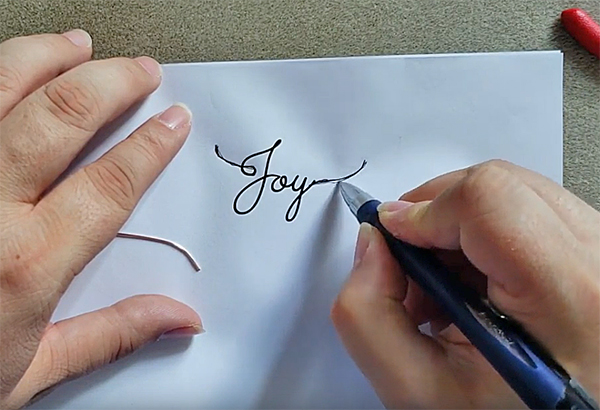
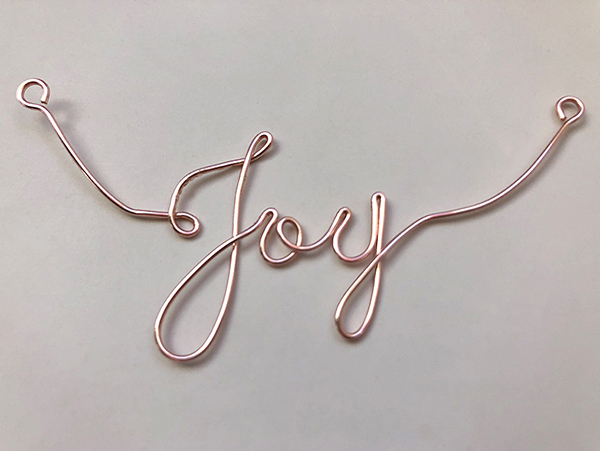
James selected a word and font he liked on the web and printed it out. ‘Joy’ is the word he is going to create today.
James is going to be using a 20 gauge Craft Wire. 20 gauge may be a little too thick and hard to work with for some, if that is the case, use a thinner 22 gauge wire. He has selected 20 gauge Rose Gold Silver Plated Craft Wire for this project. James says the 20 gauge will give a nice sturdy word when finished and it will not be necessary to work harden the wire too much to set it.
Work hardening wire is the process of changing the temper of the wire. Craft Wire is usually ‘dead soft’ on the spool. Once it is work hardened it becomes ‘half hard’. Dead soft wire is pliable and easy to manipulate. Half hard is firm and will hold its shape. This process can be done by striking the wire or pulling the wire through nylon jaw pliers. If you are striking the wire, a nylon tipped hammer is ideal so you do not mar the surface of the wire. You can also use a Wire Whacker.
Wire can also be work hardened by over manipulating it. If you bend the wire back and forth too much, it will harden and eventually become brittle. Make sure you take your time when using wire. It is very forgiving. You just don’t want to over work it.
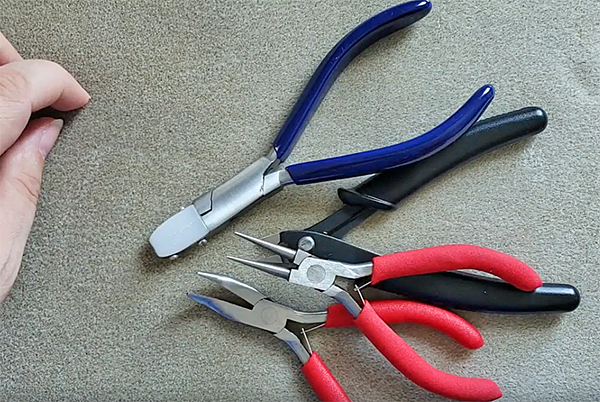
James shows the tools he uses. He has a pair of cutters. He has nylon jaw pliers. He has bent nose pliers. He has round nose pliers. He prefers to bring a good assortment of tools to his table. Each tip will have a different function. He wants to make sure it is within easy reach if he needs it. We have all of these tools available on our website as single purchases. You can also save money buying our Craft Wire Starter Kit. The Craft Wire Starter Kit includes a Bead Mat, Bead Nipper, Nylon Jaw Pliers, Round Nose Pliers, Bent Nose Pliers, Lobster Clasps, 22 gauge Craft Wire and a package of Beads.
James cuts twelve inches of wire off of the spool. Joy is a small word; he will not need too much wire. He suggests that if you are making this word repeatedly, you can measure the amount you do not use at the end and subtract that amount the next time you cut the wire off of the spool. So, if you had four inches of wire left over after creating the word, you know next time to only cut eight inches off of the spool.
James takes one end of the wire and grips it with his bent nose pliers. He places the nylon jaw pliers next to the bent nose pliers. He pulls down the length of the wire with the nylon jaw pliers. This will slightly work harden the wire and remove any kinks and bumps in the unspooled wire. He turns the wire 90 degrees and draws the wire on the other side. The wire is now straight.
James says he loves this project. It is great for the holidays. You can create gift tags for your presents. You can add names to ornaments. On Mother’s Day, you can give mom her own little pendant.
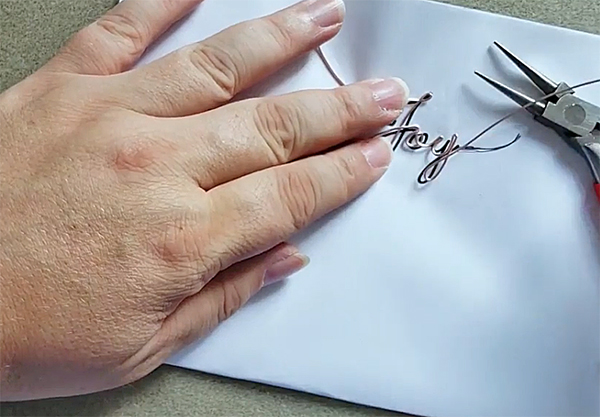
For this project, James is going to basically be tracing his Craft Wire over the printed word he has selected. It is important to find a word and font that is connected throughout. Any letter breaks in the font will make the process difficult. James adds a little line work to the word he has printed so he knows how much wire he wants to extend off of the word. Having a little extra wire at each end of the word will allow you to finish the wire later.
James wraps his wire around the tip of his round nose pliers. As he does this, he accidentally bends the wire in a direction he does not like. Craft Wire is very forgiving. He takes his nylon jaw pliers and squeezes the bent wire so it straightens again.
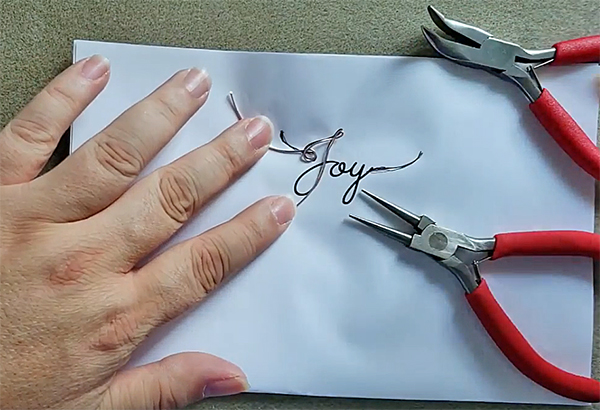
James traces his wire on the printed word. He uses both the tools and his fingers to loop and shape the word. He places the wire on template as he goes and makes sure the wire is conforming to the size and shape of the word. It is easy to make mistakes, but they can all be fixed. He is not happy with the ‘o’ in Joy. He takes a pair of bent nose pliers and bends the letter until he is satisfied with the shape.
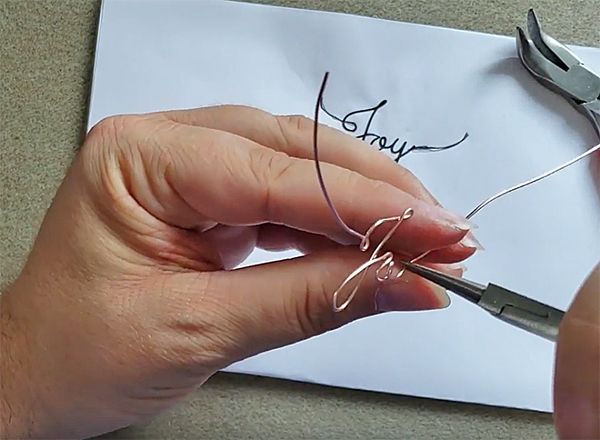
Once James has the word finished, he loops the ends with his round nose pliers. This will make it easy to attach the word to chain or Soft Flex or whatever medium you choose.
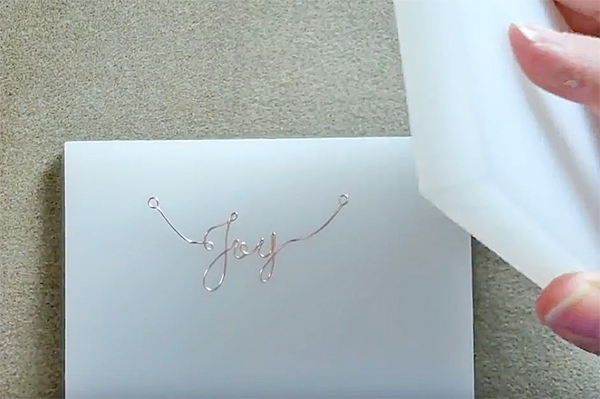
James places his finished word in his Wire Whacker to word harden the finalized shape. He strikes the two plates together to harden the piece. You can also use a hammer for this. You can use a tumbler if you have one. If you are using a hammer with a metal tip, be sure to be gentle so you do not harm the surface of the wire when you strike it.
There you have it - a lovely word for a loved one or friend.
You can add beads to your word as you go. You can create much larger words or smaller words. This video is a great project idea. Feel free to explore your creative side and see where it takes you!
Subscribe to our YouTube channel for more tips. Visit our Facebook page if you want to catch our live shows and sales. And join our Facebook group – VIB, if you want to join a friendly community or jewelry designers and all around creative people.
Visit the Soft Flex Company YouTube Channel!


Blog contributor Thomas Soles is the Trade Show Coordinator for Soft Flex Company. His favorite stones are Lapis and Pietersite. His favorite hobby is day dreaming. And his favorite mustache is Tom Selleck's. As you can see, he has a healthy (or possibly unhealthy) sense of humor. You can write to him at Thomas@SoftFlexCompany.com