

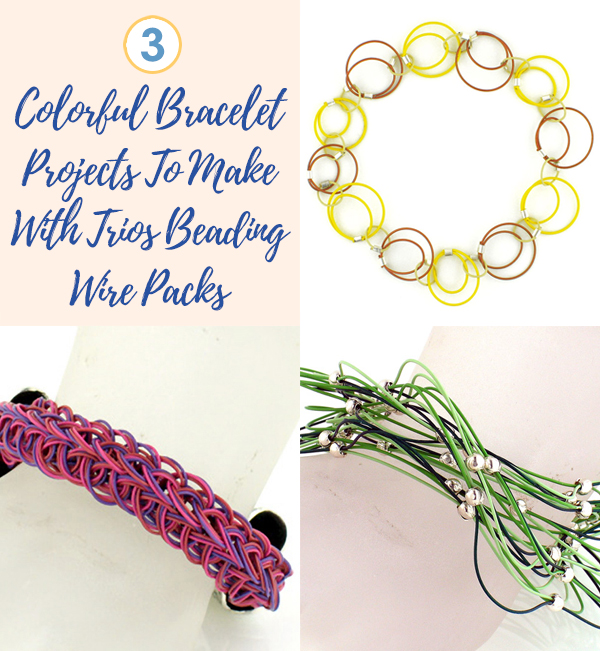
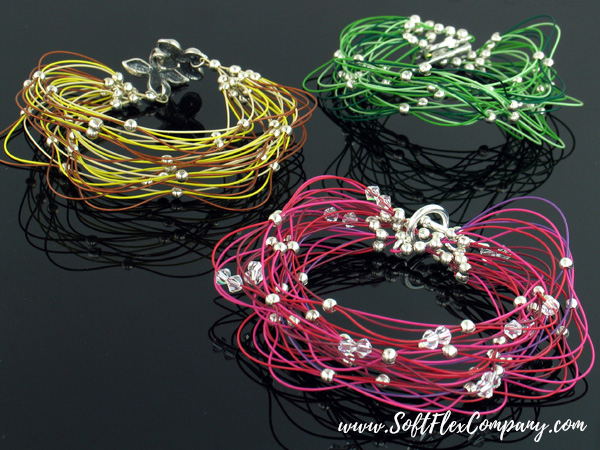
Happy Wednesday to you! What is your favorite Trios Beading Wire Pack? Do you like the mystery of Black Magic? Do you love the vibrant pop of Egg Hunt? How about the festive Holly Jolly Trios? There is a lot to love. Each Trios pack evokes a feeling, if you love color.

Today, we are going to look at three
free project designs made with different Trios. Each design was made
with a different pack. You can see how the
colors change the feel of
each design. A bracelet made with a Harmony Trios has a warm glow on
the wrist. A bracelet made with the Romance Trios is luscious and
evokes a sense of passion and affection. A unique color set applied to
the same design makes each design distinctive and different – even
if they are fundamentally the same, except for the color palette.

Your designs deserve to be colorful. Shop our Trios Beading Wire Packs and find the colors that speak to you. If you are creating some fun jewelry for the holidays or a mood – Trios make it easy to one-stop-shop your beading wire. Each Trios pack is a collection of three 10 foot spools of wire. We created each pack to fit a mood, holiday or celebrate a Design Kit we featured and loved. If you missed out on our Purple Rain Design Kit, grabbing that Trios pack will evoke the mood we hoped to capture when we created it. Make your next bracelet with color in mind!
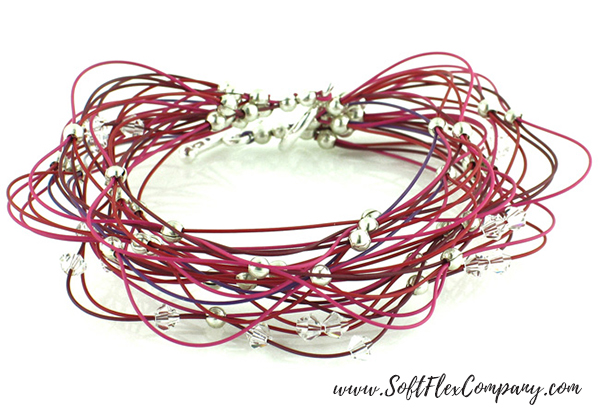
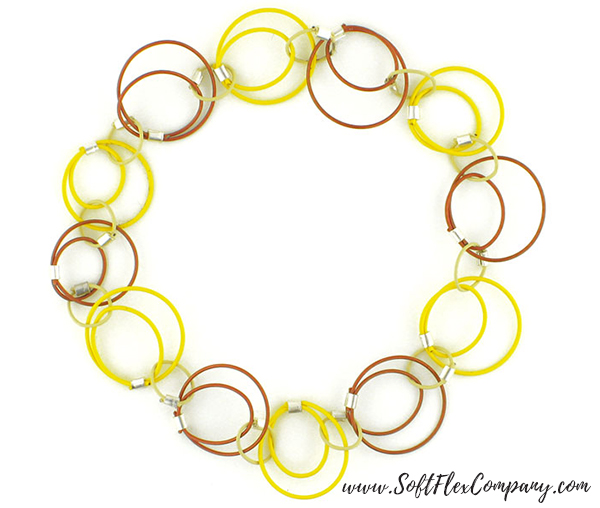
Trios Knitted Bracelet
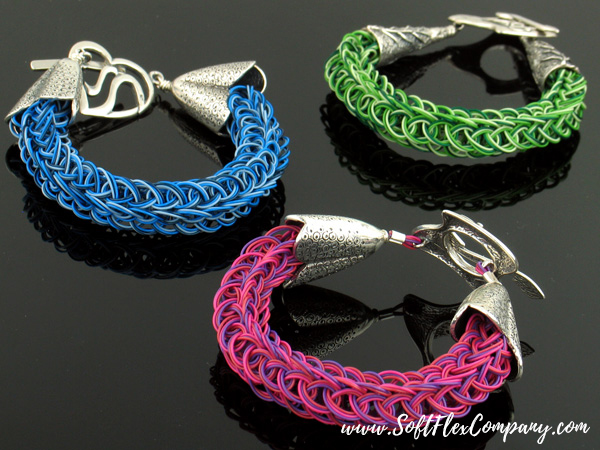
Designer Sara Oehler
Skill Level Intermediate
Renewal Trio
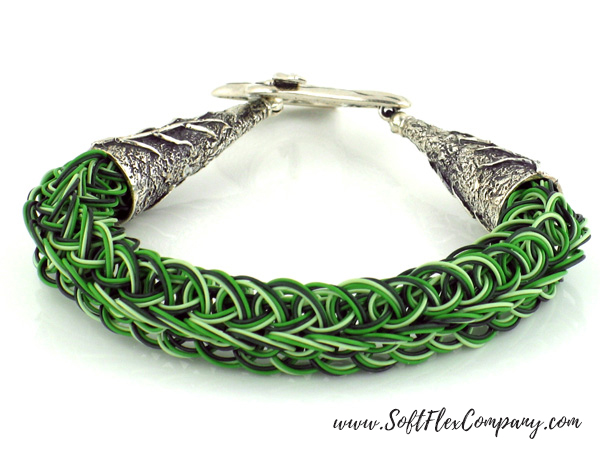
Mystical Trio
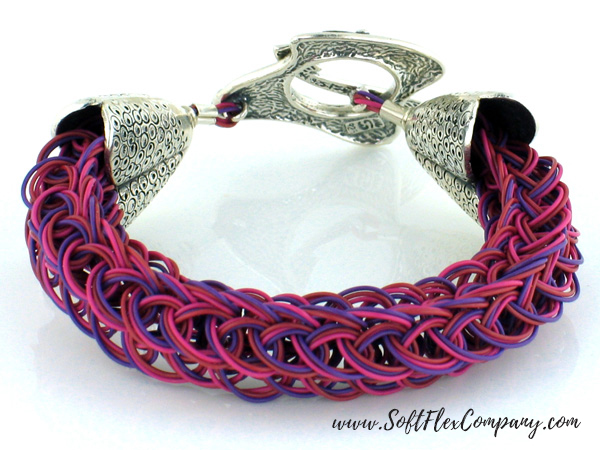
Tranquility Trio
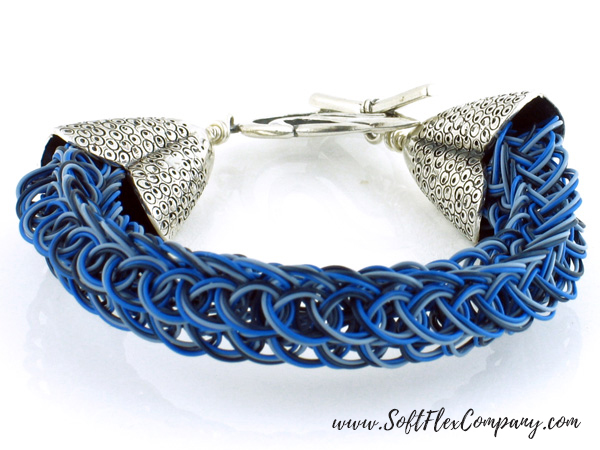
Materials
Trios Beading Wire Packs Multi-Color - 36 feet total, 12 feet in each color
3x3mm Sterling Silver Crimp Tubes - 6 pcs
Toggle - 1 set
Cones - 2 pcs
Tools
5 Pin Knitting Spool with Stylus
Mighty Crimping Pliers
Soft Flex Flush Cutters or Bead Nippers
Instructions
Click here for instructions for Knit Style 2 on the Knitting Spool
Step 1: Use a 5 pin knitting spool to "knit style 2" all 3 strands of wire as if they were just one. Knit the entire length of the wires (12 feet), leaving at least a 1.5 inch tail to attach your clasp.
Step 2: Use all three strands to string 1 cone, 1 crimp tube, and one half of the clasp. Pass back through the tube and crimp. Click here for crimping instructions. Repeat on the other side. Trim the excess wire.
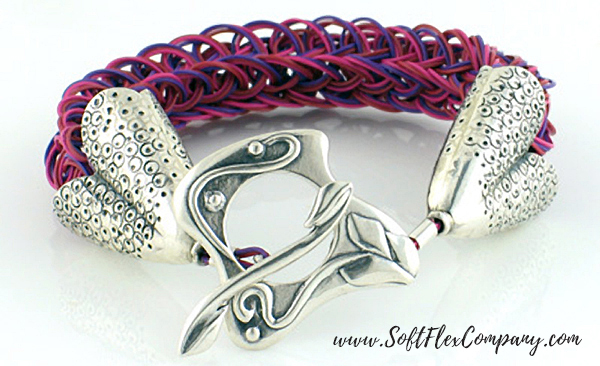
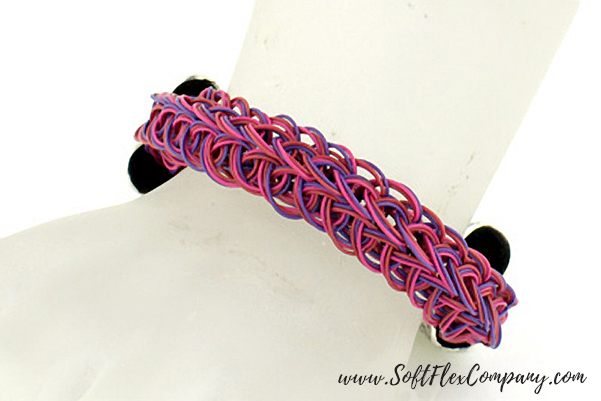
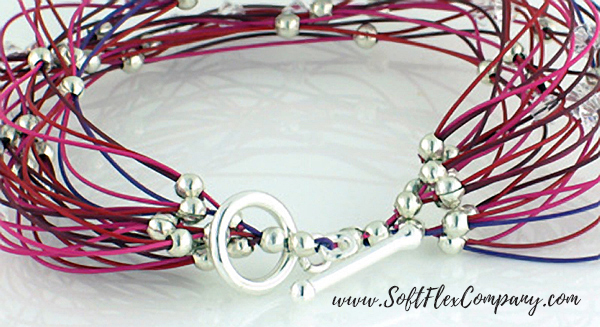
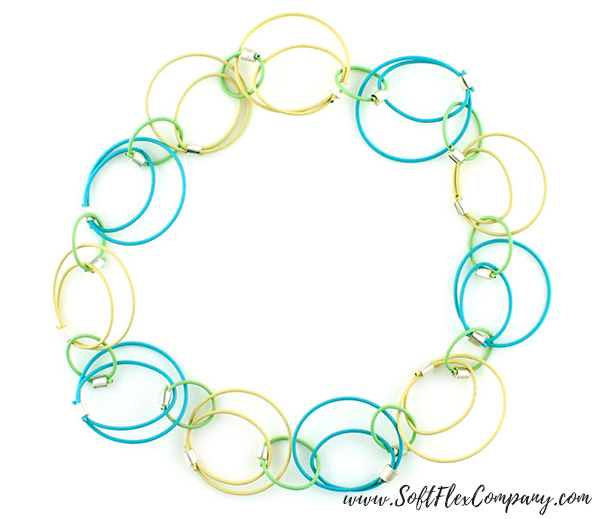
Trios Wave Bracelet
Designer Sara Oehler
Skill Level Intermediate
Mystical Trio
Renewal Trio
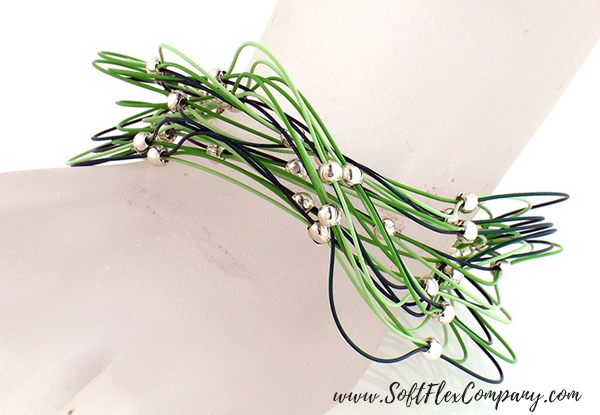
Harmony Trio
Materials
Trios Beading Wire Packs Multi-Color - 90" of each color
2x2mm Sterling Silver Crimp Tubes - 64 pcs
3mm Crimp Covers - 64 pcs
1 Strand Clasp or Toggle Clasp - 1 set
Tools
Crimping Pliers
Flush Cutters or Bead Nippers
Chain Nose Pliers
Instructions
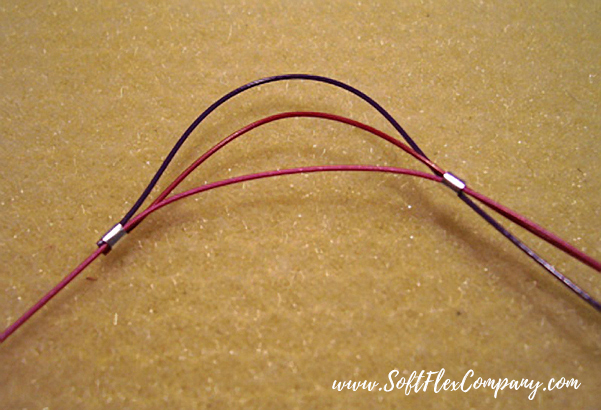
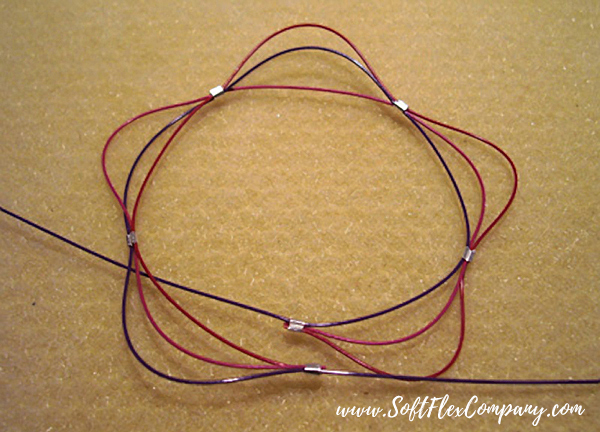
Step 1: Cut nine 10 inch pieces in each of three different colors of beading wire. Organize into nine piles of three strands, one strand of each color per pile.
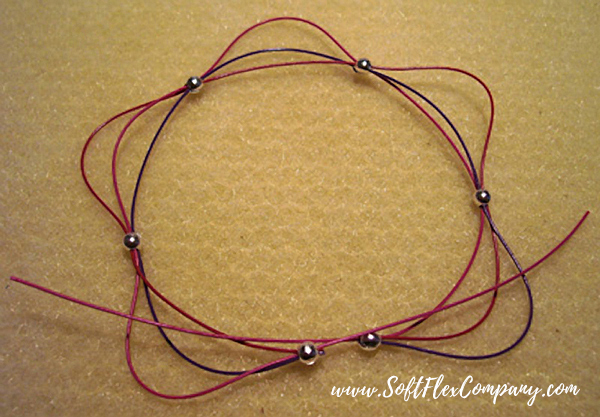
Step 2: Use three strands to string 1 crimp tube, leave a 1 1/2 inch tail and crimp. Use all three strands to string 1 crimp tube. Create a wave shape using the wire between the two crimps: Pull one of the wires up about 1/4 inch from the bottom wire, then pull the other wire up about 1/4 inch from that wire, and crimp.
Click here for crimping instructions. The wave should be about 1 1/4 inches from crimp to crimp and approximately 1/2 inch between the bottom wire and top wire of the wave. Repeat until you have 5 waves and have used 6 crimps. On each end of the waves, cut two of the wires and trim the remaing wire to 2 inches. Cover all crimps with crimp covers.
Step 3: Repeat Step 2 eight times, for a total of nine pieces. Organize the nine pieces into three piles of three.
Step 4: Use three pieces to string 1 crimp tube, pushing the crimp up next to the already set crimp tubes, and crimp. Repeat on the opposite side. Trim the two shortest of the three tails on both sides, leaving only one tail. Cover the newest crimp tubes with crimp covers.
Step 5: Repeat Step 4 twice, for a total of three pieces.
Step 6: Use three pieces to string 1 crimp tube, pushing the crimp up next to the already set crimp tubes & crimp. Repeat on the opposite side. Trim the two shortest of the three tails on both sides, leaving only one tail. Cover the newest crimp tubes with crimp covers.
Step 7: Use the final wire to string 1 crimp tube and one half of the clasp. Pass back through the tube and crimp. Repeat on the other side. Trim the excess wire.
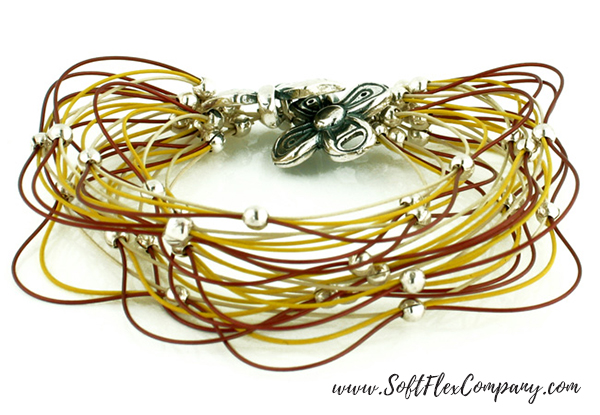
Waste Not Want Not Bracelet
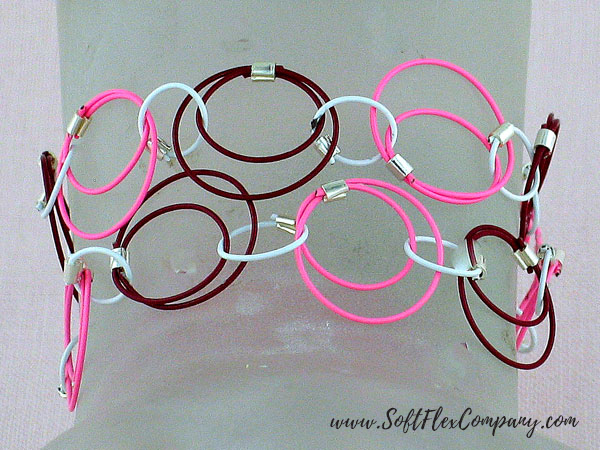
Designer Sara Oehler
Skill Level Beginner
Romance Trio
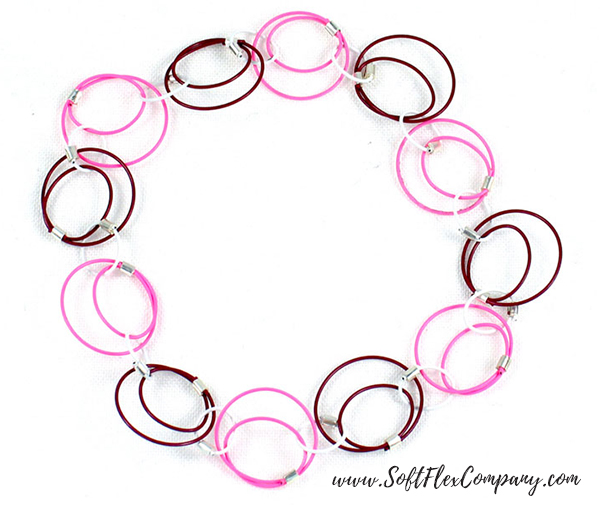
Serenity Trio
Harmony Trio
Materials
Trios Beading Wire Packs Multi-Color
2x2mm Soft Flex Sterling Silver Seamless Crimp Tubes - 20 pcs
Tools
Crimping Pliers
Flush Cutters
Instructions
Step 1: Cut five 4" lengths of wire in two different colors for the big links. You should have a total of ten 4" lengths of wire. Cut ten 2 " lengths of wire.
Step 2: String the crimp onto a 4" length of wire. Make a 1/2" loop and string the wire through the crimp again. Make a 5/8" loop and string the tail of the wire through the crimp. The wire passed through the crimp 3 times. Crimp the tube using the crimping pliers and cut off excess wire.
Click here for crimping instructions. Create five of these components in two different colors for a total of ten big links.
Step 3: Use a 2" length of wire to connect two of the large components made in two different colors. String a crimp onto your wire. String the wire through the middle of each of the large components. Make a 1/4" loop and string the tail of the wire back through the crimp. Crimp the tube using the crimping pliers and cut off excess wire.
Step 4: Continue to connect all big links with the 2" lengths of wire.
Step 5: This bracelet will have some spring to it and should fit over your hand. You can change the size by adding links or removing links. You can make it more interesting by adding beads or make several and mix up the colors for big or small links. This design is a great way to use up leftover pieces of wire so that you can use just about every bit from the trio.
Projects not intended for children under the age of 13. The information on this instruction sheet is presented in good faith, but no warranty is given, nor results guaranteed. Soft Flex® Company disclaims all liability from any injury to anyone undertaking the construction of this project as a result of improper safety precautions.
Join our
Facebook group – VIB. Stay in the know. Stay up to date. From our bead shows to our video shows and sales, you can stay in touch with us. The community is full of artistic and helpful beaders and crafty people. Inspire and be inspired. Share your pictures and get the beading bug from others!
Visit the
Soft Flex Company YouTube Channel!


Blog contributor Thomas Soles loves Jazz Age writers and crunchy french fries. His favorite gemstones are Lapis and Pietersite. His favorite hobby is day dreaming. And his favorite mustache is Freddie Mercury's. As you can see, he has a healthy (or possibly unhealthy) sense of humor. You can write to him at Thomas@SoftFlexCompany.com