Don’t over look your components. Crimps and clasps are needed to finish your designs. But they do not have to be simple and easy to miss. A beautiful clasp will make a design stunning. Your wonderfully finished crimps can be shown and not concealed away. Your ear wires and head pins can add to the design aesthetic and not detract from it. Get creative. Check out some of our jewelry. We think every bead and every component is important. Don’t miss the video at the bottom of the page. Kristen had a surplus of jump rings. She used those as spacer beads on a necklace. Out of the box thinking can be wonderful!
Show us your beaded bracelets. Join our Facebook group - VIB and post your pictures. VIB is a fun community of beaders that love to create jewelry and share their work. You are not obligated to post photos, but if you want to, we would love to see them.Our little community is full of jewelry designers that love to be inspired and love to inspire others. It is a great place to find some fun jewelry ideas.
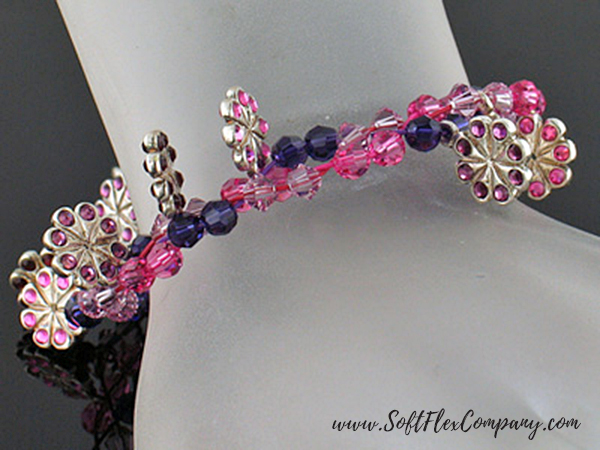
Mystical Crystal Charm Bracelet
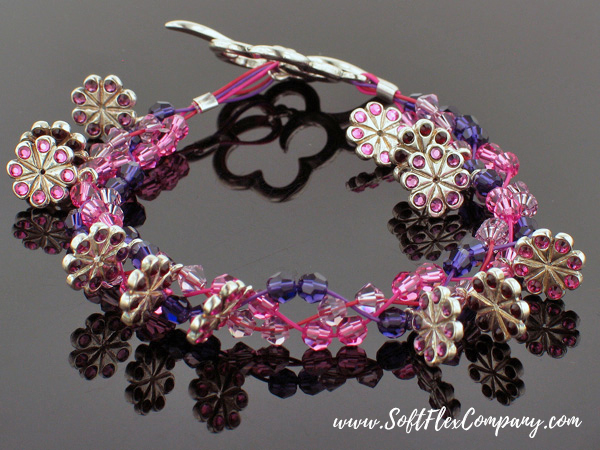
Designer Jamie Hogsett
Skill Level Beginner
Materials
Soft Flex Trios Mystical Beading Wire Set (Purple Amethyst, Pink Tourmaline, Spinel)
26mm Sterling Silver Flower Toggle Clasp - 1 set
3x3mm Sterling Silver Crimp Tubes - 2 pcs
13mm Sterling Silver Flower Charm with Rose Austrian Crystal - 4 pcs
13mm Sterling Silver Flower Charm with Siam Ruby Austrian Crystal - 4 pcs
13mm Sterling Silver Flower Charm with Amethyst Austrian Crystal - 4 pcs
4mm Purple Velvet Crystallized Swarovski Elements Crystal Rounds - 24 pcs
4mm Rose Crystallized Swarovski Elements Crystal Rounds - 24 pcs
4mm Light Amethyst Crystallized Swarovski Elements Crystal Bicones - 24 pcs
Tools
Mighty Crimping Pliers
Cutters
Bead Stoppers
Instructions
Finished Size: 7 1/2"
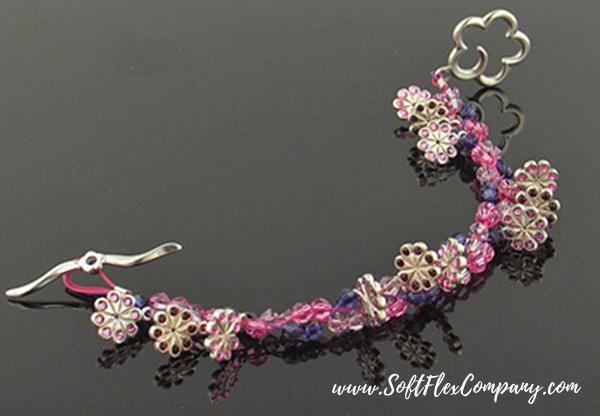
Step 1: Cut 12" each of Purple Amethyst wire, Pink Tourmaline wire, and Spinel wire. Use all three wires to string 1 crimp tube and the ring half of the clasp. Pass all three wire ends back through the tube, and crimp using Mighty Crimping pliers. Click here to see crimping instructions.
Step 2: Use the Purple Amethyst wire to string 5 Purple Velvet crystal rounds and 1 Amethyst charm. String {6 Purple Velvet crystal rounds and 1 Amethyst charm} three times. String 1 Purple Velvet crystal round. Place a Bead Stopper on the wire; set aside.
Step 3: Use the Pink Tourmaline wire to string 1 Rose crystal round. String {1 Rose charm and 6 Rose crystal rounds} three times. String 5 Rose crystal rounds. Place a Bead Stopper on the wire; set aside.
Step 4: Use the Spinel wire to string 3 Light Amethyst crystal bicones. String {1 Siam Ruby charm and 6 Light Amethyst crystal bicones} three times. String 3 Light Amethyst crystal bicones. Place a Bead Stopper on the wire.
Step 5: Slowly and carefully braid the three wires together, pushing two crystal beads (or 1 crystal bead, 1 charm, and 1 crystal bead, depending on the order of the beads) up to the braid before crossing the next wire over. Due to the way the charms and crystal beads are strung, the charms should come together in groups of three, with the groups of charms alternating on different sides of the bracelet.
Step 6: Continue to braid until all the beads are incorporated into the bracelet. Use all three wire ends to string 1 crimp tube and the bar half of the clasp. Pass the wires back through the crimp tube, and crimp.
Trios Woven Bracelet
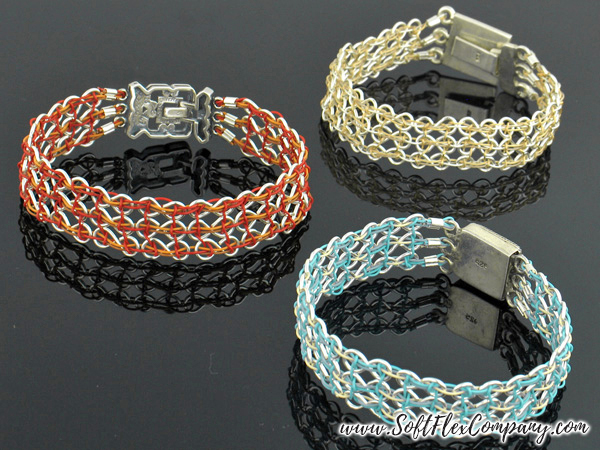
Designer Sara Oehler
Skill Level Advanced
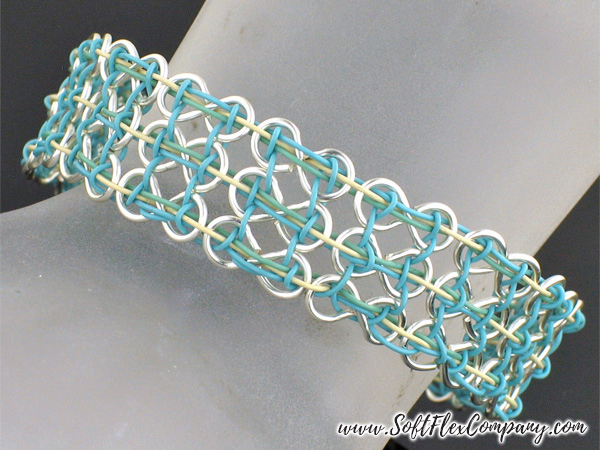
Vitality Trios
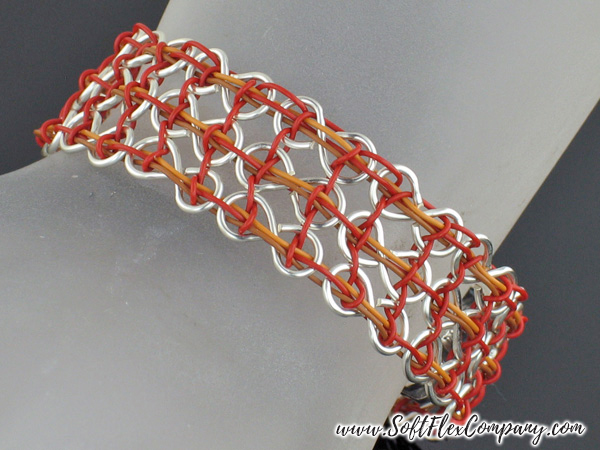
Extreme Trios
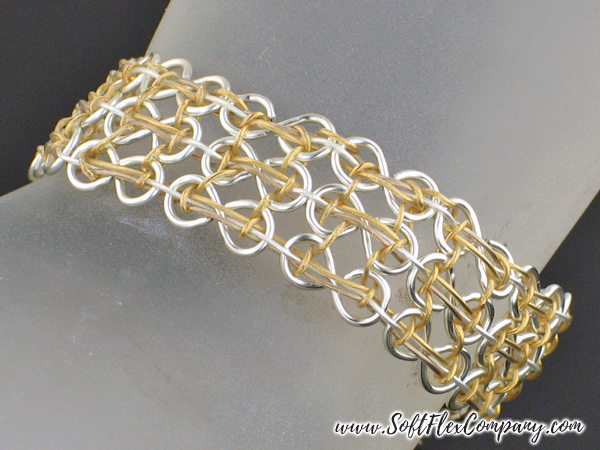
Serenity Trios
Materials
Soft Flex Trios Wire Set, .019 Diameter - 30" in each color + 4 ft in your favorite of the 3 colors
20ga Non-Tarnish Silver Soft Flex Craft Wire - 39"
3x3mm Sterling Silver Crimp Tubes - 6 pcs
3 Strand Clasp - 1 set
Tools
Mighty Crimping Pliers
Cutters
Nylon Jaw Pliers
Chain Nose Pliers
Round Nose Pliers
Instructions
Step 1:Use 1 inch of Soft Flex Craft Wire to create an "S" link. Use Round Nose Pliers to hold one end of the wire and form a loop toward the center. Repeat on the other side of the wire, making sure to form the loop in the opposite direction in order to form the "S" shape. Repeat to make thirty-nine "S" links. Try to make each side of the "S" link as even as possible. Sort into three piles of thirteen "S" links.
Step 2: Cut three 10 inch lengths of wire in each of the three colors. Make three groupings, with one strand of each color.
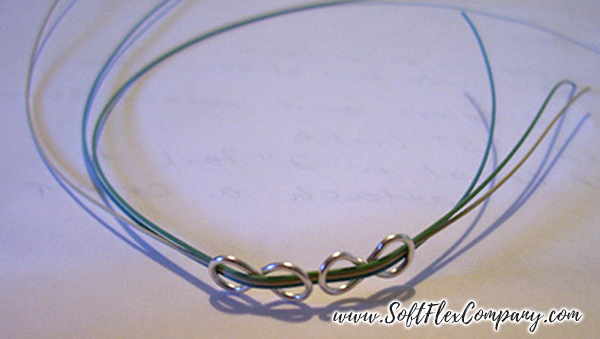
Step 3: Use two colored wires from one grouping and weave through one pile of thirteen "S" links, leaving at least a 2 inch tail of wire on either side to attach to the clasp using a crimp tube later. The woven piece will curl. Use the third color to weave back through the 13 “S” links in the opposite direction, through the middle of the first two colored wires. This will straighten out the woven piece.
Step 4: Repeat Step 3 two more times, until you have three total woven pieces.
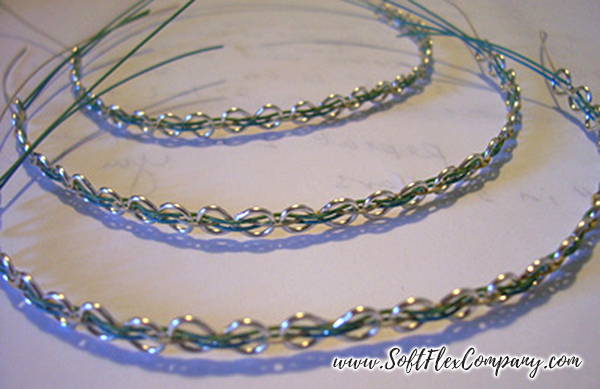
Step 5: Cut 4 feet of your favorite of the three colors. Line up all three of the woven pieces, side-by-side. Cross weave the wire leaving about a 2 inch tail. Keep the wire that you are weaving as straight as possible, weave at a steady even pace. Knot the tail on either end. Flicker a flame on the knot to secure it (by melting the nylon).
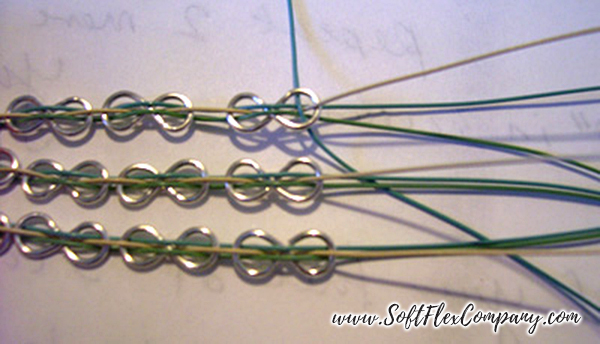
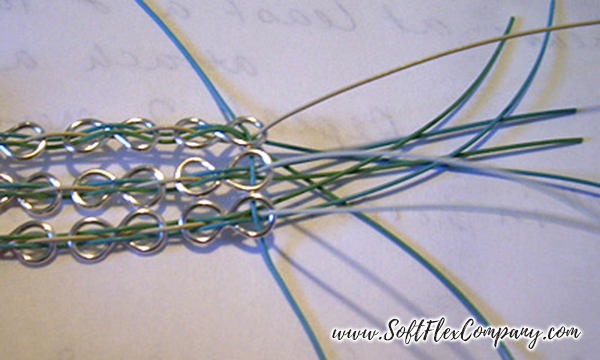
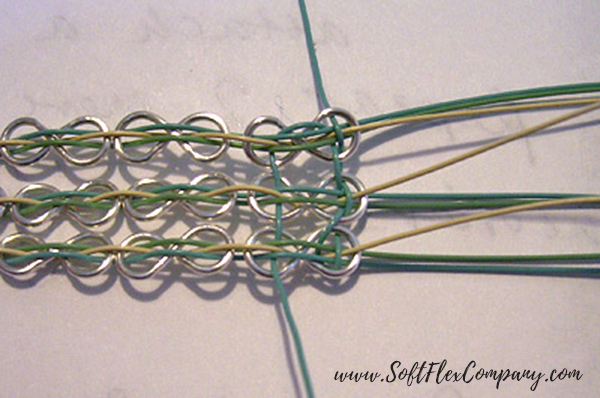
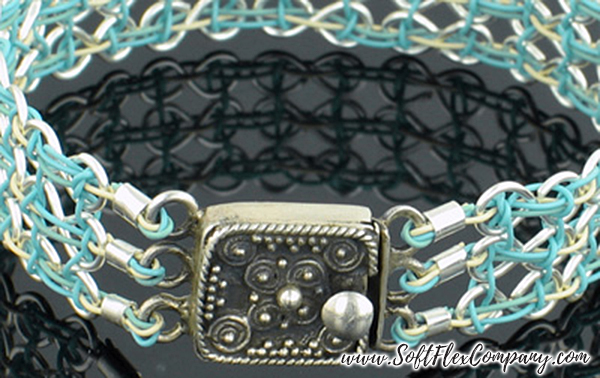
Step 6: Use three strands from one woven piece (Step 3) to string 1 crimp tube and the loop of the clasp. Pass back through the tube and crimp. Click here for crimping instructions. Repeat twice using the ends from each woven piece, then repeat for the other ends of the bracelet. There will be 3 crimps attaching the bracelet on each side of the 3-strand clasp.
Crystal Chandelier Earrings
Designer Shelley Richey
Skill Level Beginner-Intermediate
Materials
Sterling Silver Ear Wires - 1 pair
24ga Sterling Silver 3 inch Head Pins - 2 pcs
24ga Sterling Silver 2 inch Head Pins - 4 pcs
24ga Sterling Silver 1.5 inch Head Pins - 2 pcs
4.5mm Sterling Silver Open Jump Rings - 8 pcs
26x17x1mm Sterling Silver 4 Loop Connectors - 2 pcs
Size 11 Clear Seed Beads - 40 pcs
4mm Clear Crystal Faceted Round Beads - 14 pcs
6mm Clear Crystal Faceted Round Beads - 2 pcs
Tools
Round Nose Pliers
Cutters
Needle Nose Pliers
Instructions
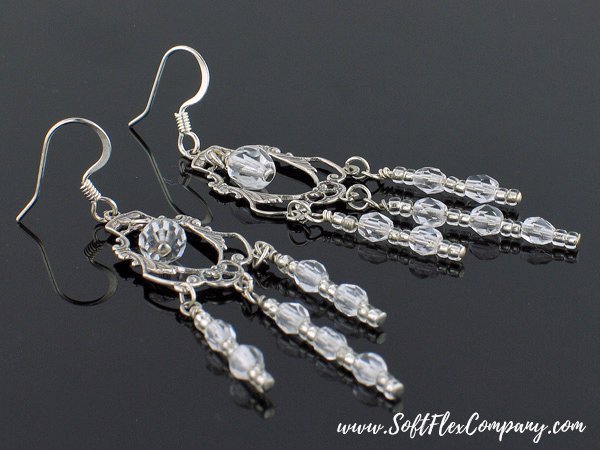
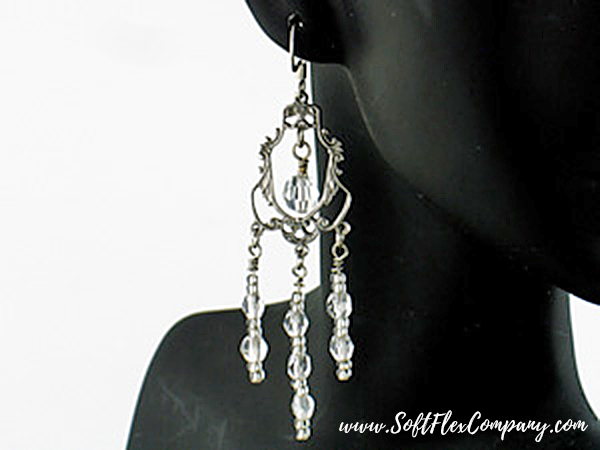
Step 1: Use one 1.5 inch head pin to string one 6mm crystal. Form a wire wrapped dangle. Use 1 jump ring to attach the crystal dangle to the top inside loop of 1 connector.
Step 2: Use one 2 inch head pin to string 2 seed beads, one 4mm crystal, 2 seed beads, one 4mm crystal, and 2 seed beads. Form a wire wrapped dangle. Use 1 jump ring to attach the crystal dangle to the bottom left loop of the connector. Repeat entire step and attach the dangle to the bottom right loop of the connector.
Step 3: Use one 3 inch head pin to string 2 seed beads, one 4mm crystal, 2 seed beads, one 4mm crystal, 2 seed beads, one 4mm crystal, and 2 seed beads. Form a wire wrapped dangle. Use 1 jump ring to attach the crystal dangle to the bottom center loop of the connector.
Step 4: Attach 1 ear wire to the top outside loop of the connector.
Step 5: Repeat Steps 1-4 to make a second earring.
Join the fun in our VIB Facebook Group today! Stay in the know. Stay up to date. From our bead shows to our video shows and sales, you can stay in touch with us. The community is full of artistic and helpful beaders and crafty people. Inspire and be inspired. Share your pictures and get the beading bug from others!
Visit the Soft Flex Company YouTube Channel!
Blog contributor Thomas Soles is the Trade Show Coordinator for Soft Flex Company. His favorite stones are Lapis and Pietersite. His favorite hobby is day dreaming. And his favorite mustache is Tom Selleck's. As you can see, he has a healthy (or possibly unhealthy) sense of humor. You can write to him at Thomas@SoftFlexCompany.com


