

You have been around. You are well traveled. You want your jewelry to reflect your experience. You want colors that show culture and refinement. You are not that green child trying to find your way. You don't want to design your next necklace with a boring beading wire. You deserve colors that represent you. Trios Beading Wire Packs are a great way to upgrade your color selection.

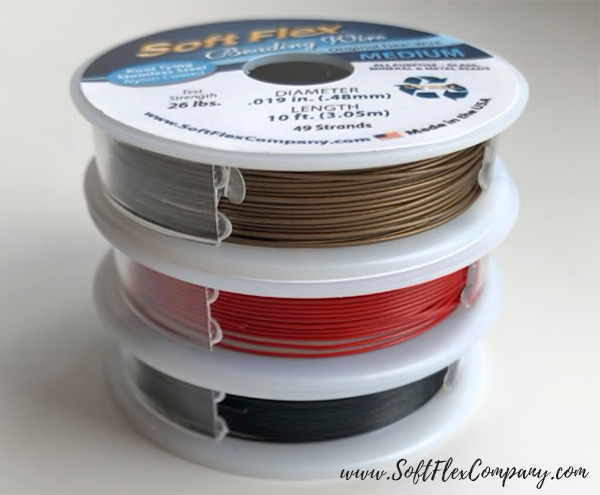
We have a large assortment of color to choose from. We have 30 foot spools if you like a particular color. We have 10 foot spools if you want a specific color for a couple designs. We also have Trios collections. Our Trios beading wire packs are comprised of three 10 foot spools of Soft Flex Wire. Trios are themed packs of color wire. We have Trios that evoke moods. We have Trios that celebrate the color spectrum of holidays. And we have Trios created to highlight our Design Kits. Let's look at a wire that suits the experienced beader - our Sophisticated Trios Beading Wire Packs.

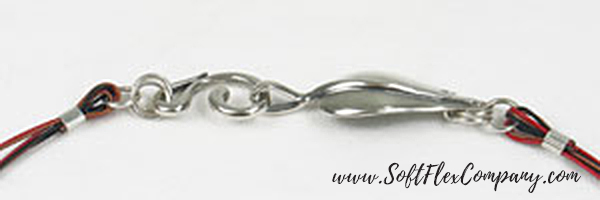
The Sophisticated Trios collection was created to evoke a mood. We felt this Trios collection was cosmopolitan. Refined and worldly is the mood we think this Trios color set embodies.
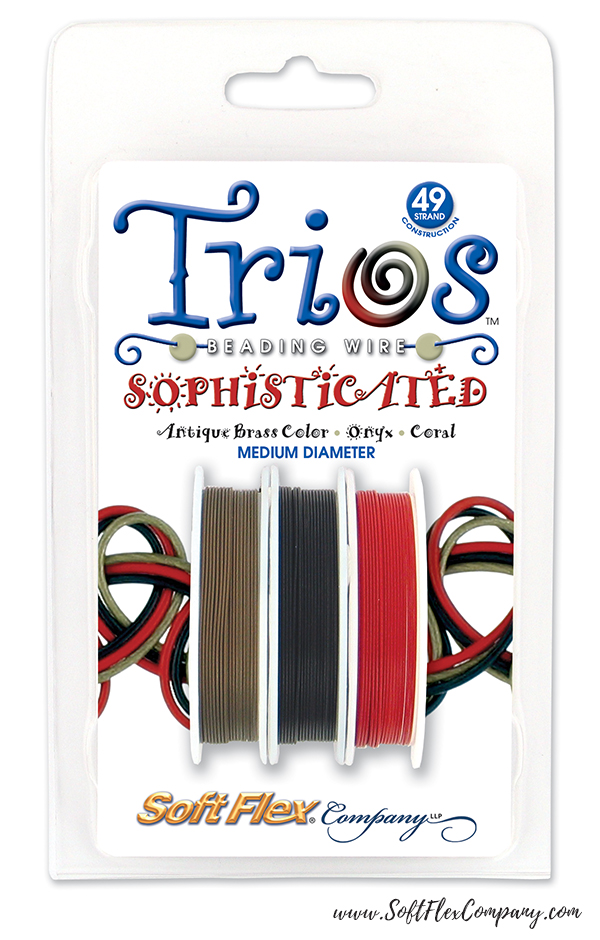
We included Antique Brass, Black Onyx, and Red Coral Colors.
Explore color! Trios Color Wire is a lead-free beading wire for designers that want to create jewelry with color mixing in mind. Trios Color Wire Sets encapsulate the vivid palette of nature and the glamour of the fashion world. Fill your jewelry making kit with color!
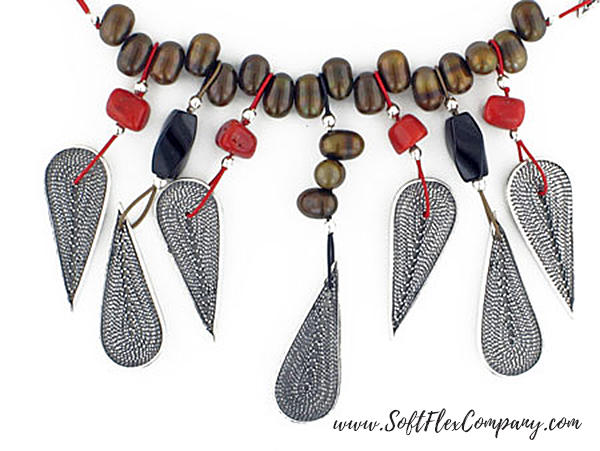
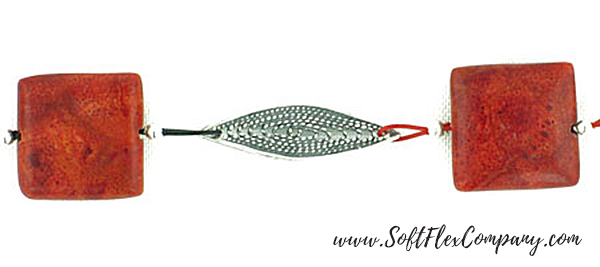
Sophisticated Necklace
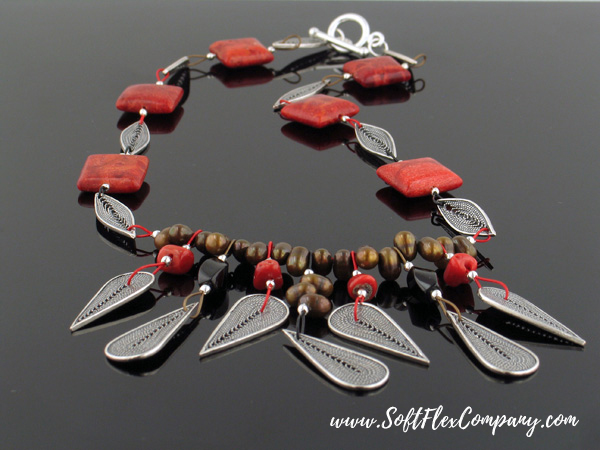
Designer Jamie Hogsett
Skill Level Intermediate
Materials
Sophisticated Trios Beading Wire Set (Antique Brass, Black Onyx, Red Coral)
12mm Sterling Silver Toggle Clasp - 1 set
5mm Silver Filled Jump Rings - 2 pcs
2x2mm Soft Flex Sterling Silver Seamless Crimp Tubes - 28 pcs
24x7mm Sterling Silver Filigree Connector - 8 pcs
25x10mm Sterling Silver Filigree Drop - 7 pcs
6x4mm Bronze Freshwater Pearl Tear Drops - 19 pcs
10x4mm Black Tourmaline Twisted Rectangles - 2 pcs
6x4mm Red Coral Natural Beads - 4 pcs
14mm Red Sponge Coral Squares - 6 pcs
Tools
Chain Nose Pliers
Crimping Pliers
Cutters
Instructions
Finished size: 17 3/4"
Step 1: Use 3" of Coral wire to string 1 crimp tube. Pass back through the tube, forming a small loop, and crimp. Click here for crimping instructions. String 1 Coral bead, 1 crimp tube, and the hole in the round end of 1 filigree drop. Pass back through the tube and crimp. Repeat entire step three times for a total of four Coral dangles.
Step 2: Use 3" of Antique Brass wire to string 1 crimp tube. Pass back through the tube, forming a small loop, and crimp. String 1 Black Tourmaline twisted rectangle, 1 crimp tube, and the hole in the pointed end of 1 filigree drop. Pass back through the tube and crimp. Repeat entire step for a total of two Antique Brass dangles.
Step 3: Use 5" of Onyx wire to string 1 crimp tube. Pass back through the tube, forming a small loop, and crimp. String 3 Pearls, 1 crimp tube, and the hole in the round end of 1 filigree drop. Pass back through the tube and crimp.
Step 4: Use 6" of Coral wire to string 1 crimp tube and one end of 1 filigree connector. Pass back through the tube and crimp. String 2 Pearls, 1 Coral dangle, 2 Pearls, 1 Antique Brass dangle, 2 Pearls, 1 Coral dangle, 2 Pearls, the Onyx dangle, 2 Pearls, 1 Coral dangle, 2 Pearls, 1 Antique Brass dangle, 2 Pearls, 1 Coral dangle, 2 pearls, 1 crimp tube, and one end of 1 filigree connector. Pass back through the tube and crimp.
Step 5: Use 3" of Onyx wire to string 1 crimp tube and the other end of 1 filigree connector used in the previous step. String 1 Coral square, 1 crimp tube, and one end of 1 filigree connector. Pass back through the tube and crimp.
Step 6: Repeat Step 5 using Coral wire and attaching the first loop to the other end of the previous filigree connector.
Step 7: Repeat Step 5 using Antique Brass wire and attaching the first loop to the other end of the previous filigree connector.
Step 8: Use 1 jump ring to attach the other end of the final connector to one half of the clasp.
Step 9: Repeat Steps 5-8 for the other half of the necklace, using the other half of the clasp.

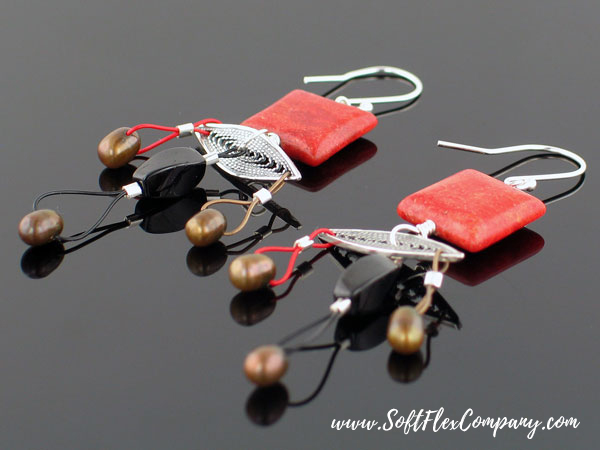
Sophisticated Earrings
Designer Jamie Hogsett
Skill Level Beginner
Materials
Sophisticated Trios Beading Wire Set (Antique Brass Color, Black Onyx, Red Coral)
2x2mm Sterling Silver Crimp Tubes - 8 pcs
Silver Plated Ear Wires - 1 pair
24 gauge 2" Sterling Silver Eye Pins - 2 pcs
24x7mm Sterling Silver Filigree Connector - 2 pcs
6x4mm Bronze Freshwater Pearl Tear Drops - 6 pcs
10x4mm Black Tourmaline Twisted Rectangles - 2 pcs
14mm Red Sponge Coral Squares - 2 pcs
Tools
Crimping Pliers
Cutters
Chain Nose Pliers
Round Nose Pliers
Instructions
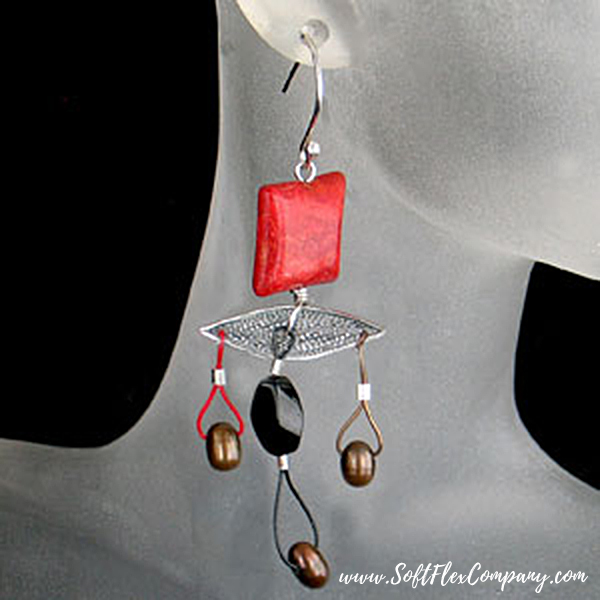
Step 1: Use 2 1/2" of Onyx wire to string 1 crimp tube. Pass the wire back through the tube, forming a small loop, and crimp. Click here for crimping instructions. String 1 Black Tourmaline rectangle, 1 crimp tube, and 1 pearl. Pass back through the tube, leaving a loose loop of wire around the pearl, and crimp. Set aside.
Step 2: Use 1 1/2" of Coral wire to string one end of one connector, 1 crimp tube, and 1 pearl. Pass the first end of the wire back through the tube and pass the other end of the wire back through the tube leaving a loose loop of wire around the pearl, and wasting as little wire as possible. Crimp the tube.
Step 3: Repeat Step 2 using Antique Brass Color wire and attaching the wire to the other end of the same connector.
Step 4: Attach 1 eye pin to 1 ear wire. Use the ear wire to string 1 Coral bead. Begin forming a wire wrapped loop with a large (at least 6mm) loop. Prior to closing and wrapping the loop, attach it to the center of the connector and the small loop of wire formed in Step 1.
Step 5: Repeat Steps 1 to 4 for the second earring.
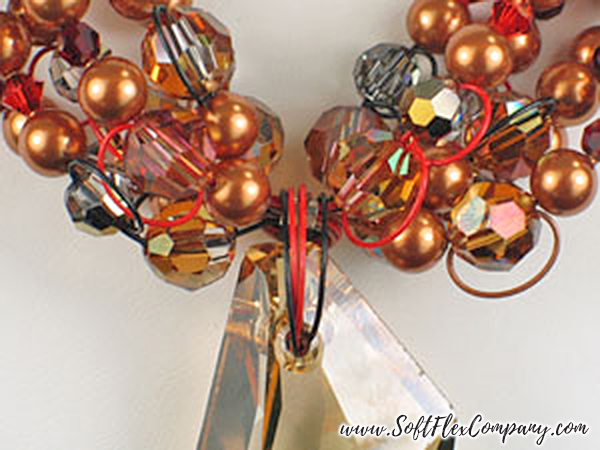
Crystal Sophistication

Designer Jamie Hogsett
Skill Level Intermediate
Materials
Sophisticated Trios Beading Wire Set (Black Onyx, Red Coral, Antique Brass)
Sterling Silver Hook and Eye Clasp - 1 set
6mm Silver Filled Open Jump Rings - 4 pcs
6mm Silver Filled Jump Rings - 2 pcs
3x3mm Sterling Silver Crimp Tubes - 4 pcs
3mm Crystal Golden Shadow Crystallized Swarovski Elements Crystal Bicone Beads - 27 pcs
4mm Crystal Red Magma Crystallized Swarovski Elements Crystal Bicone Beads - 25 pcs
4mm Crystal Satin Crystallized Swarovski Elements Crystal Round Beads - 36 pcs
4mm Siam Crystallized Swarovski Elements Crystal Round Beads - 10 pcs
4mm Crystal Copper Crystallized Swarovski Elements Crystal Round Beads - 10 pcs
6mm Dorado Crystallized Swarovski Elements Crystal Round Beads - 24 pcs
8mm Crystal Golden Shadow Crystallized Swarovski Elements Crystal Round Beads - 10 pcs
6mm Copper Crystallized Swarovski Elements Crystal Pearls - 49 pcs
50mm Crystal Golden Shadow Crystallized Swarovski Elements Crystal De-Art Pendant - 1 pc
Tools
Wire Cutters
Bead Stoppers
Mighty Crimping Pliers
2 pairs of Chain Nose Pliers
Instructions
Finished Size: 16 1/2"
Step 1: Cut two 21 inch pieces of Black Onyx wire. Cut two 21 inch pieces of Red Coral wire. Cut two 21 inch pieces of Antique Brass wire.
Step 2: Hold all six wires together and use them to string 1 crimp tube to the center of the wires. Pass all six wires through the crimp tube again, forming about a 6mm loop of wire at the center of the wires. Crimp the tube. Click here for crimping instructions.
Step 3: Cut two 3 inch pieces of Black Onyx wire. Cut two 3 inch pieces of Red Coral wire. Cut two 3 inch pieces of Antique Brass wire.
Step 4: Hold all six wires together and use them to string 1 crimp tube and the pendant. Pass the wires through the loop of wire formed in Step 2 and through the crimp tube again. Adjust the wires so that the loop of wire is about 12-15mm, and crimp the tube. Slide the crimp tube so that it is hidden inside the pendant.
Step 5: Use 1 Red Coral wire from one side of the necklace to string 1 Crystal Golden Shadow 8mm round to the center of the necklace. Pass the wire through the bead again to form a loop of wire around the bead. String 1 Dorado 6mm round. Pass the wire through the bead again. String 1 pearl, 1 Red Magma bicone, 1 pearl, and 1 Dorado 6mm round. Pass the wire through the bead again. String 1 pearl, 1 Siam round, 1 pearl, 1 Crystal Satin round, 1 Golden Shadow bicone, 1 Crystal Copper 4mm round, 1 Golden Shadow bicone, and 1 Crystal Satin round. Place a Bead Stopper on the end of the wire and set aside.
Step 6: Use the other Red Coral wire from the same side of the necklace to string 1 pearl and 1 Dorado 6mm round. Pass the wire through the bead again. String 1 pearl, 1 Siam round, 1 pearl, and 1 Dorado 6mm round. Pass the wire through the bead again. String 1 pearl, 1 Red Magma bicone, 1 pearl, 1 Crystal Satin round, 1 Crystal Golden Shadow bicone, 1 Crystal Copper round, 1 Crystal Golden Shadow bicone, 1 Crystal Satin round and 1 Crystal Golden Shadow bicone. Place a Bead Stopper on the end of the wire and set aside.
Step 7: Use 1 Black Onyx wire from the same side of the necklace to string 1 pearl and 1 Crystal Golden Shadow 8mm round. Pass the wire through the bead again. String 1 pearl, 1 Siam round, 1 pearl, and 1 Dorado round. Pass the wire through the bead again. String 1 pearl, 1 Red Magma bicone, and 1 Dorado round. Pass the wire through the bead again. String 1 Red Magma bicone, 1 Crystal Satin round, 1 Crystal Copper round, 1 Crystal Golden Shadow bicone, 3 Crystal Satin rounds, and 1 Crystal Golden Shadow bicone. Place a Bead Stopper on the end of the wire and set aside.
Step 8: Use the other Black Onyx wire from the same side of the necklace to string 1 Crystal Golden Shadow round. Pass the wire through the bead again. String 1 Dorado round. Pass the wire through the bead again. String 1 pearl, 1 Red Magma bicone, 1 pearl, and 1 Dorado round. Pass the wire through the bead again. String 1 pearl, 1 Red Magma bicone, 3 Crystal Satin rounds, 1 Crystal Golden Shadow bicone, 1 Crystal Satin round, 1 Red Magma bicone, 1 Crystal Satin round, and 1 Crystal Golden Shadow bicone. Place a Bead Stopper on the end of the wire and set aside.
Step 9: Use 1 Antique Brass wire from the same side of the necklace to string 1 Crystal Golden Shadow round. Pass the wire through the bead again. String 1 Dorado round. Pass the wire through the bead again. String 1 pearl, 1 Siam round, 1 pearl, and 1 Dorado round. Pass the wire through the bead again. String 1 pearl, 1 Red Magma bicone, 1 pearl, 1 Crystal Satin round, 1 Red Magma bicone, 1 Crystal Copper round, 1 Crystal Golden Shadow bicone, 1 Crystal Satin round, 1 Red Magma bicone, 1 Crystal Satin round, and 1 Crystal Golden Shadow bicone. Place a Bead Stopper on the end of the wire and set aside.
Step 10: Use the other Antique Brass wire from the same side of the necklace to string 1 pearl and 1 Crystal Golden Shadow round. Pass the wire through the bead again. String 1 pearl, 1 Siam round, 1 pearl, and 1 Dorado round. Pass the wire through the bead again. String 1 pearl and 1 Dorado round. Pass the wire through the bead again. String 1 Red Magma bicone, 1 Crystal Satin round, 1 Crystal Copper round, 1 Crystal Golden Shadow bicone, 1 Crystal Satin round, 1 Red Magma bicone, 1 Crystal Satin round, and 1 Crystal Golden Shadow bicone.
Step 11: Remove all the Bead Stoppers. Use all six wires to string 1 crimp tube and 1 soldered jump ring. Adjust the wires as necessary so that there is about 3 - 3 1/2 inches of wire between the last beads strung and the crimp tube. Pass the wires back through the tube and crimp.
Step 12: Attach the soldered jump ring to the eye (leaf) half of the clasp using 2 open jump rings.
Step 13: Use 1 Red Coral wire to string 1 pearl and 1 Crystal Golden Shadow round. Pass the wire through the bead again. String 1 pearl, 1 Siam round, 1 pearl and 1 Dorado round. Pass the wire through the bead again. String 1 pearl and 1 Dorado round. Pass the wire through the bead again. String 1 Red Magma bicone, 1 Crystal satin round, 1 Crystal Copper round, 1 Red Magma bicone, 1 Crystal Golden Shadow bicone, 3 Crystal Satin rounds, and 1 Crystal Golden Shadow bicone. Place a Bead Stopper on the end of the wire and set aside.
Step 14: Use the remaining Red Coral wire to string 1 Crystal Golden Shadow round. Pass the wire through the bead again. String 1 Dorado round. Pass the wire through the bead again. String 1 pearl, 1 Red Magma bicone, 1 pearl, and 1 Dorado round. Pass the wire through the bead again. String 1 pearl, 1 Siam round, 1 pearl, 1 Crystal Satin round, 1 Crystal Golden Shadow bicone, 2 Crystal Satin rounds, and 1 Crystal Golden Shadow bicone. Place a Bead Stopper on the end of the wire and set aside.
Step 15: Use 1 Black Onyx wire to string 1 Crystal Golden Shadow round. Pass the wire through the bead again. String 1 Dorado round. Pass the wire through the bead again. String 1 pearl, 1 Red Magma bicone, 1 pearl, and 1 Dorado round. Pass the wire through the bead again. String 1 pearl, 1 Red Magma bicone, 1 pearl, 1 Crystal Satin round, 1 Crystal Golden Shadow bicone, 1 Crystal Copper round, 1 Crystal Golden Shadow bicone, 1 Red Magma bicone, and 1 Crystal Golden Shadow round. Place a Bead Stopper on the end of the wire and set aside.
Step 16: Use the remaining Black Onyx wire to string 1 pearl and 1 Crystal Golden Shadow round. Pass the wire through the bead again. String 1 pearl, 1 Siam round, 1 pearl, and 1 Dorado round. Pass the wire through the bead again. String 1 pearl, 1 Red Magma bicone, and 1 Dorado round. Pass the wire through the bead again. String 1 Red Magma bicone, 1 Crystal Satin round, 1 Crystal Copper round, 1 Crystal Golden Shadow bicone, 3 Crystal Satin rounds, and 1 Crystal Golden Shadow bicone. Place a Bead Stopper on the end of the wire and set aside.
Step 17: Use 1 Antique Brass wire to string 1 pearl and 1 Dorado round. Pass the wire through the bead again. String 1 pearl, 1 Siam round, 1 pearl, and 1 Dorado round. Pass the wire through the bead again. String 1 pearl, 1 Red Magma bicone, 1 pearl, 1 Crystal Satin round, 1 Crystal Golden Shadow bicone, 1 Crystal Copper round, 1 Crystal Golden Shadow bicone, 1 Crystal satin round, and 1 Crystal Golden Shadow bicone. Place a Bead Stopper on the end of the wire and set aside.
Step 18: Use the remaining Antique Brass wire to string 1 Crystal Golden Shadow round. Pass the wire through the bead again. String 1 Dorado round. Pass the wire through the bead again. String 1 pearl, 1 Red Magma bicone, 1 pearl, and 1 Dorado round. Pass the wire through the bead again. String 1 pearl, 1 Siam round, 1 pearl, 1 Red Magma bicone, 1 Crystal Satin round, 1 Crystal Copper round, 1 Crystal Golden Shadow bicone, 3 Crystal Satin rounds, and 1 Crystal Golden Shadow bicone.
Step 19: Repeat Step 11.
Step 20: Repeat Step 12, using the hook half of the clasp.

How to Make Jewelry with Sara Oehler: Make A Fun And Easy Pair Of Soft Flex Trios Earrings
Join the fun in our VIB Facebook Group today! Stay in the know. Stay up to date. From our bead shows to our video shows and sales, you can stay in touch with us. The community is full of artistic and helpful beaders and crafty people. Inspire and be inspired. Share your pictures and get the beading bug from others!
Visit the Soft Flex Company YouTube Channel!


Blog contributor Thomas Soles loves Jazz Age writers and crunchy french fries. His favorite gemstones are Lapis and Pietersite. His favorite hobby is day dreaming. And his favorite mustache is Freddie Mercury's. As you can see, he has a healthy (or possibly unhealthy) sense of humor. You can write to him at Thomas@SoftFlexCompany.com