

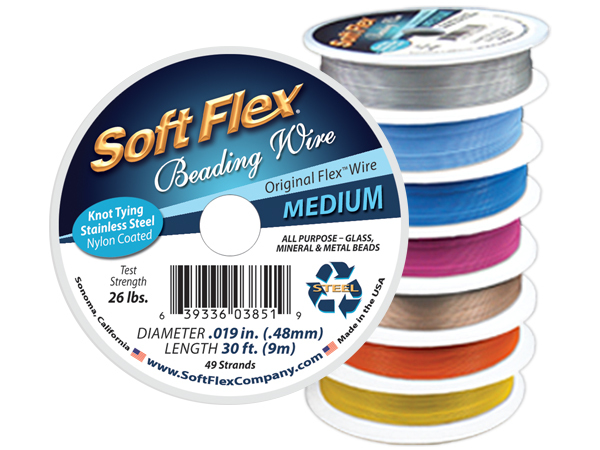
Beading wire is not just for stringing beads. Today, Kristen shows us how to macramé a bracelet using Soft Flex beading wire. Soft Flex is constructed with marine quality stainless steel, but it is so flexible, you can tie knots in it. It is the perfect beading wire for delicate macramé. Grab some colored beading wire and let’s make a fantastic piece of jewelry!

Macramé is an ancient art form. Macramé knots have been found on statues in excavated areas of Babylon. Macramé fringes were favored for decorating horses. Macramé was used on towels, rugs, and more as the popularity of the knotting art grew. Errant thread and fiber on woven craft could be knotted to secure the ends or used as a decorative fringe to keep the ends from fraying.
Macramé was immensely popular in Victorian England. Macramé adorned costumes, clothing for any occasion, and undergarments. Victorian homes had decorative macramé at the dinner table, curtains, and in the bedroom. It was a multipurpose and multifunction art form.
There was a resurgence of macramé in the 1970s. Anybody that lived through the 70s can attest to the omnipresence of the knotting art. Macramé dreamcatchers adorned our bedroom walls. Macramé designs held our potted ferns. Some people added macramé to their wardrobe with knotted scarves, sweaters and even bikinis. Macramé owls hung on our walls. Macramé owls were fantastic beasts – large and wall covering; the owl typically clutched a piece of wood. The wood anchored the rope and made it taut. A macramé owl could be as big as the owner wanted to craft it. My family had a four foot macramé owl that overlooked the front door and hung on the living room wall.
Macramé was embraced by American and British Navies. Decorative knotted fringe was a great way to add a non-skid surface to naked metal rails. Macramé hammocks offered comfortable bedding. Sailors could be seen wearing macramé belts. Macramé could be traded or sold amongst shipmates or in port, which would serve as a means to spread the popularity of the art. I am a former sailor. My ship was heavily decorated in knotted fringes in ceremonial areas. My ship’s railing was covered, which made it nice when traversing ladders (stairs), I never worried about slipping. Modern knotting in the American Navy is called Marlinespike Seamanship. The marlinspike is a knotting awl. Sailors may learn some fundamental knots in boot camp but the majority of knotting is learned when it is rate specific. A rate is the sailor’s job. If the rate requires knotting, they will be required to become qualified in that area of knotting. My rate was aircraft handling; unfortunately, this meant I was not required to learn knotting. I have since picked up basic macramé, though.
Macramé is still an active art form. Modern teenagers and children still love to make macramé jewelry. Many craft stores or big box stores will have kits specifically designed for younger children. These kits will teach the fundamentals of jewelry making with macramé. The cord may be nylon and the beads may be plastic, but the finished piece will look great on grade school children and is one of the first ways that child may express their individuality artistically.
Fun! Let’s get started and learn how to create an amazing bracelet with Kristen. Kristen just started a live show series on YouTube. If you would like to watch her live and see how she makes jewelry, she broadcasts her shows on Mondays at 11:00am PST. If you have any questions, you can email or leave a message on Facebook. We love to educate and touch base with fellow bead and jewelry lovers.
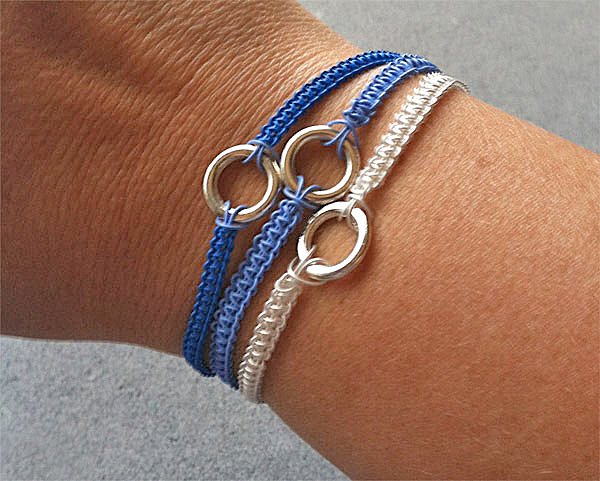
3-Strand Macramé Bracelet
Designer Kristen Fagan
Materials
Soft Flex Beading Wire .019 diameter - 16 ft per strand
(Shown in Blue Topaz, Tanzanite and Extreme 925 Sterling Silver Plated)
10mm Closed Jump Rings - 3 pcs
3 Strand Clasp - 1 set
3x3mm Crimp Tubes - 6 pcs
Tools
Mighty Crimping Pliers
Cutters
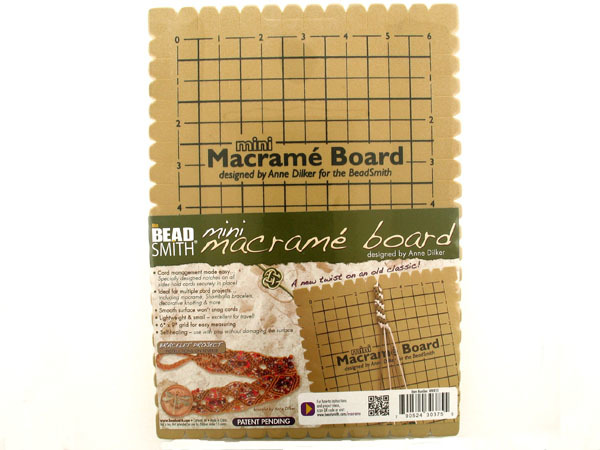
Macrame Board
Micro Macrame Basics and Beyond Book (optional)
Instructions
Step 1: Begin by cutting the beading wire into two 36 inch and two 12 inch lengths. Fold the 12 inch piece in half, pull the loop through the jump ring, fold it over the ring, and pull the rest of the wire through the loop. Repeat the step on the other side of the ring. Lay the design on the Macrame board with the strands vertical and anchored into the notches.
Step 2: Center the 36" wire under the anchored two strands below the jump ring. Begin the 1st half of your square knot by folding the right wire over the two middle strands and under the left wire. Pull the left wire under the right and middle strands and through the loop on the right side. Pull tight and slide the knot to the top.
Step 3: Finish the 2nd half of the square knot by folding the left wire over the middle strands and under the right wire. Pull the right wire under the left and middle strands and through the loop on the left side. Pull tight and repeat the steps – left, right, left, right. (Note: if you feel your bracelet start twisting you may have knotted two right sides or two left sides in a row - simply unknot the wire and fix).
Step 4: Continue knotting using the square knot method until half of your desired bracelet length is reached. To see step by step photos the square knot check out page 14 in the book Micro Macrame Basics and Beyond.
Step 5: Flip your macrame board around and center the other 36" wire under the other two anchored strands. Repeat steps 1-4 on this half of your bracelet.
Step 6: This completes one strand. Repeat this process two more times in the same or different beading wire colors to create a three strand bracelet.
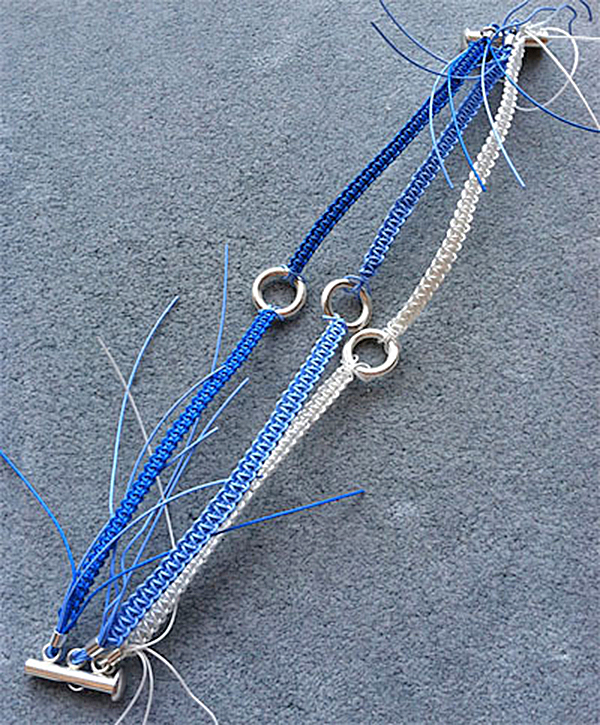
Step 7: Once your strands are at the desired length, string a 3x3mm crimp tube to each of the strands ends and thread through the clasp.Before you crimp, check that the size length is correct for each of them, that the strands are straight and wire attached to the center rings are all going in the same direction.
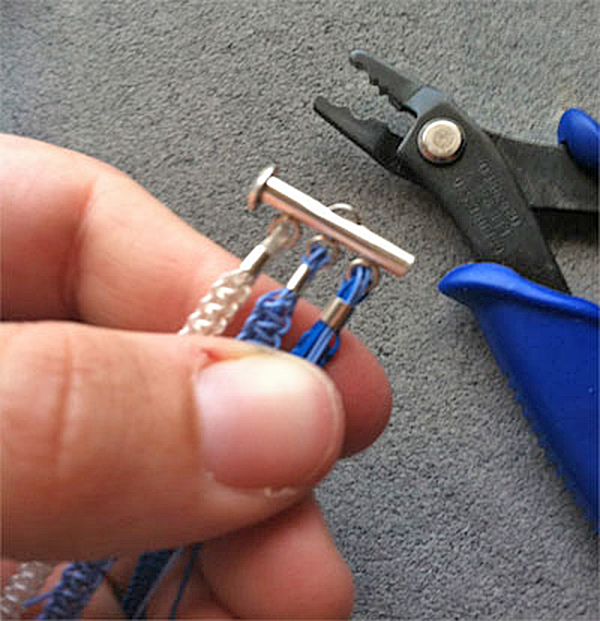
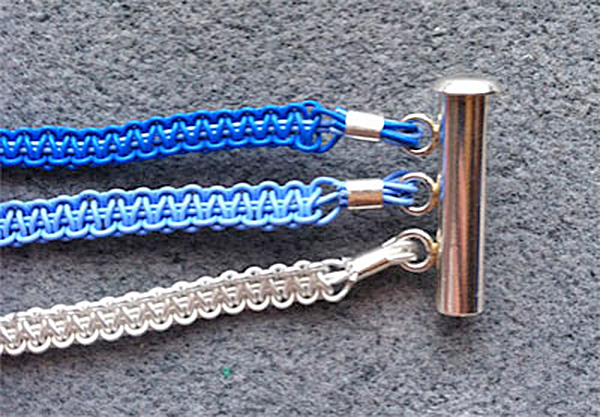
Step 8: Once you're happy with the strands, crimp the 3x3mm crimp tubes using the mighty crimping pliers. Be mindful to crimp all three strands the same with the seam facing on the back. Trim the excess wire.
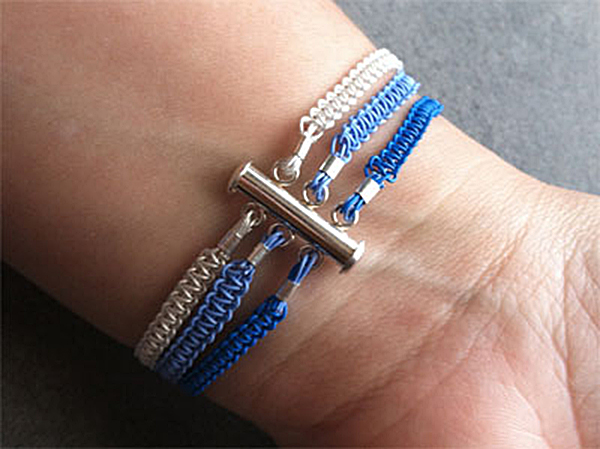
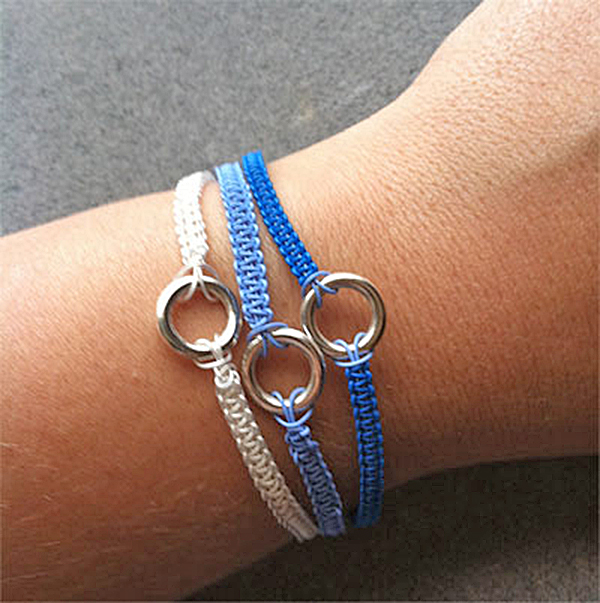
Step 9: You can make these in all sorts of beading wire colors and connector styles!
Join the fun in our VIB Facebook Group today! Stay in the know. Stay up to date. From our bead shows to our video shows and sales, you can stay in touch with us. The community is full of artistic and helpful beaders and crafty people. Inspire and be inspired. Share your pictures and get the beading bug from others!
Visit the Soft Flex Company YouTube Channel!


Blog contributor Thomas Soles is the Trade Show Coordinator for Soft Flex Company. His favorite stones are Lapis and Pietersite. His favorite hobby is day dreaming. And his favorite mustache is Tom Selleck's. As you can see, he has a healthy (or possibly unhealthy) sense of humor. You can write to him at Thomas@SoftFlexCompany.com