

It is the perfect time to start holiday crafts. This is the calm before the storm. We can create our ornaments and jewelry without the stress of the busy season. We are going to be posting lots of holiday ideas in the lead up to the end of the year. We want you to have plenty of time to design some fun jewelry while you still have some slow time to yourself.

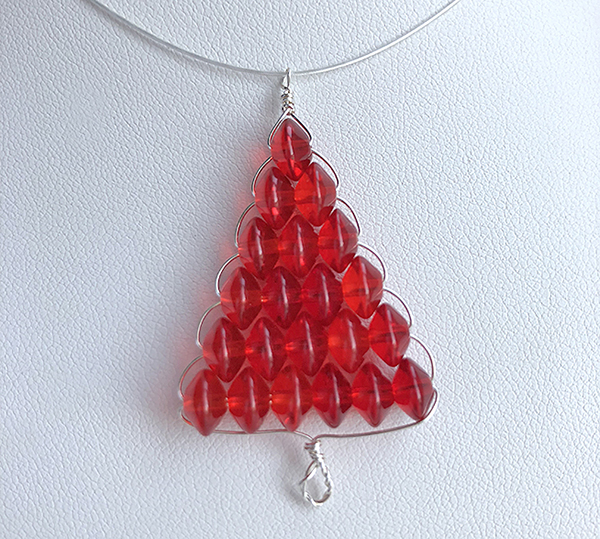
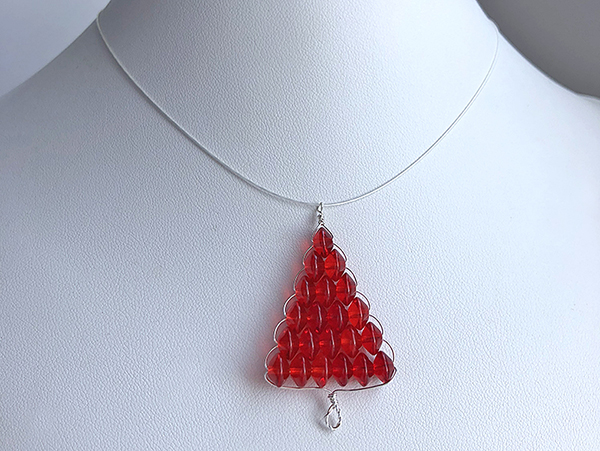
Sara loves Christmas. She always creates a bunch of goodies for the holidays. She has designed ornaments, seasonal jewelry, and she has an absolutely amazing recipe for ginger cookies. She recently designed a cute little tree pendant and filmed a video about it to boot.
Sara starts her video with an introduction. She created a sweet little pendant tree and she thinks everybody will love it. Sara loves everything about Christmas. She loves the trees, the holiday décor, making ornaments, packages – she loves it all. She likes to start thinking about Christmas early. She loves to add personal touches to her tree and packages she mails. The personal touch is always sweet.
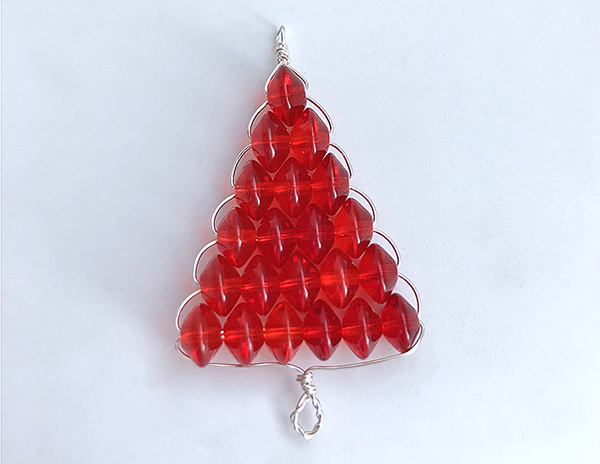
Sara thinks this pendant is a great little gift idea. It is simple and versatile. It can be manipulated and changed in so many ways. You can add a chain and wear it as a pendant. You can add ribbon and add it to a package. You can make it larger or smaller. It can be an ornament or an adornment in a window. It would look terrific if placed somewhere that light would illuminate the beads.
Sara says we do not have the beads she used available on our website. But, you can use any saucer beads and they will work marvelously. If you used Swarovski saucers, that would be wonderful, light would love your pendant. You can mix and match colors or go with one single color. A green tree would be cute, as would a white crystal or silver tree. There is a lot of room to get playful.
Sara used Soft Flex Craft Wire to create the pendant. In this case, she opted for 22 gauge Non-Tarnish Silver Craft Wire. Soft Flex carries 18 gauge wire through 28 gauge wire. 18 gauge is the thickest. 28 gauge is the thinnest. 22 gauge is a good medium range. 22 gauge is great for a project like this where you are going in and out of beads. You don’t want your wire too thick so it won’t fit and be hard to manipulate.
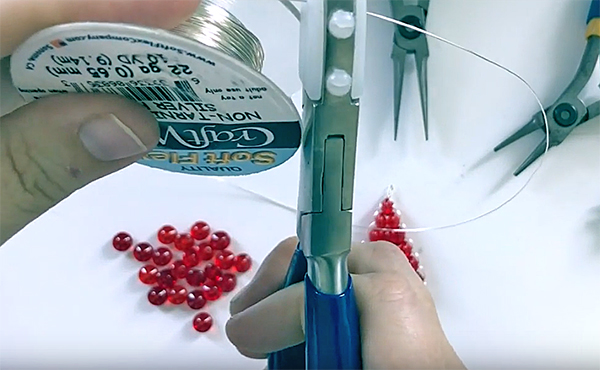
Sara opted for Silver Craft Wire. But you can go with any color you feel best suits your pendant. Craft Wire is silver plated or enameled. It is a copper wire. The only two metals that comprise Craft Wire are copper and silver. It won’t tarnish or change colors. The only one that will patina is Bare Copper Craft Wire – which is great if you want to wire wrap antiques. Sara says gold color wire would also look lovely for this pendant.
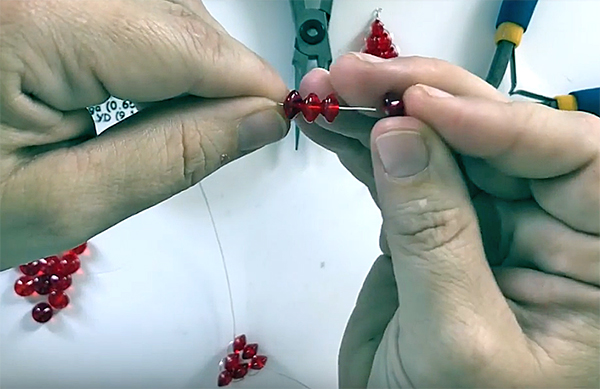
Sara pulls a healthy amount of wire off the spool. She suggests 12 to 16 inches for a project this size, just so you are sure you have enough. While the wire is still on the spool, she uses her nylon jaw pliers to straighten the wire. This gets any bumps or kinks out and makes the wire slightly firmer to work with. She cuts the straightened wire off the spool with cutters.
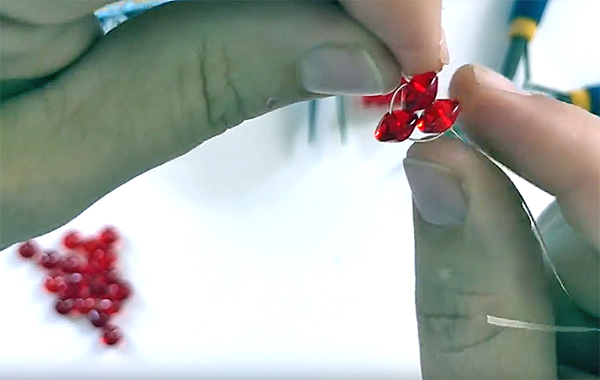
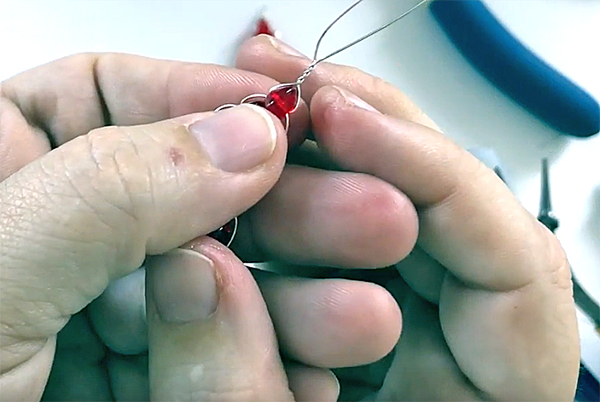
Sara strings one bead and moves it to the center of the wire. She strings two beads on the ends of the wire. She loops the wire and slowly pulls the end of the wire so the two beads at the ends draw down to the center of the wire and join the first bead. The three beads are now snug in the center of the wire in a triangular shape. This is the top of the Christmas tree. Sara suggests using a gold or white bead for the first bead and it would look like a star or angel. Sara adds a bead for the next row; three beads this time, on the ends of the wire, and then she loops the wire. She draws the wire down and snugs those three beads against the second row on the tree. The triangle shape is getting larger.
Sara says she would love it if you liked our YouTube videos or subscribed to us. She says we have lots of free project ideas coming up for the holidays. She says you can find those on our channel or our blog. She says we have a brand new website and we are adding our projects back.
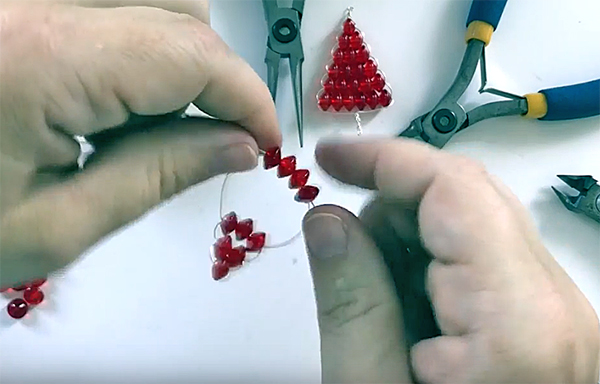
Sara continues adding a bead on each row. She adds a row of four and then a row of five. She draws the beads down each time, after making a loop. Her pendant is getting larger with each row. This design is so simple to make but it is so stunning.
Sara says you may find your Craft Wire bending or kinking slightly as you work on this project. If that is the case, just straighten it with the nylon jaw pliers and you are good to go. Nylon jaw pliers are available on our website. You can shop with us if you are retail. You can shop with us if you are wholesale or a bead store. We sell to distributors and manufacturers. We sell to every kind of customer. Your pricing may change with your customer level. But we always have sales and discounts for everybody.
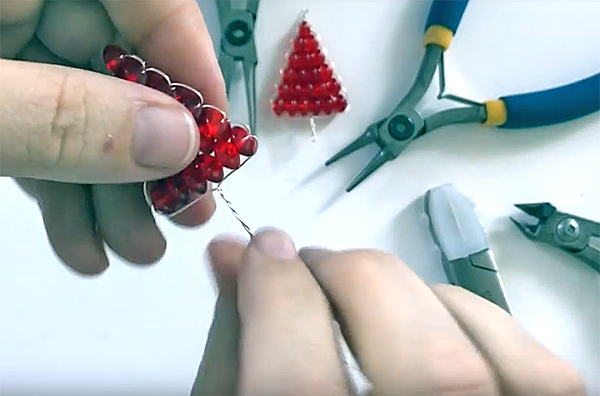
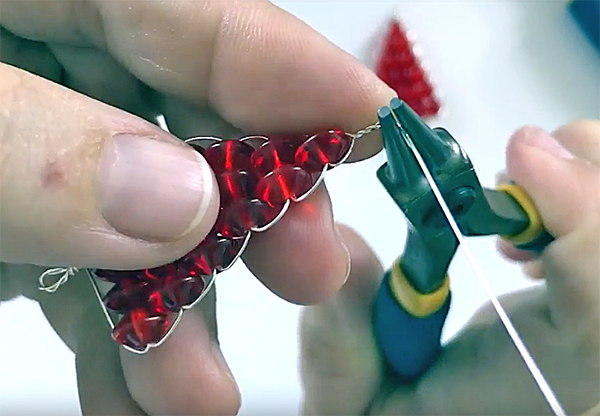
Once she is satisfied with the size of the tree, she straightens the remaining wire at the base of the tree. She centers the two wires in the middle of the tree and twists them together to close the design. Once the wires have twisted, she wraps the base of the tree.

Sara says you can use round nose pliers for a nice look or wrap with your fingers. The remaining wire is basically the stump of the tree. She trims the wire with Soft Flex Flush Cutters.
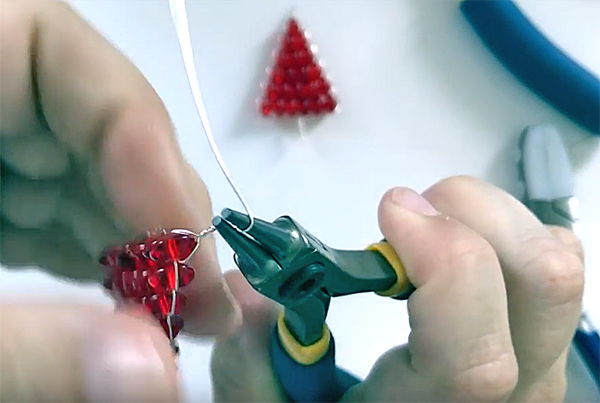
Sara uses chain nose pliers to tuck in any loose ends of the wire. That will stop the wire from snagging clothes.
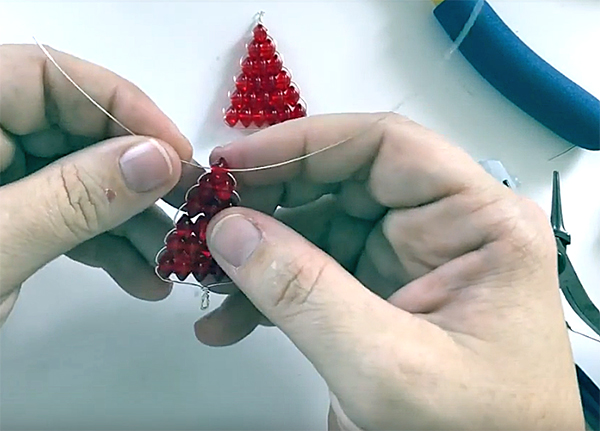
If you are going to hang the tree as a pendant, you are going to need something to hang it from. Sara cuts three more inches off of the spool after straightening it with the nylon jaw pliers. She says you can probably use less, but for the purpose of the video, she is using more. She strings this wire through the top bead on the tree. She twists this wire at the top of the tree.
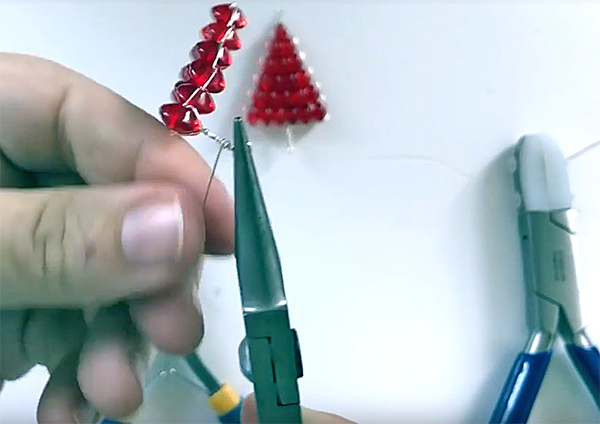
Once the wire is twisted at the top of the tree, she cuts one of the two strands off at the twist. The other strand will be a loop. She uses round nose pliers to bend the wire. She pulls the wire over and then under. She now has a loop. She holds the base of the loop with the pliers and wraps around the base of the loop to finish. She says the loop can be closer to the tree pendant. You can finish with a clean or messy wrap. The loop almost looks like a star on the tree.
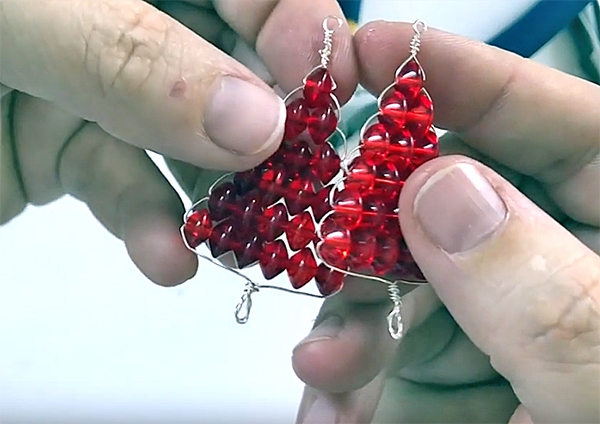
She says the tree is adorable. Great for family package adornments. You could also make earrings with the tree.
Join the fun in our VIB Facebook Group today! Stay in the know. Stay up to date. From our bead shows to our video shows and sales, you can stay in touch with us. The community is full of artistic and helpful beaders and crafty people. Inspire and be inspired. Share your pictures and get the beading bug from others!
Visit the Soft Flex Company YouTube Channel!


Blog contributor Thomas Soles is the Trade Show Coordinator for Soft Flex Company. His favorite stones are Lapis and Pietersite. His favorite hobby is day dreaming. And his favorite mustache is Tom Selleck's. As you can see, he has a healthy (or possibly unhealthy) sense of humor. You can write to him at Thomas@SoftFlexCompany.com