

This bird’s nest is one of our favorite lucky charms. This cute charm is simple to make and easy to customize. You can use your favorite colors and beads when creating this little nest. From small chunky stones to colorful Czech Glass, let your creativity go wild. Add a beaded dangle or use a thicker Craft Wire, this is the perfect project for the playful.

Employee James Browning filmed his second episode of Conversations In Wire. Conversations In Wire films every other Thursday. It is a YouTube series where James explores his passion for Craft Wire jewelry. His first episode was an intro to wire wrapped jewelry. He discussed a technique he uses to wire wrap stones for focal beads.
James starts his second video with a brief introduction. He welcomes anybody visiting or living in the Northern California to visit our gallery. Soft Flex Gallery is open every Wednesday from 10:00am to 3:00pm. We have open house events, but your best bet is a Wednesday visit. You can call to schedule an appointment if Wednesday is inconvenient. The appointment must be approved as we need to make sure the gallery is staffed. There are items in the gallery that are not on our website and there are always gallery sales that are well worth checking out.
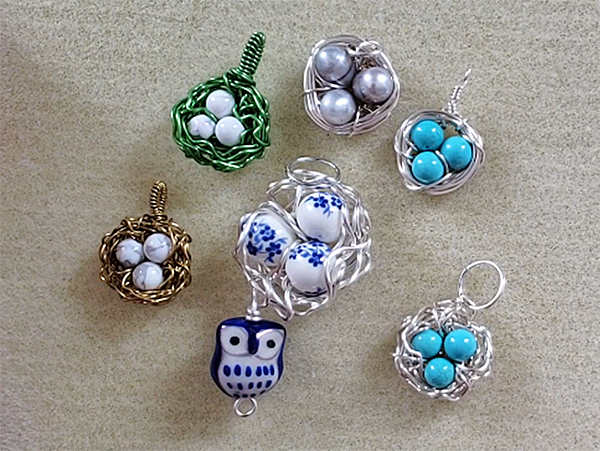
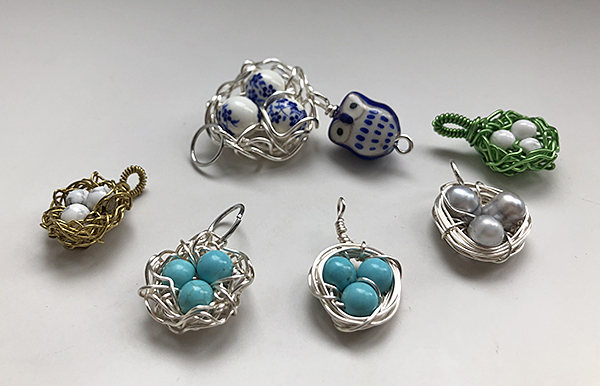
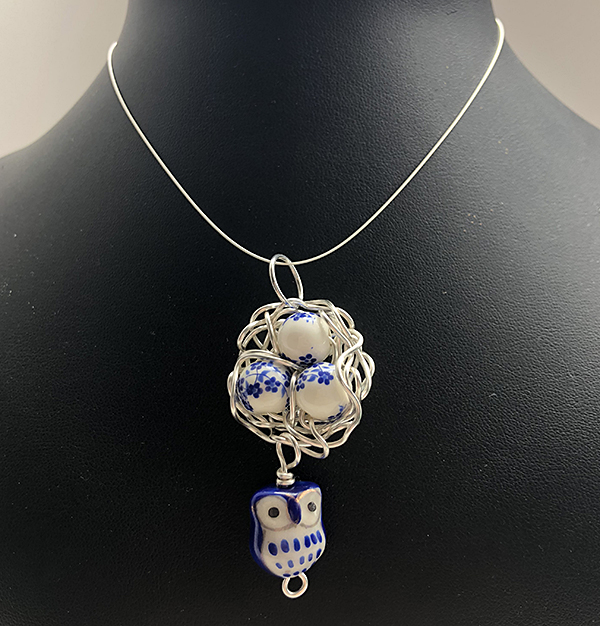
James shows some of his bird’s nest charms. He shows an organic nest with smaller beads. The nest resembles a natural nest with twig like shapes. He shows a nest made with larger beads and a larger gauge of Craft Wire. This nest has a cute owl dangle. The third nest is similar to the first but the wrap is different. It has a cleaner looking wrap. The fourth has larger beads. The fifth and sixth are color variations.
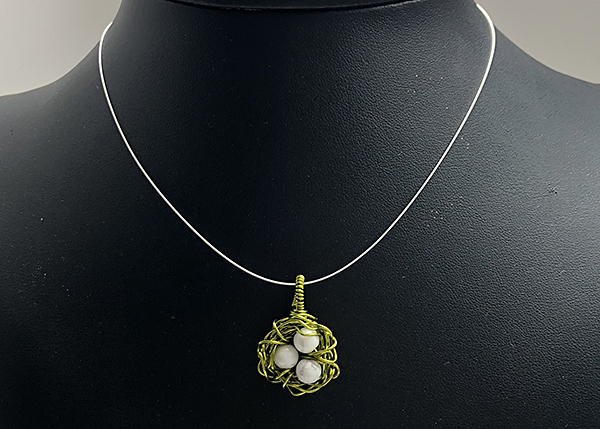
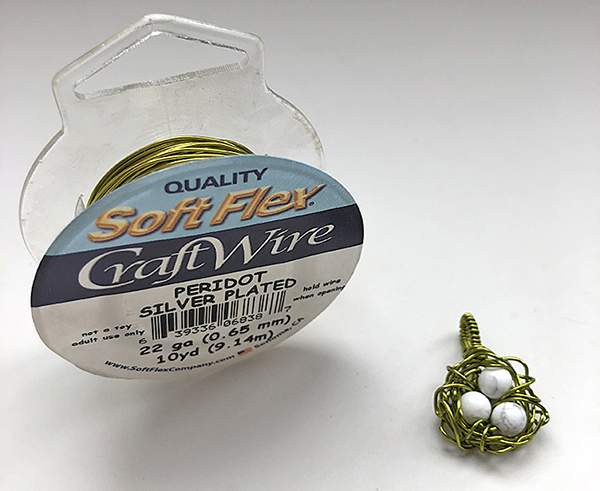
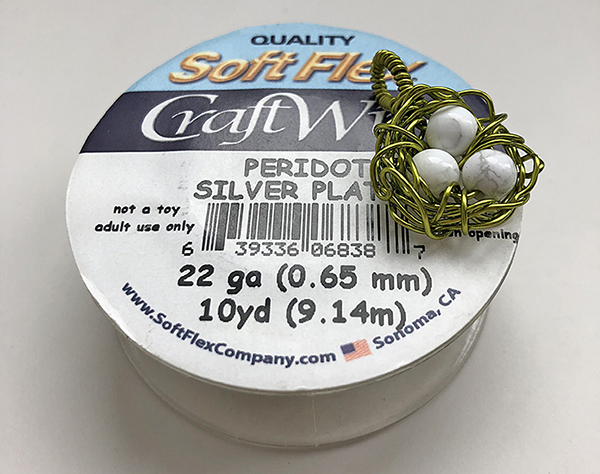
James says today’s project requires only a couple of things. You will need three beads, 4mm is a good size (if you are following James’ design, feel free to improvise, though). You will need Craft Wire. James is using a 22 gauge Peridot Craft Wire for the design he is making, you will need a larger gauge if you use larger beads. He says the 22 gauge wire and the tools he is using are available in a new kit, the Craft Wire Starter Kit. For this project he is using: a bead mat, a pair of bead nippers, bent nose pliers, nylon jaw pliers, and a pair of round nose pliers.
James is using three feet of Craft Wire for this project. He suggests cutting the Craft Wire off of the spool in this case. Some people like working with the wire while it is on the spool, but for this project it is easier to cut it. After cutting the wire off of the spool he then straightens it. He uses his bent nose pliers to hold the wire in place. He uses the nylon jaw pliers to straighten the wire. He draws the nylon jaw pliers down the length of the wire to remove any bumps and kinks. The nylon jaw work hardens the wire slightly. He says the thicker gauges tend to have more bends and bumps.
Once the wire is straightened, James puts three beads on one end. He leaves a three inch tail on that end. He bends the wire at the beads so the first bead and last bead touch. You can try to put the bend under one of the beads, but it is not important as you will be covering that up later. Once the three beads are in a small triangle, he twists the wire to close them in. At this point, all you need to do is wrap around the stones. You can do a simple wrap around them or you can do a textured wrap by bending the wire and making it look like a nest in the wild. For the textured wrap, he says to imagine the nest is full of twigs and try to make it resemble an organic nest in the wild. You can use tools to bend the wire or you can bend the wire with your fingers. He takes the bendy wire and circles around the nest. He says to do about six inches of bendy wire. He establishes the back of the nest and sides of the nest by wrapping the bendy wire. He says there is no rhyme or reason on this part of the project. You can make the nest look however you want.
At this point he says James does what he calls ‘lashing’. He lashes the bendy wire together so it stays in places. Without these lashes, the wire will slip and the nest will open up. Once the nest is open, it no longer looks like a nest. Lashing is taking the straight wire and weaving through the bendy parts for security. Once everything is woven together, the nest will be secure and will hold its shape. He says the wire can be fussy at this point, but don’t lose your patience. The nest does not have to look perfect. He says if the bendy pieces slip at this point you can bend the parts in place with your fingers.
James says it is important to be gentle when working with colored Craft Wire. Tools that have abrasive edges can mar or flake the color from the wire. He suggests using Tool Magic on wire working tools to keep the tools surfaces blunt. Tool Magic is a rubber coating that you can dip tools into. Tool Magic takes two to three hours to set. So make sure you plan ahead. Letting the tool set overnight is an easy way to plan ahead. Tool Magic gives the tool tips a soft shielding so the tools will not mar the wire. It also provides a nice non-slip surface that makes wire working easier. Make sure when dipping tools in Tool Magic that you only dip the tips and not the hinges on the tools. Tool Magic is not permanent and can be peeled off the tools. It will not leave any residue on the tools or harm them in any way.
James continues to wrap around the nest until it starts taking shape. When the nest is full looking, start lashing the wires through to secure the bendy wires. If any lashed loops look out of place, you can fix them as you go or bend them into the nest. James details the nest with tools. He says do not use too much force with the tools or you will work harden the wire, which can make the wire brittle. He pulls the wire around to establish the bottom of the nest. He moves the wire on the sides so it looks nest like. He kinks any straight wire to make it look more natural. He pulls wire away from the ‘eggs’ so they are not concealed. This project is a forgiving one for a beginner, there is a lot of room for mistakes and improvement.
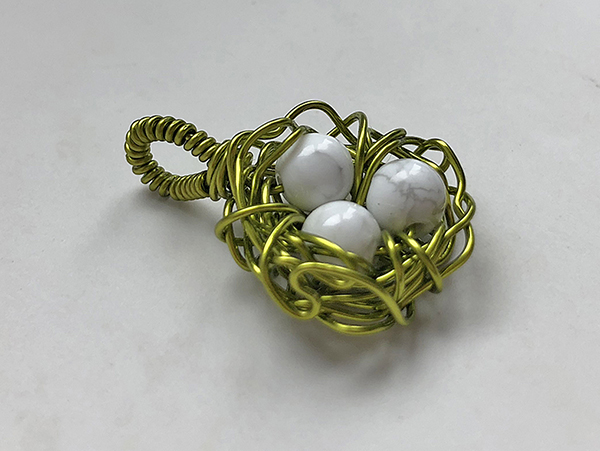
To finish the nest, you can figure out what your favorite option is. James likes to create a bail with the tails. He twists the wire around itself so it has a nice finish. He then bends the twisted wire into a loop. If the bail is not appealing to you, you can add a jump ring or wrap the end any way you see fit.
The nest is yours to play with. You can change the gauge of the wire, the color of the wire, the size of the stones.
Be creative, be playful.
Visit our Facebook page for more project ideas. Visit our Facebook Group if you would like to join our creative circle and post pictures of your new nest.
If you missed James' first episode, be sure to check it out here:
Visit the Soft Flex Company YouTube Channel!


Blog contributor Thomas Soles is the Trade Show Coordinator for Soft Flex Company. His favorite stones are Lapis and Pietersite. His favorite hobby is day dreaming. And his favorite mustache is Tom Selleck's. As you can see, he has a healthy (or possibly unhealthy) sense of humor. You can write to him at Thomas@SoftFlexCompany.com