

What a glorious day! The breeze is cool. The skies are clear. I should be working, but I think I am going to string a necklace first. There is never a bad time to create a lovely piece of jewelry. I have my beads and a delicious color of Soft Flex Beading Wire selected. I just need a clasp to finish. We have an amazing selection of clasps. Our Crystal Squaredelles are beautiful and the perfect way to enhance a necklace.

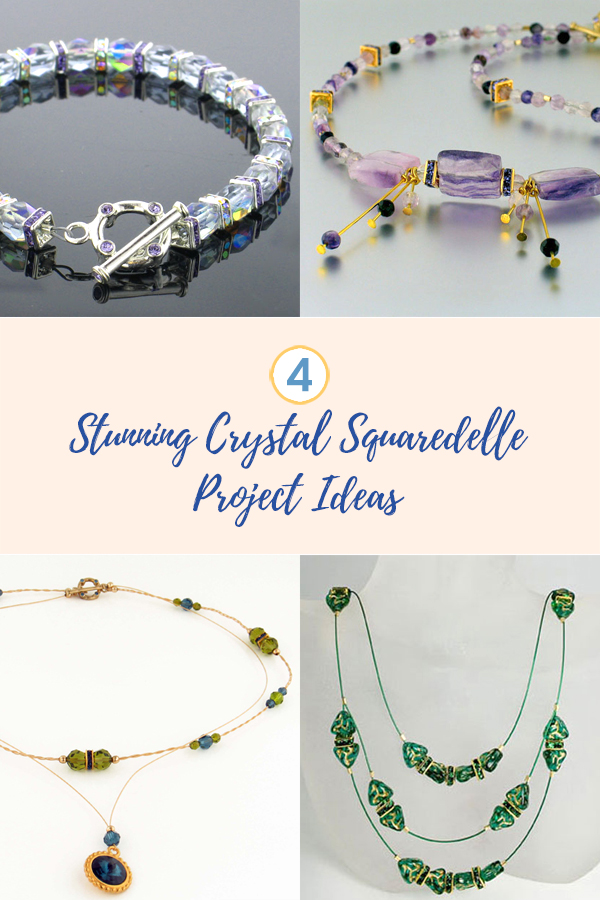
We carry Crystal Squaredelle charms, clasps, and spacers. They are absolutely gorgeous. We have an abundance of crystal colors and metal finishes. There is a perfect Crystal Squaredelle for every design. They look incredible and so expensive – but that is the fun part, they are very reasonable. Your finished jewelry will look high end and you won't hurt your pocketbook.
Crystal Squaredelles are on Closeout. Grab them while you can. This price is so low! Hurry, these will not be restocked.

Explore color! Trios Color Wire is a lead-free beading wire for designers that want to create jewelry with color mixing in mind. Trios Color Wire Sets encapsulate the vivid palette of nature and the glamour of the fashion world. Trios Color Wire Sets are comprised of three 10 foot spools of Soft Flex Wire. Fill your jewelry making kit with color!
Let's not waste this day, let's make some jewelry!
Fancy Crystals Bracelet
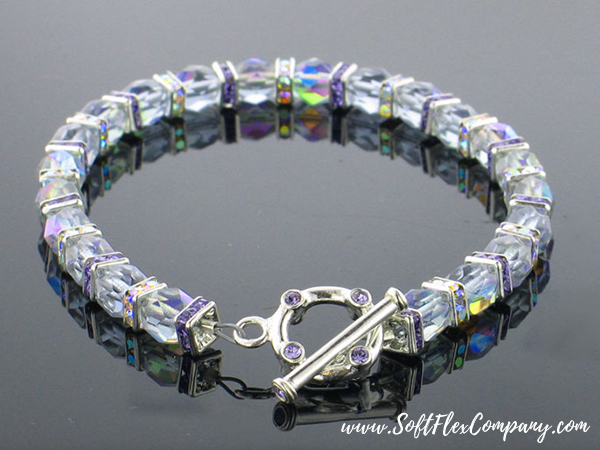
Designer Janet Balich
Skill Level Beginner
Materials
4mm Austrian Crystal Squaredelles (Color Option 1) - 11 pcs
4mm Austrian Crystal Squaredelles (Color Option 2) - 12 pcs
6mm Fire Polished Beads - 22 pcs
Austrian Crystal Toggle Clasp - 1 set
Soft Flex Beading Wire .024 diameter - 8 pcs
2x3mm Sterling Silver Crimp Tubes - 2 pcs
Tools
Mighty Crimping Pliers
Cutters
Instructions
Step 1: Use Soft Flex Flush Cutters to cut about 8" of .024 Soft Flex Wire from the spool.
Step 2: String one sterling silver crimp tube and one half of the toggle clasp. Pass back through the crimp tube and secure using crimping pliers. Click here for crimping instructions. Cut off excess wire at the crimp using Flush Cutters.
Step 3: String 1 Squaredelle Color Option 2, 1 Fire Polished Bead, 1 Squardelle Color Option 1, and 1 Fire Polished Bead. Continue stringing, repeat the sequence ten times. String 1 Squaredelle Color Option 2.
Step 4: String one sterling silver crimp tube and the other half of the toggle clasp. Pass back through the crimp tube and secure using crimping pliers. Cut off excess wire with Flush Cutters.
Golden Fluorite Necklace

Designer Virginia Magdaleno
Skill Level Beginner
Materials
Soft Touch Beading Wire .019 diameter - 1 spool
18k Gold Plated Toggle - 1 set
2x2mm Gold Filled Crimp Tubes - 12 pcs
6mm Gold Plated Finish Tanzanite Squardelles - 6 pcs
20 Gauge 2" Gold Filled Head Pins - 6 pcs
Large Emerald Cut Fluorite - 3 pcs
Faceted Fluorite Rounds - 74 pcs
Tools
Round Nose Pliers
Needle Nose Pliers
Cutters
Crimping Pliers
Instructions
Step 1: Use 1 Head Pin to string 1 Round Flourite and form a wire wrapped loop 1 1/2 inches from the top of the bead. Use 1 Head Pin to string 1 Round Flourite and form a wire wrapped loop 1 inch from the top of the bead. Use 1 Head Pin to string 1 Round Flourite and form a wire wrapped loop 1/2 inch from the top of the bead. Repeat entire step for a second set of dangles.
Step 2: Use Soft Flex Flush Cutters to cut 17 inches of Soft Touch Wire. Please note: Adjust length of wire according to neck size. Seventeen inches will accommodate a very small neck.
Step 3: String one 2x2mm crimp tube and one half of the clasp. Pass back through the tube and secure using your Regular Crimping Pliers. Click here for crimping instructions. Use Flush Cutters to trim excess wire.
Step 4: String 5 Round Flourite, 1 Crimp Tube, 7 Round Flourite, 1 Crimp Tube, 4 Round Flourite, 1 Squaredelle, 4 Round Flourite, 1 Crimp Tube, 5 Round Flourite, 1 Crimp Tube, 1 Emerald Cut Flourite, 1 long dangle, 1 medium dangle, 1 short dangle, 1 Round Flourite, and 1 Squaredelle.
Step 5: String 1 Emerald Cut Flourite.
Step 6: Repeat Step 4, reversing the stringing sequence. Repeat Step 3, attaching the wire to the other half of the clasp.
Luxe Layers Necklace
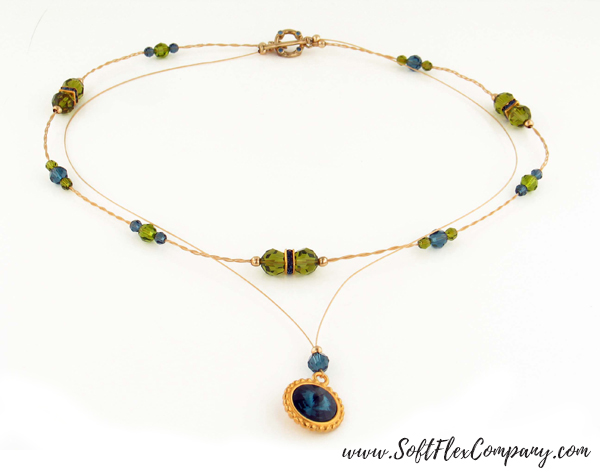
Designer Jamie Hogsett
Skill Level Beginner
Materials
24K Gold Plated Soft Flex Extreme Wire .014 diameter - 93"
18K Gold Plated Toggle Clasp with Montana Crystals - 1 set
2x2mm Gold Filled Crimp Tubes - 11 pcs
3mm Gold Filled Crimp Covers - 11 pcs
6mm Gold Plated with Montana Squaredelles - 3 pcs
12mm TierraCast Gold Beaded Rivoli Setting from Artbeads - 1 pc
12mm Swarovski Elements Montana Crystal Rivoli from Artbeads - 1 pc
8mm Swarovski Elements Olivine Crystal Rounds from Artbeads - 6 pcs
6mm Swarovski Elements Olivine Crystal Rounds from Artbeads - 3 pcs
4mm Swarovski Elements Olivine Crystal Rounds from Artbeads - 6 pcs
6mm Swarovski Elements Montana Crystal Rounds from Artbeads - 4 pcs
4mm Swarovski Elements Montana Crystal Rounds from Artbeads - 6 pcs
Tools
Cutters
Crimping Pliers
E6000 Adhesive
Toothpick
Instructions
Finished Size: 18 3/4"
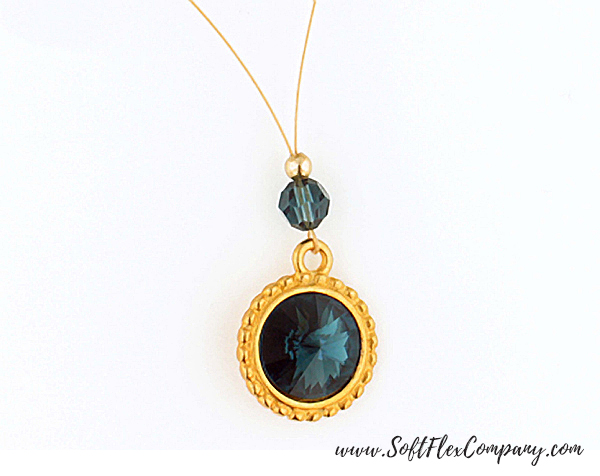
Step 1: Use the toothpick to apply a small amount of E6000 to the inside of the rivoli setting and the back side of the rivoli. Place the rivoli into the setting and let dry.
Step 2: Once completely dry, use 21" of beading wire to string the rivoli setting to the center of the wire. Use both wire ends to string 1 medium Montana round and 1 crimp tube. Snug the crimp tube down to the crystal round, and crimp. Click here for crimping instructions. Cover the crimp tube with 1 crimp cover. Set aside.
Step 3: Use three 24" pieces of beading wire to string 1 crimp tube, 1 large olivine round, 1 squaredelle, 1 large olivine round, and 1 crimp tube to the center of the wires. Crimp the crimp tubes and cover each crimp tube with 1 crimp cover.
Step 4: On one side of the centered beads, braid the three wires together for 1 1/4". Use all three wire ends to string 1 small olivine round, 1 medium Montana round, and 1 small olivine round. Braid the wires together for 1 1/4". Use all three wire ends to string 1 small Montana round, 1 medium olivine round, and 1 small Montana round. Braid the wires together for 1 1/4".
Step 5: Use all three wire ends to string 1 crimp tube. Crimp the tube and cover with 1 crimp cover. String 1 large olivine round, 1 squaredelle, 1 large olivine round, and 1 crimp tube. Crimp the tube and cover with 1 crimp cover.
Step 6: Braid the wires together for 1 1/4". Use all three wire ends to string 1 small olivine round, 1 medium Montana round, and 1 small olivine round.
Step 7: Braid the wires together for 1 1/4". Use all three wire ends to string 1 crimp tube and the ring half of the toggle clasp. Pass back through the tube, and crimp. Cover the crimp tube with 1 crimp cover.
Step 8: On the other side of the centered beads, braid the three wires together for 1 1/4". Use all three wire ends to string 1 small Montana round, 1 medium olivine round, and 1 small Montana round. Braid the wires together for 1 1/4". Use all three wire ends to string 1 small olivine round, 1 medium Montana round, and 1 small olivine round. Braid the wires together for 1 1/4".
Step 9: Repeat Step 5. Braid the wires together for 1 1/4". Use all three wire ends to string 1 small Montana round, 1 medium olivine round, and 1 small Montana round. Repeat Step 7, using the bar half of the toggle clasp.
Step 10: Use one end of the wire set aside in Step 2 to string 1 crimp tube and 1 half of the clasp. Measure and adjust the wire to be sure the rivoli will fall at the center of the necklace, and crimp. Cover the crimp tube with 1 crimp cover. Repeat for the other half of the necklace.
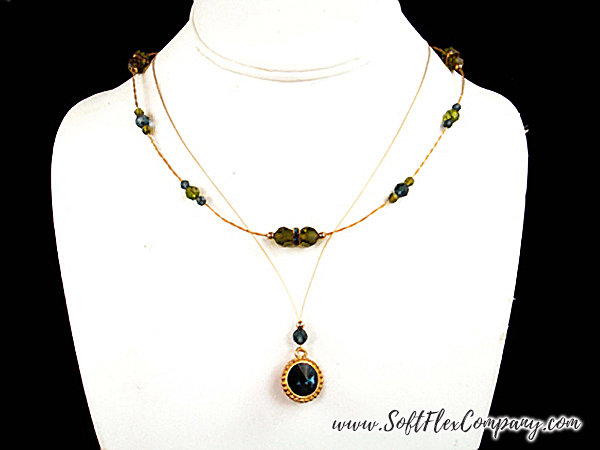
Emerald City Necklace
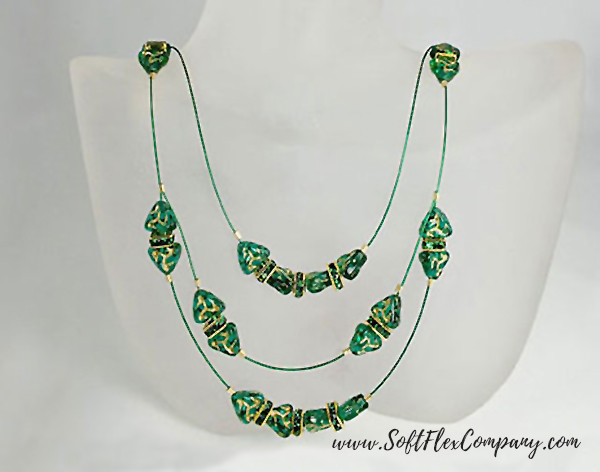
Designer Jessica L. Garrison
Skill Level Beginner
Materials
Green Emerald Soft Flex Beading Wire .019 diameter - 35"
18K Gold Plated Toggle With Faceted Emerald Crystal - 1 set
2x2mm Gold Filled Crimp Tubes - 22 pcs
4mm Gold Plated Finish Emerald Crystal Squaredelles - 14 pcs
Celtic Knot Emerald Green Triangle Czech Glass Beads - 24 pcs
Tools
Crimping Pliers
Cutters
Bead Board
Instructions
Step 1: Cut three strands of Green Soft Flex Wire from the spool, in the following lengths: 20”, 6”, and 8”.
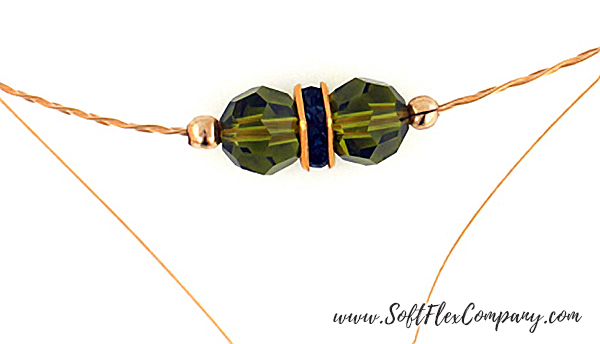
Step 2: Taking the longest length of wire, string beads in the following order: 1 Czech Glass Knot, 1 Squaredelle, 1 Czech Glass Knot, 1 Squaredelle, 1 Czech Glass Knot (in the opposite direction as the first two), 1 Squaredelle, and one more Czech Glass Knot in the same direction as the third. The Czech Glass beads should look like arrows, the two on the right pointing to the right, and the two on the left pointing to the left. Center these beads on the wire and secure on each side using a 2x2mm Gold Filled Crimp and Crimping Pliers. Click here for crimping instructions. This will now be strand A of your design.
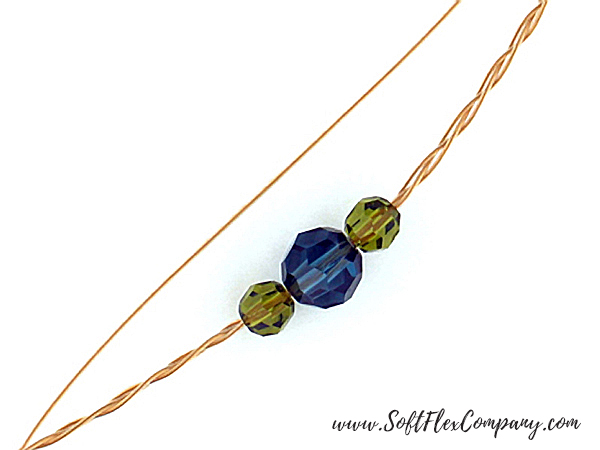
Step 3: Measuring 1 1/2 inches from the last crimp, secure a 2x2mm crimp on each side of the design using Crimping Pliers. String 1 Czech Glass Knot (with “Arrow“ pointing towards the crimp), 1 - Squaredelle, and 1 - Czech Glass Knot with “Arrow“ pointing opposite the first. It would be best to lay the design down on the bead board for the remaining steps.
Step 4: Next, take the 6“ length of wire. String a 2x2mm crimp on your longest length, next to the beads you just strung in Step 3. Before crimping, slip the 6“ length of wire into the crimp as well, and secure using crimping pliers. Trim off any excess wire at the crimp using Flush Cutters. You should start to see that your necklace is now forming into a two strand necklace in the front. This second length will be strand B of your design.
Step 5: String another crimp onto the strand B, and secure using crimping pliers about 1“ from the last crimp.
Step 6: String 1 Czech Glass Knot, with the “Arrow“ pointing towards the crimp, 1 – Squaredelle, and 1 – Czech Glass Knot with the “Arrow“ pointing opposite the first. String a crimp onto the wire and secure using crimping pliers right next to the last bead.
Step 7: Measuring 1“ from the last crimp, secure another crimp on the wire using crimping pliers.
Step 8: Now repeat step 6.
Step 9: Bring the end of your strand B together with strand A, and string both strands through a 2x2mm crimp and secure using crimping pliers right next to the last beads on strand A.
Step 10: Repeat step 3 on strand A.
Step 11: Repeat step 4, using the last length of wire cut from the spool. This is now strand C.
Step 12: On Strand C, measure about 3” from the crimp and secure a crimp using crimping pliers.
Step 13: Repeat the beads strung in step 2 here.
Step 14: Now, bring strand C together with strand A and string both strands through a 2x2mm crimp and secure using crimping pliers right next to the last beads on strand A. You should now have a three strand design in the front, with only one strand in the back.
Step 15: Repeat step 3 on each side of the design.
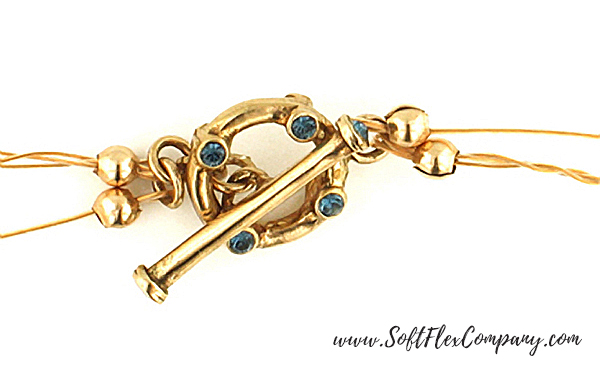
Step 16: About 1” from the last crimp, string the wire through a 2x2mm crimp, through one end of the toggle and back through the crimp. Secure using crimping pliers, and trim off excess wire using Flush Cutters.
Step 17: Repeat step 16 on the other end of the design.
Join the fun in our VIB Facebook Group today! Stay in the know. Stay up to date. From our bead shows to our video shows and sales, you can stay in touch with us. The community is full of artistic and helpful beaders and crafty people. Inspire and be inspired. Share your pictures and get the beading bug from others!
Visit the Soft Flex Company YouTube Channel!


Blog contributor Thomas Soles loves Jazz Age writers and crunchy french fries. His favorite gemstones are Lapis and Pietersite. His favorite hobby is day dreaming. And his favorite mustache is Freddie Mercury's. As you can see, he has a healthy (or possibly unhealthy) sense of humor. You can write to him at Thomas@SoftFlexCompany.com