Autumn is a lovely time of year. The colors we associate with the season are rich and warm, from antique brass and rusty copper to burnt orange and mustard yellow. Our houses are decorated with earthy tones. Our jewelry is elegant and sumptuous. It is a great time to show your creative side and make some wonderful jewelry. Today, we have four great ideas for your next bead stringing project.
Check out our Metallics Bead Stringing Wire. Re-ignite your creative fire and turn that attic treasure into a professional piece of jewelry. Soft Flex Company's Metallics Beading Wire is a new way to shine! Don’t trust that family heirloom on anything but the best. Metallics is constructed of either 21 or 49 micro woven stainless steel wires and is available in 3 diameters: .014, .019, and .024. Metallics is supple enough that it can be knotted and comes in Copper and Antique Brass Colors. Try a new project or turn an old skeleton key into a wonderful focal bead. Metallics lets the technology of today reinvigorate the findings of yesterday!
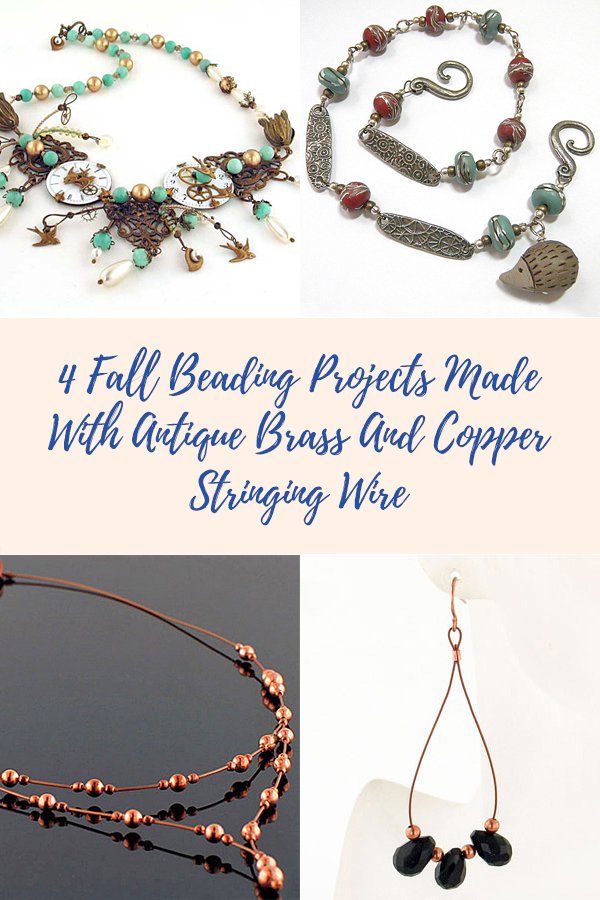
4 Fall Beading Projects Made With Antique Brass And Copper Stringing Wire
Antique Brass Metallics Beading Wire
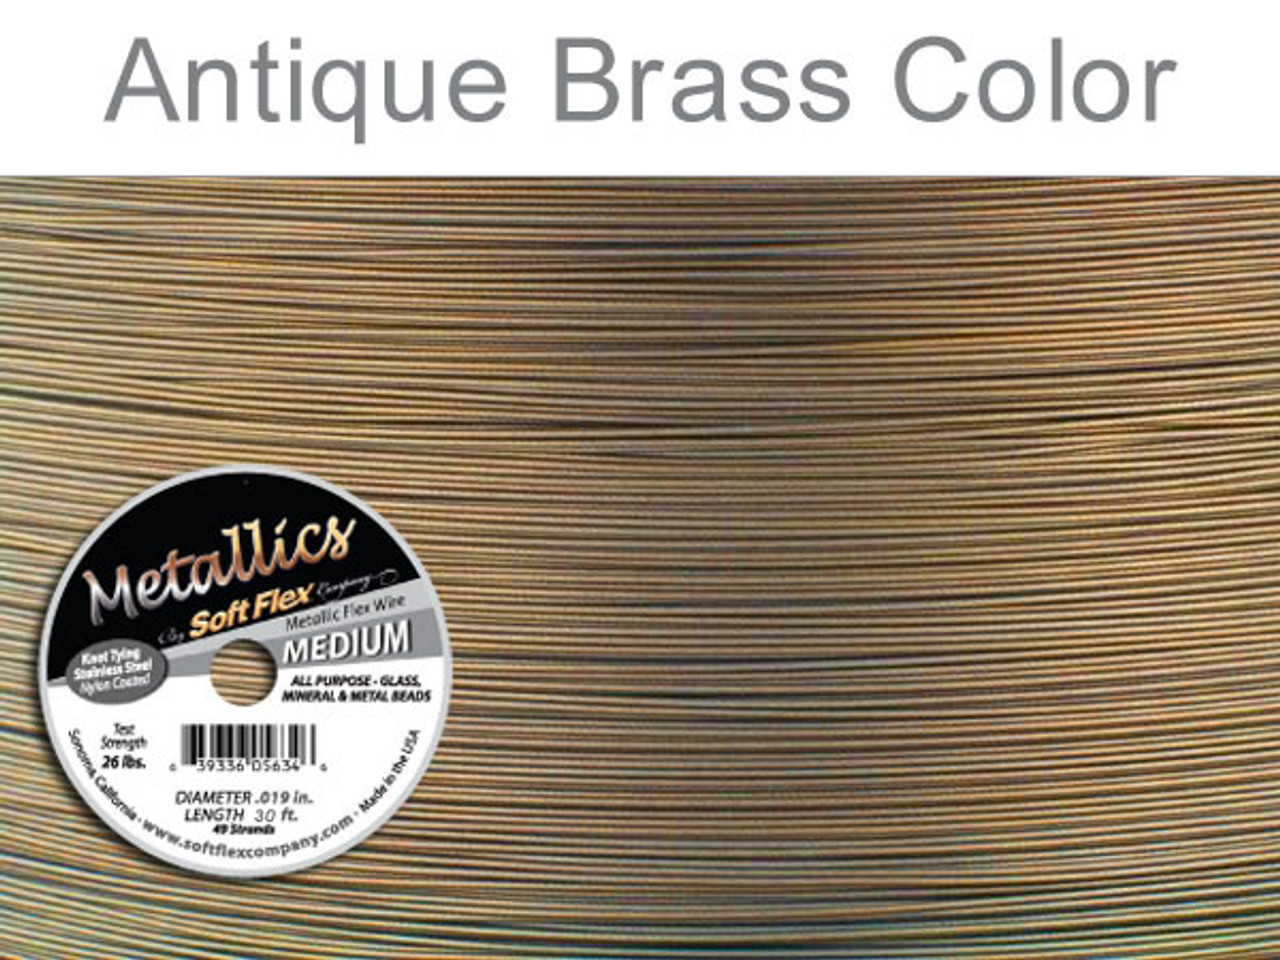
Antique Brass color bead stringing wire is wonderful for your autumn jewelry designs. This rich metal pairs well with so many color palettes. The warm color works equally well as an accent or the primary color theme. Do you want to design a muted tribute to the falling leaves or add some soft gold tones to a seasonal choker? This wire color is a great choice for fall jewelry.
Time Flies Necklace
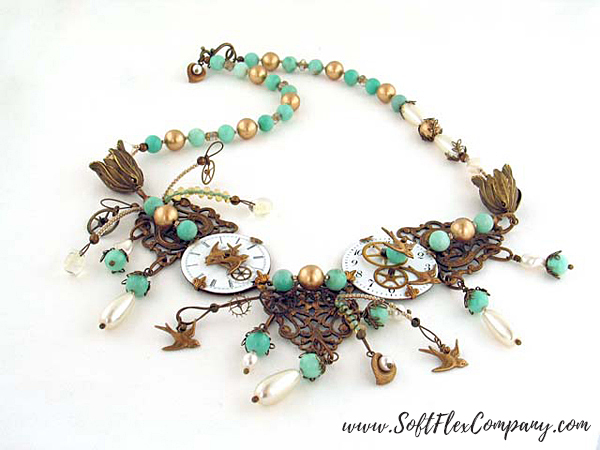
Designer Diana Shiraishi
Skill Level Intermediate/Advanced
Materials
Antique Brass Color.019 diameter Soft Flex Metallics Wire
22mm x 13mm Antique Brass Hook and Eye Clasp from
Artbeads.com
2mm x 2mm Gold Filled Crimp Tubes - 13
4mm Gold Filled Crimp Covers - 13
4mm Antique Brass Jump Rings - 3
10mm Vintage Etched Jump Rings (Cut From Chain) From
U Bead It - 2
5mm x 11mm Vintage Etched Oval Jump Rings (Cut From Chain) from
U Bead It - 7
2" Brass Head Pins - 12
2" Gold Filled Eye Pins - 2
10mm x 6mm Swirling Leaves Antique Brass Bead Caps - 11
10mm Calla Lily Antique Brass Bead Caps - 2
18mm x 21mm Large Leaves Antique Brass Bead Caps - 2
45mm Antique Brass Frames from
U Bead It - 2
37mm x 39mm Antique Brass Filigree Ornate Shields From
U Bead It - 3
17mm x 16mm Antique Brass Flying East Swallow Charms From
U Bead It - 6
7mm Vintage Gears From
AprilMelody.com - 2 pcs
11mm Vintage Gears From
AprilMelody.com - 3 pcs
14mm Vintage Gear From
AprilMelody.com - 1 pcs
17mm Vintage Gear From
AprilMelody.com - 1 pcs
34-36mm Vintage Watch Faces from
AprilMelody.com - 2 pcs
Clear With Antique Gold Lining Size 11 Seed Beads From
U Bead It - 100
3.4mm Aqua Green Color-Lined Fringe Beads - 21
6mm Frosted With Antique Gold Accent Cross Beads - 6
7mm x 9mm Antique Clear Glass Drop Beads - 2
8mm China Veriscite Rounds From
Limabeads.com - 29
5mm White Swarovski Elements Crystal Pearls From
Artbeads.com - 2
6mm White Swarovski Elements Crystal Pearls From
Artbeads.com - 2
8mm x 9mm White Swarovski Elements Crystal Twist Pearls From
Artbeads.com - 6
10mm Satin Gold Vintage Pearls - 15 pcs
8mm x 18mm White Glass Teardrop Pearls - 5 pcs
1/4" Foam Adhesive Mini Circles From
Michaels - 12 pcs
G-S Hypo Cement
Tools
Heavy duty cutters
Cutters
Chain Nose Pliers
Round Nose Pliers
Crimping Pliers
Instructions
Finished Size: 24"
Step 1: Use heavy duty cutters to remove any metal studs from the back of the watch faces, making the back of the watch faces as smooth as possible. Use hypo-cement to attach one 7mm gear to one watch face. Let dry.
Step 2: Use cutters to cut off the loop of one swallow charm. Use hypo-cement to attach the swallow to the remaining watch face. Use hypo-cement to attach one 11mm gear to the watch face. Let dry.
Step 3: Use 1 head pin to string 2 swallow charms. Stick the head pin through the center of 1 foam circle. String the center of the watch face used in Step 1. Snug the beads and form a simple loop as close to the back of the watch face as possible. Bend the loop so that it is parallel to the back of the watch face. Attach five foam circles evenly to the back of the watch face. Attach the watch face to 1 antique brass frame. Set aside.
Step 4: Use 1 head pin to string 1 swallow charm, 1 veriscite round, and the spoke of the 17mm gear. Stick the head pin through the center of 1 foam circle. String the center of the watch face used in Step 2. Snug the beads and form a simple loop as close to the back of the watch face as possible. Bend the loop so that it is parallel to the back of the watch face. Attach five foam circles evenly to the back of the watch face. Attach the watch face to 1 antique brass frame. Set aside.
Step 5: Use round nose pliers to bend one point of the antique brass frame used in Step 3 about 135 degrees toward the watch face. String the center hole of the widest end of 1 antique brass shield onto the point of the frame, then continue to bend the frame until it reaches the front of the watch face.
Step 6: Repeat Step 5 to attach the opposite point of the same frame to the left loop of the widest end of 1 antique brass shield (with the point of the shield pointing down).
Step 7: Repeat Step 5 using the other watch face and the third shield.
Step 8: Repeat Step 5 using the right loop of the shield used in Step 6.
Step 9: Attach one 10mm etched jump ring to the loop in the point of the shield used in Step 5. Attach one 10mm etched jump ring to the loop in the point of the shield used in Step 7.
Step 10: Use 11" of beading wire to string 1 crimp tube and the first jump ring used in Step 9. Pass back through the crimp tube and crimp.
Click here for crimping instructions. Cover the crimp tube with crimp covers.
Step 11: String 1 veriscite round, 1 seed bead, 1 vintage pearl, 1 seed bead, and 1 veriscite round. Pass the wire from the front of the shield to the back in the same hole that the point of the frame is attached to the shield. Pass the wire between the watch face and the frame by the top point of the frame. Pass the wire from the back of the second shield to the front in the same hole as the point of the frame is attached to that shield.
Step 12: Repeat Step 11 moving from the second to the third shield.
Step 13: Bend all of the remaining frame points around the watch faces.
Step 14: String 1 veriscite round, 1 seed bead, 1 vintage pearl, 1 seed bead, 1 veriscite round, 1 crimp tube, and the second jump ring used in Step 9. Pass back through the tube and crimp. Cover the crimp tube with a crimp cover.
Step 15: Attach one 4mm jump ring to the 14mm gear. Use 5" of beading wire to string 1 crimp tube and the 4mm jump ring. Pass back through the crimp tube, leaving a large loop of wire, and crimp. Cover the crimp tube with a crimp cover. Pass the wire from the front to the back of the first shield, then from the back to the front again, using holes next to the point of the shield. String 14 fringe beads 1 crimp tube, and 1 glass drop. Pass back through the tube and crimp. Cover the crimp tube with a crimp cover.
Step 16: Attach one 4mm jump ring to one 11mm gear. Use 7" of beading wire to string 1 crimp tube and 1 glass drop. Pass back through the tube and crimp. Cover the crimp tube with a crimp cover. String 18 seed beads. Pass the wire from the front to the back of the first shield, then from the back to the front again, using holes next to the point of the shield. String 15 seed beads, 1 crimp tube, and the 4mm jump ring. Pass pack through the tube, leaving a large loop of wire, and crimp. Cover the crimp tube with a crimp cover.
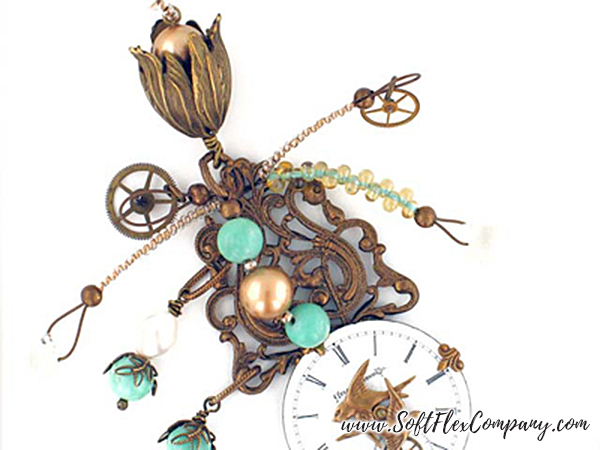
Step 17: Use 1 head pin to string 1 swallow charm. Form a wire wrapped loop. Repeat to make a second swallow dangle. Use 1 head pin to string one 5mm pearl, 1 seed bead, and 1 calla lily bead cap; form a wire wrapped loop. Repeat to make a second calla lily dangle.
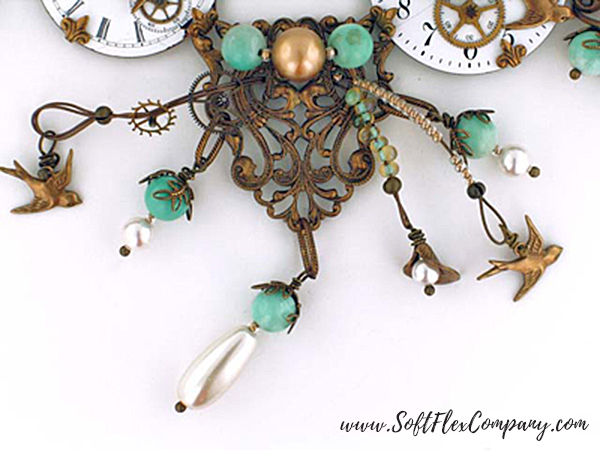
Step 18: Use two 7" pieces of beading wire to string 1 crimp tube and 1 swallow dangle. Pass back through the tube, leaving a large loop of wire, and crimp. Use both wires to string one 8mm gear from back to front and front to back again. Use both wires to string one 11mm gear from back to front and front to back again, spacing it 1/4" from the previous gear. Pass the wire from the front to the back of the second/center shield, then from the back to the front again, using holes just below the veriscite and vintage pearl string on the shield. Use one wire end to string 17 seed beads, 1 crimp tube, and 1 swallow dangle. Pass back through the tube, leaving a large loop of wire, and crimp. Cover the crimp tube with a crimp cover. Use the other wire end to string 7 fringe beads, 1 crimp tube, and 1 calla lily dangle. Pass back through the tube, leaving a large loop of wire, and crimp. Cover the crimp tube with a crimp cover.
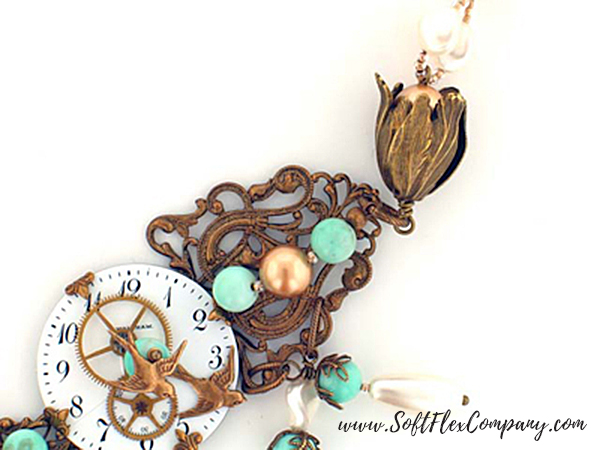
Step 19: Use 1 head pin to string 1 tear drop pearl, 1 seed bead, 1 veriscite round, and 1 swirling leaf bead cap. Form a wire wrapped loop. Repeat twice to make a total of three tear drop dangles.
Step 20: Use 1 head pin to string 1 veriscite round, 1 swirling leaves bead cap, and 1 twist pearl. Form a wire wrapped loop. Repeat once to make a total of two twist dangles.
Step 21: Use 1 head pin to string one 6mm pearl, 1 seed bead, 1 veriscite round, and 1 swirling leaf bead cap. Form a wire wrapped loop. Repeat once to make a total of two 6mm dangles.
Step 22: Use 1 oval jump ring to attach one teap drop dangle to the point of the second shield. *Use 1 oval jump ring to attach one 6mm dangle to the middle right of the second shield. Use 1 oval jump ring to attach one tear drop dangle to the bottom left loop of the third shield. Use 1 oval jump ring to attach one twist dangle to the bottom middle loop of the third shield. Repeat from * for the other half of the front of the necklace.
Step 23: Use 1 eye pin to string 2 vintage pearls and 1 large leaves bead cap (wide end first). Form a wire wrapped loop. Repeat to form a second large leaves link.
Step 24: Use 10" of beading wire to string 1 crimp tube, 3 seed beads, 1 twist pearl, 3 seed beads, the simple loop end of 1 large leaves link, 3 seed beads, 1 twist pearl, and 3 seed beads. Pass back through the tube and crimp. Cover the crimp tube with a crimp cover.
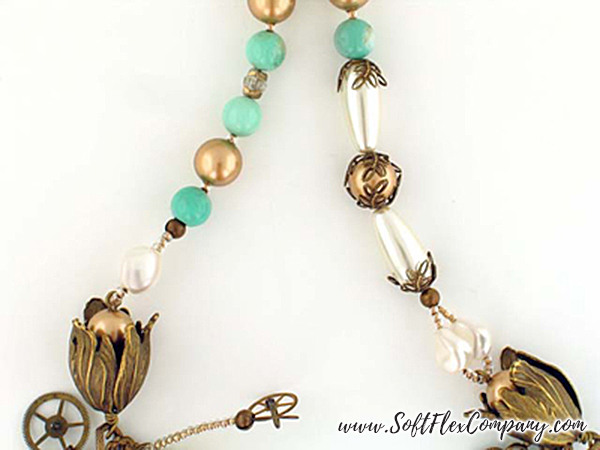
Step 25: String 1 veriscite round. String {1 seed bead, 1 vintage pearl, 1 seed bead, 1 veriscite round, 1 cross bead, and 1 veriscite round} four times. String 1 crimp tube and the hook half of the clasp. Pass back through the tube and crimp. Cover the crimp tube with a crimp cover. Use one 4mm jump ring to attach the remaining calla lily dangle to the hook half of the clasp. Attach the first 10mm jump ring used in Step 9 to the wire wrapped loop of the large leaves link.
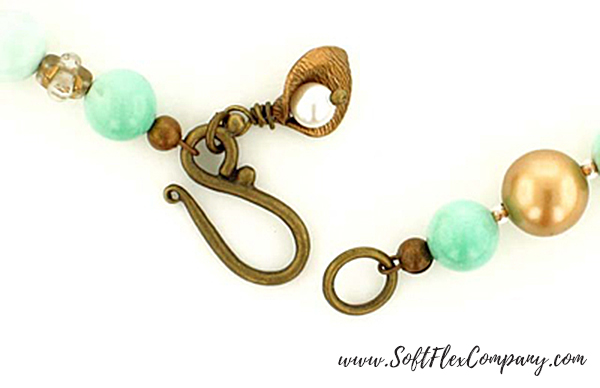
Step 26: Repeat Step 24 using the other large leaves link. String 1 swirling leaves bead cap (narrow end first), 1 tear drop pearl (wide end first), 1 swirling bead cap (narrow end first), 1 vintage pearl, 1 swirling bead cap (wide end first), 1 tear drop pearl (narrow end first), and 1 swirling bead cap (wide end first). String {1 veriscite round, 1 seed bead, 1 vintage round, 1 seed bead, 1 veriscite round, and 1 cross bead} three times, omitting the final cross bead. String 1 crimp tube and the eye half of the clasp. Pass back through the tube and crimp. Cover the crimp tube with a crimp cover. Attach the second 10mm jump ring used in Step 9 to the wire wrapped loop of the large leaves link.
Creature Comfort Necklace
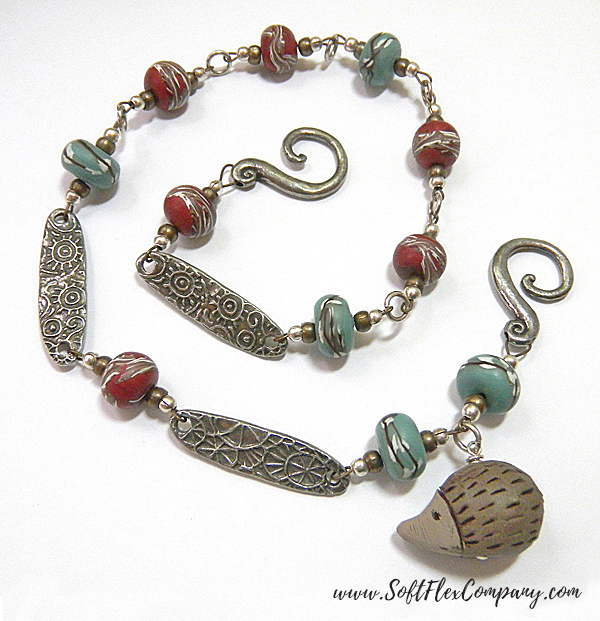
Featured in the May 2011 issue of Bead Style magazine.
Designer Jamie Hogsett
Skill Level Beginner
Materials
Antique Brass Soft Flex Metallics Wire .014 diameter - 33"
17x25mm Pewter Hook from
Green Girl Studios - 2 pcs
2x2mm Sterling Silver Crimp Tubes - 22 pcs
3mm Sterling Silver Crimp Covers - 22 pcs
6mm Silver Filled Jump Rings - 7 pcs
2" Sterling Silver Head Pin - 1 pc
4x3mm Brass Rondelles from
Vintaj - 22 pcs
9x33mm Pewter Links from
Green Girl Studios - 3 pcs
10x8mm Rust Polymer Clay Rondelles from
Humblebeads - 6 pcs
11x7mm Teal Polymer Clay Rondelles from
Humblebeads - 5 pcs
16x24x15mm Brown Polymer Clay Hedgehog Bead from
Humblebeads - 1 pc
Tools
Cutters
Chain Nose Pliers
Round Nose Pliers
Crimping Pliers
Instructions
Finished Size 16 1/2"
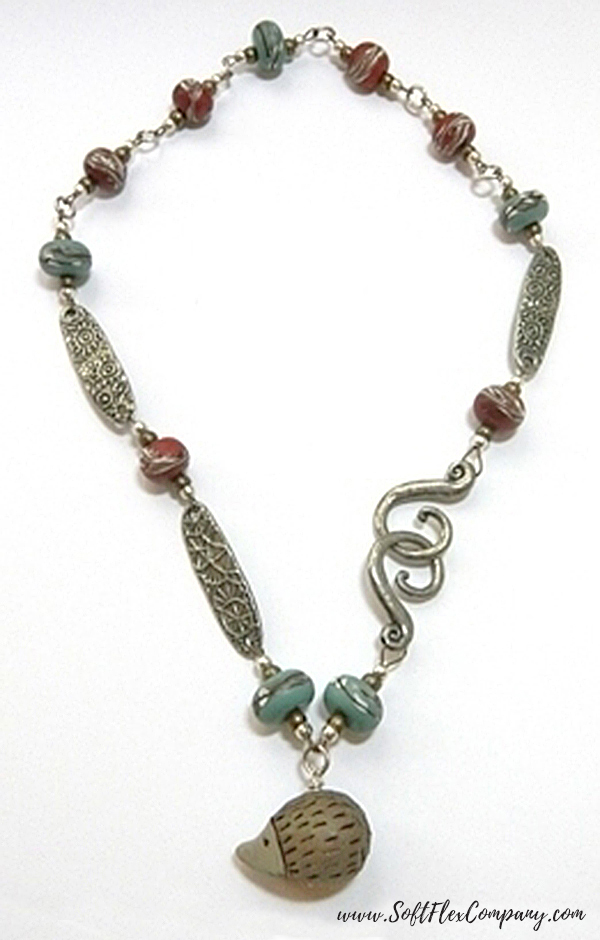
Step 1: Use the head pin to string the hedgehog bead (bottom to top) and form a wire wrapped loop. Attach 1 jump ring to the loop. Set aside.
Step 2: Use 3" of beading wire to string 1 crimp tube and 1 hook. Pass back through the tube and crimp. Cover the crimp tube with 1 crimp cover. String 1 brass rondelle, 1 teal rondelle, 1 brass rondelle, 1 crimp tube, and the jump ring used in Step 1. Pass back through the tube and crimp.
Click here for crimping instructions. Cover the crimp tube with 1 crimp cover.
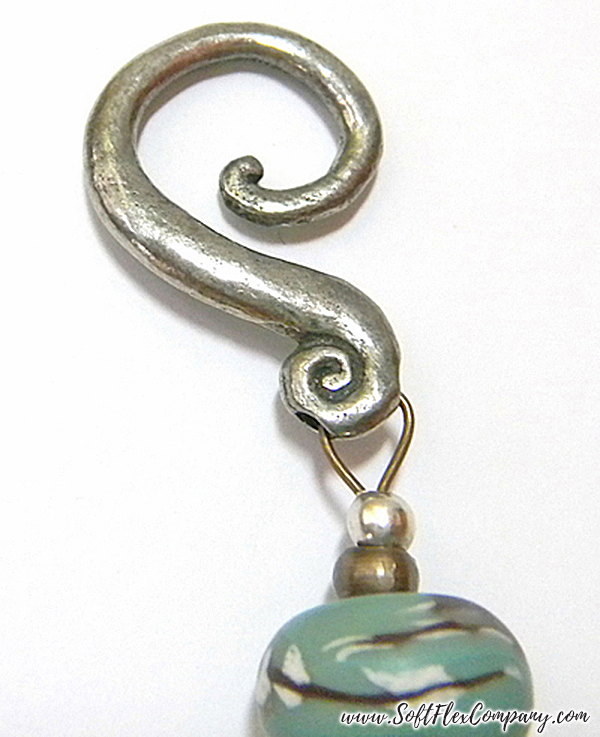
Step 3: Use 3" of beading wire to string 1 crimp tube and the jump ring used in Steps 1 and 2. Pass back through the tube and crimp. Cover the crimp tube with 1 crimp cover. String 1 brass rondelle, 1 teal rondelle, 1 brass rondelle, 1 crimp tube, and one hole of 1 link. Pass back through the tube and crimp.
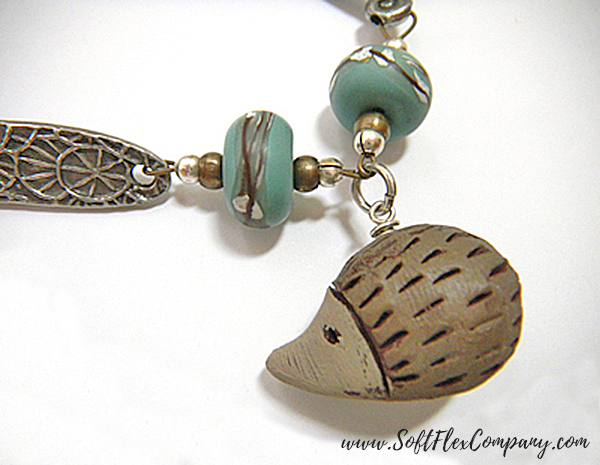
Step 4: Use 3" of beading wire to string 1 crimp tube and the other hole of the previous link. Pass back through the tube and crimp. Cover the crimp tube with 1 crimp cover. String 1 brass rondelle, 1 rust rondelle, 1 brass rondelle, 1 crimp tube, and one hole of 1 link. Pass back through the tube and crimp. Cover the crimp tube with 1 crimp cover.
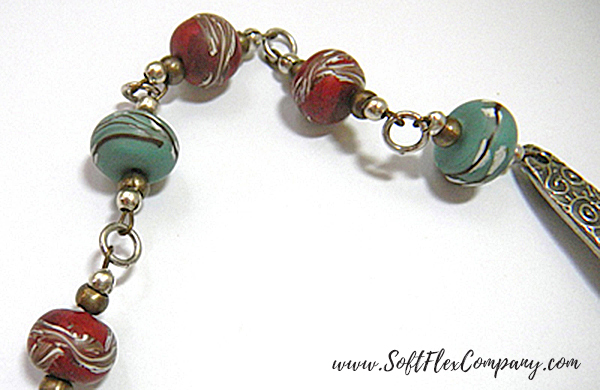
Step 5: Use 3" of beading wire to string 1 crimp tube and the other hole of the previous link. Pass back through the tube and crimp. Cover the crimp tube with 1 crimp cover. String 1 brass rondelle, 1 teal rondelle, 1 brass rondelle, 1 crimp tube, and 1 jump ring. Pass back through the tube and crimp. Cover the crimp tube with 1 crimp cover.
Step 6: Use 3" of beading wire to string 1 crimp tube and the previous jump ring. Pass back through the tube and crimp. Cover the crimp tube with 1 crimp cover. String 1 brass rondelle, 1 rust rondelle, 1 brass rondelle, 1 crimp tube, and 1 jump ring. Pass back through the tube and crimp. Cover the crimp tube with 1 crimp cover.
Step 7: Repeat Step 6.
Step 8: Use 3" of beading wire to string 1 crimp tube and the previous jump ring. Pass back through the tube and crimp. Cover the crimp tube with 1 crimp cover. String 1 brass rondelle, 1 teal rondelle, 1 brass rondelle, 1 crimp tube, and 1 jump ring. Pass back through the tube and crimp. Cover the crimp tube with 1 crimp cover.
Step 9: Repeat Step 6 twice.
Step 10: Use 3" of beading wire to string 1 crimp tube and the previous jump ring. Pass back through the tube and crimp. Cover the crimp tube with 1 crimp cover. String 1 brass rondelle, 1 teal rondelle, 1 brass rondelle, 1 crimp tube, and 1 jump ring. Pass back through the tube and crimp. Cover the crimp tube with 1 crimp cover.
Step 11: Repeat Step 6 twice.
Step 12: Use 3" of beading wire to string 1 crimp tube and the previous jump ring. Pass back through the tube and crimp. Cover the crimp tube with 1 crimp cover. String 1 brass rondelle, 1 teal rondelle, 1 brass rondelle, 1 crimp tube, and one hole of the remaining link. Pass back through the tube and crimp. Cover the crimp tube with 1 crimp cover.
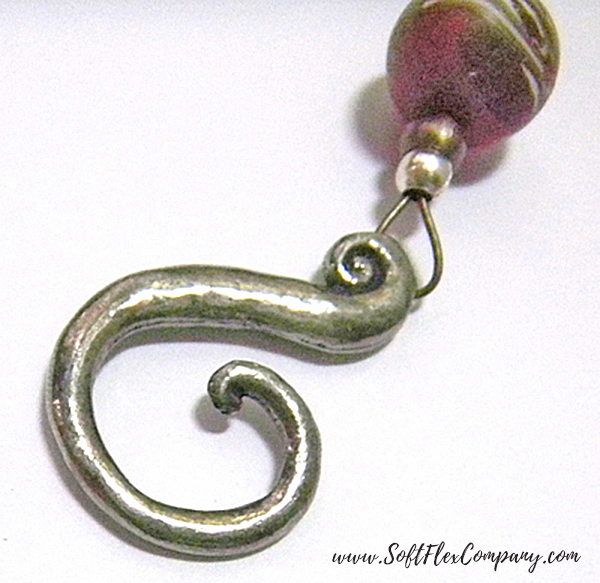
Step 13: Use 3" of beading wire to string 1 crimp tube and the other hole of the previous link. Pass back through the tube and crimp. Cover the crimp tube with 1 crimp cover. String 1 brass rondelle, 1 rust rondelle, 1 brass rondelle, 1 crimp tube, and the other hook. Pass back through the tube and crimp. Cover the crimp tube with 1 crimp cover.
Copper Metallics Beading Wire
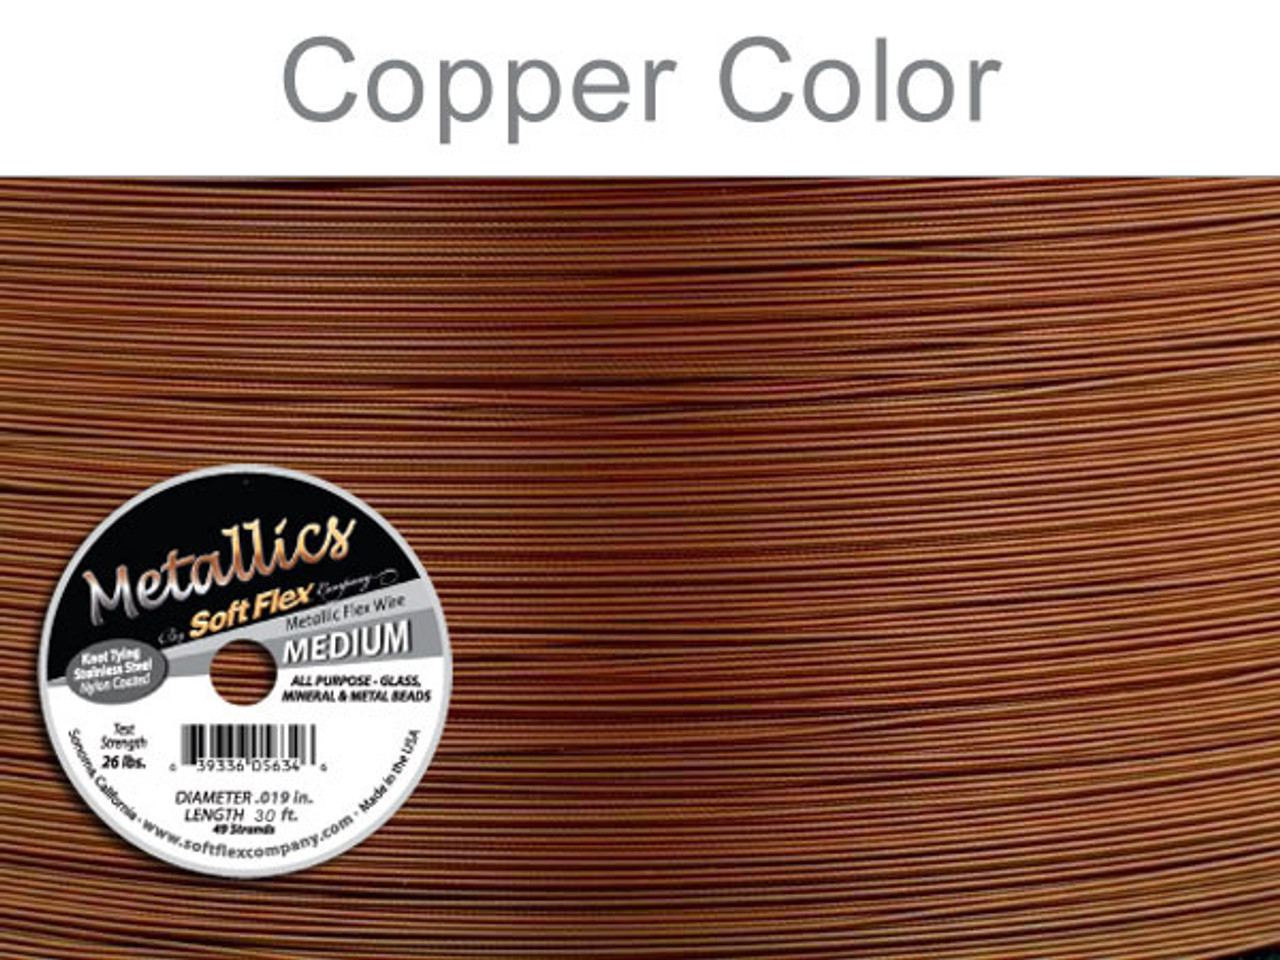
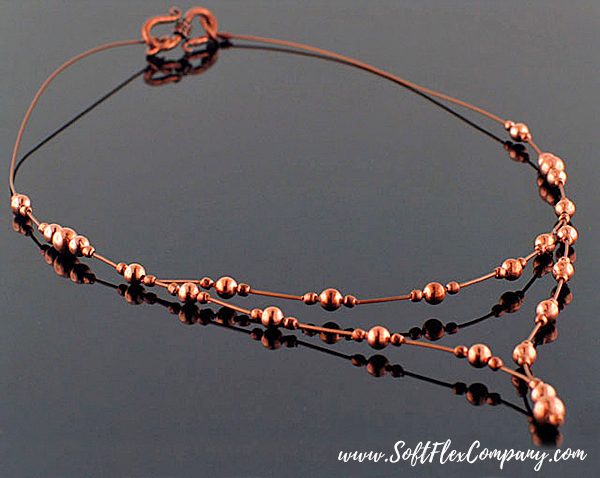
Our Copper color bead stringing wire is luxurious. The soft rusty tone is kissed with a shimmering aura. This wire really glows. This is a stunning choice for elegant autumn necklaces. It is also an amazing wire for that Southwestern jewelry design you have in mind. Want to show off your opulent fall jewelry with a radiant accent? This wire needs to be in your collection!
Effortless Copper Necklace
Designer Sara Oehler
Skill Level Beginner
Materials
Copper Color Soft Flex Metallics Wire .019 diameter - 18"
Copper
Clasp- 1 set
2x2mm Copper Crimp Tubes - Approx. 48 pcs
Copper
Beads, I used 3mm & 4mm round (any size or shape in copper would work) - Approx. 30 pcs
Tools
Crimping Pliers
Cutters
Instructions
Step 1: Cut two 10 inch pieces of .019 wire. Use both wires to string 1 crimp tube, one 4mm bead, one 3mm bead, and 1 crimp tube. Adjust the second tube so that it is at the very end of the wires, and crimp. Snug the beads down to the crimped tube, and crimp the other tube. This will be the focal point of your necklace.
Step 2: Decide the distance apart on the wire you'd like your beads to be and use 1 wire to string 1 crimp tube to that distance (Sara placed her beads about 1/2" apart). Crimp the tube. String one 3mm bead and 1 crimp tube. Crimp the tube to keep the bead stationary. Repeat three times. Repeat the entire step using the second wire. Set aside.
Step 3: To create the second strand, cut a piece of .019 wire about 7 inches long. String 1 crimp tube, one 3mm bead, and 1 crimp tube to the center of the wire. Crimp the tubes to hold the bead in place.
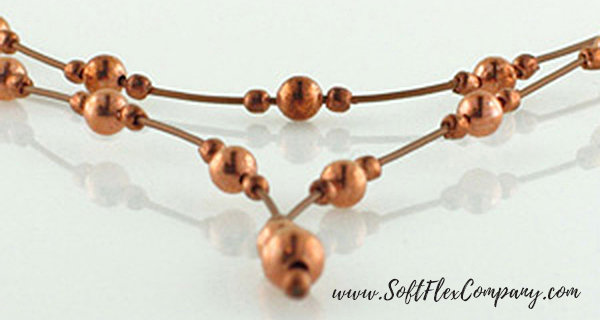
Step 4: String 1 crimp tube and place it about 1/2" from the previous tube; crimp. String one 3mm bead and 1 crimp tube. Crimp the tube to keep the bead stationary. Repeat to add another bead grouping. Repeat entire step using the other end of the wire.
Step 5: Combine the two strands by crimping the two wires together: Use the longer strand to string 1 crimp tube. Pass one end of the shorter strand up into the tube. Adjust the tube so that it is about 1/2" from the previous tube and crimp. String one 3mm bead and 1 crimp tube. Crimp the tube to hold the bead in place. Repeat entire step to connect the two strands on the other side of the necklace.
Step 6: Use 1 strand of wire to string 1 crimp tube. Crimp the tube so that it is about 1/2" from the previous tube. String one 3mm bead, one 4mm bead, one 3mm bead, and 1 crimp tube. Crimp the tube. String 1 crimp tube and crimp it 1/2" from the previous tube. String one 3mm bead and 1 crimp tube; crimp. Repeat entire step for the other half of the necklace.
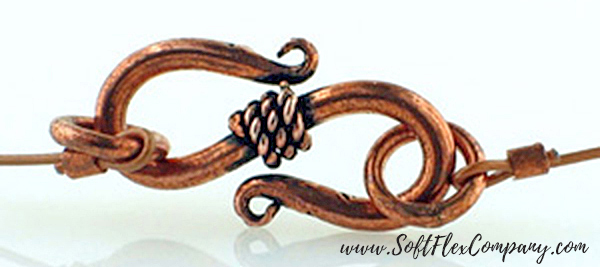
Step 7: Use 1 end of the wire to string 1 crimp tube and one half of the clasp. Pass back through the tube, adjust the necklace length (the finished piece should be just longer than a choker, with the wire resting on your collarbone), and crimp. Repeat for the other end of the necklace.
Copper Darling Dangle Earrings
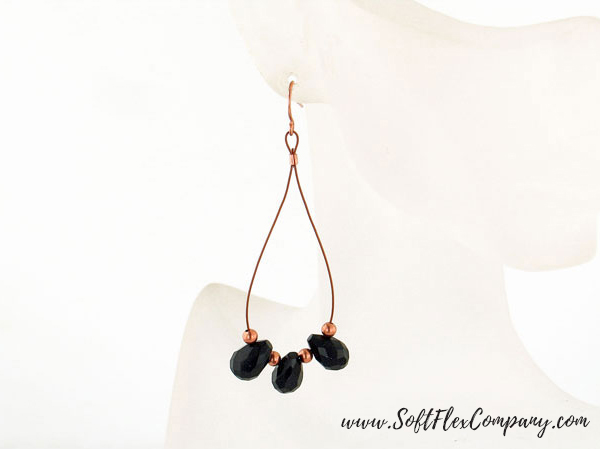
Designers Sara Oehler and Lisa Vernon
Skill Level Beginner
Materials
Copper Color Soft Flex Metallics Wire .019 diameter - 8"
Copper Ear Wires - 1 pair
2x2mm Copper Crimp Tubes - 2pcs
2mm Copper Round
Beads - 4 pcs
Briolette Shaped
Beads - 3 pcs
Tools
Crimping Pliers
Cutters
Instructions
Step 1: Use Soft Flex® Flush Cutters to cut 4 inches of wire.
Step 2: Use one end of the wire to string 1 crimp tube and 1 ear wire. Pass back through the tube, but do not crimp.
Step 3: Use the other end of the wire to string 1 Copper Bead - 1 Briolette Shaped Bead - 1 Copper Bead - 1 Briolette Shaped Bead - 1 Copper Bead - 1 Briolette Shaped Bead - 1 Copper Bead. Pass back through the tube so that there are 3 strands of wire in the tube.
Step 4: Adjust the wire to make the dangle as short or long as you prefer.
Step 5: Crimp the tube using Regular Crimping Pliers.
Click here for crimping instructions. Trim excess wire.
Step 6: Repeat Steps 1-6 to make a second earring.
Join the fun in our VIB Facebook Group today! Stay in the know. Stay up to date. From our bead shows to our video shows and sales, you can stay in touch with us. The community is full of artistic and helpful beaders and crafty people. Inspire and be inspired. Share your pictures and get the beading bug from others!
Visit the Soft Flex Company YouTube Channel!

Blog contributor Thomas Soles loves Jazz Age writers and crunchy french fries. His favorite gemstones are Lapis and Pietersite. His favorite hobby is day dreaming. And his favorite mustache is Freddie Mercury's. As you can see, he has a healthy (or possibly unhealthy) sense of humor. You can write to him at Thomas@SoftFlexCompany.com


