

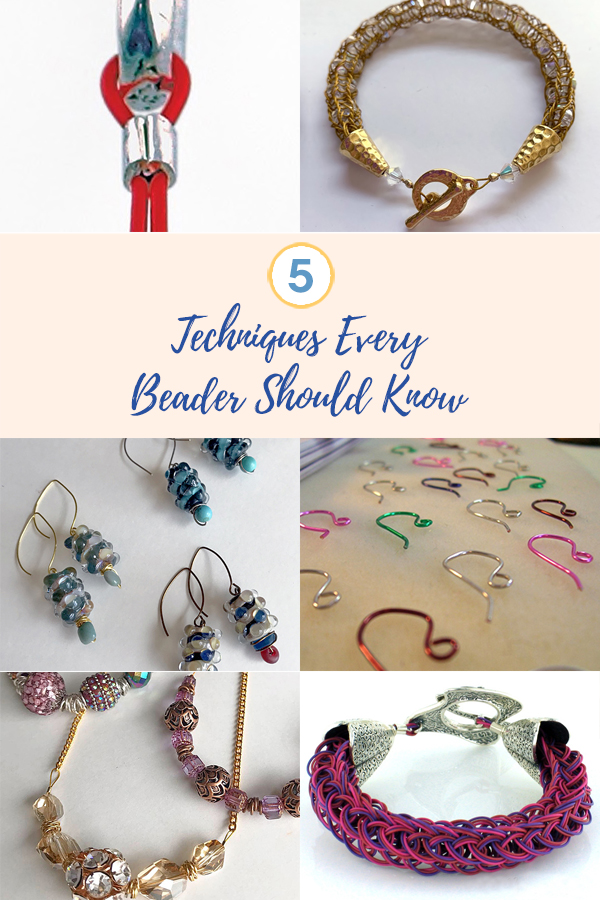
Would you like to become a better beader? Making jewelry is an easy craft to pick up, but if you want to master your skills, you need to expand your technical knowledge. Today, we have collected five techniques we think are essential for becoming a better bead stringer. We will teach you how to crimp. How to open a jump ring. How to make handcrafted ear wires and more. If you want to elevate your game, you need to read this blog! Let's discuss jewelry design.

Chances are, your first jewelry design was a single strand necklace or bracelet. Odds are that is was not overly complicated. Just a classic and simple piece of wearable art. This blog is a great read if you are still finishing basic jewelry pieces. We want to give you some techniques that will allow you to grow as an artist and master new talents. Make your next jewelry design a masterpiece!
5 Techniques Every Beader Should Know
Before We Begin...
This video has an amazing amount of instruction for basic bead stringing. If somebody were to ask what is required viewing for a new jewelry designer, I would not hesitate to recommend they watch this video in its entirety. Sara gives an in depth look at how to use beading components. If you have a basic knowledge of how findings work in your jewelry toolkit, you are already on the quick path to becoming a much stronger designer.


If you are familiar with how to use and finish jewelry findings, much of this video is just going to rehash jewelry techniques you are already know. In fact, a lot of this blog is probably just going to cover stuff you do daily as a jewelry crafter. But if you have a friend that needs an extra bump or instruction, pass the word. They will find a good deal of helpful tips.
How To Crimp Your Jewelry Design
Crimping is a skill that should be tackled immediately. You could even practice crimping before you string your first design. A good way to master this talent is to buy economy beading thread and cheap crimps. Don't bother stringing beads, just focus on the end game, finish that crimp strong and secure. Once you are comfortable using crimping pliers and crimp beads, you will be a much more confident designer. Below, we will show you everything you need to know to finish a crimp tube so that it will never slip.
Once you have figured out how to use your crimping pliers, we strongly suggest buying good beading wire, tools, and high quality crimp tubes. You may pay a little more upfront, but you will not have to worry about restringing your jewelry designs. Invest in the best and your handcrafted jewelry will last for years. We also suggest that you purchase the right tools for the job. Don't settle for second best, unless you enjoy restringing your work.
Regular Crimping Pliers

Crimping pliers are a must if you want to finish your jewelry like a professional. Once you master your crimping pliers, every crimp is uniform and secure. Trying to smash your crimps with a pair of regular pair of pliers means your crimps will be irregular and prone to slipping. Crimping pliers allow for your design to be secure with a crimp bead that looks and feels smooth.

Regular crimping pliers work with 2x2mm crimps or 2x3mm crimps. 2x2mm crimps are the most common crimps you will have in your kit. They work with .014 fine and .019 medium diameter wires. 2x3mm crimps are going to be ideal if you want to make sure your .024 heavy diameter designs are secure.
Your crimping tool has two holes on the top of the head. One is a round hole – the rounder, and one hole has a tooth in the center – the crimper. You are going to be using the crimper first. This puts a divot in your crimp tube. The rounding hole is up next. The round hugs the crimp together. The divot gives it a clam shell appearance, the rounder rounds into a pleasing tube shape that promises a lot of security. One thing to note, you do not have to smash the crimp bead. Just give your crimping pliers a nice firm squeeze, like you were shaking hands with your grandmother. This will mold the crimp tube into a tight finish and will not work harden and weaken the metal.

Step 1 - String a crimp tube and a clasp onto the wire. String the wire back through the crimp tube. Straighten the wires inside the crimp tube so that they lay side by side.

Step 2 - Using the crimper gently compress the crimp tube, creating a divot.

Step 3 - Using the rounder gently compress the crimp tube. Turn and repeat until it creates a round shape. Cut off the excess wire at the base of the crimp. For your first design, we would recommend 2x2mm crimps if you are using our medium diameter wire.
Here is a great reference for crimp sizes and instructional links on how to crimp: All About Crimps
You have a choice as a beginner, start with regular crimping pliers or kick off your journey with Magical Crimping Pliers. The choice is purely aesthetic. Each tool has its strengths and weaknesses. Both are amazing and worth purchasing. One tool is not more difficult to work with than the other. You have nothing to lose by learning how to use each. If you work with both, it will give you that much more control on how you want your finished jewelry to look.
Magical Crimping Pliers are the next generation of crimping tools. If you use crimp covers to conceal a finished crimp, you will love Magical Crimping Pliers. Magical Crimping Pliers will turn an ordinary crimp tube into a finished, rounded, bead. A beautiful end to any design.
Here is the secret: regular crimping pliers have two holes, a crimping hole to place a divot in the crimp and a rounding hole to finish. Magical Crimping Pliers have a single rounding hole. This hole rounds any 2x2mm tube into a rounded bead. This quick rounding method eliminates the need for a crimp cover.
Magical Crimping Pliers

Magical Crimping Pliers have a single rounding hole. This limits the pliers to 2x2mm crimps. But you can explore different diameters. If you are finishing a single strand necklace, we suggest using .019 Medium or .024 Heavy Soft Flex beading wire. You can also use Magical Crimping Pliers on multi-strand necklaces using finer diameters.
Magical Crimping Pliers are for beginner beaders and seasoned artists alike. Easy to learn and quick to master. At Soft Flex Company, we always suggest using high quality wire and crimps, such as our Soft Flex Wire and our crimps (which are seamless and thick-walled). Choosing a budget wire and crimps might not have the same strength and finish.
The Magical Crimping Pliers was created to be used with 2x2mm crimp tubes. It is important to use good quality crimp tubes with the Magical Crimping Pliers. Soft Flex manufactures their tubes with double the wall thickness of most and they are also seamless. They are terrific for this application. A weaker walled crimp will have a hard time cinching into the nylon coating. Recommended for .019 and .024 flexible beading wire only.

Step 1 - String a crimp tube. If attaching a clasp or ear wire, make sure that wires lay side by side.

Step 2 - Place the crimp tube inside the groove of the Magical Crimping Pliers and squeeze.

Step 3 - The pliers will pinch the four corners of the crimp tube and look like a square.

Step 4 - Turn the crimp tube on its side in the Magical Crimping Pliers, making sure the top of the square is up and squeeze. Rotate and squeeze a few more times.

Step 5 - The crimp should tighten down on the wire and look like a round bead.
Congratulations, you have learned how to crimp with two wonderful tools. Put away your regular pliers. Smashing a crimp tube is just going to end in failure. Use the right tool for the right job and your jewelry will withstand even the most robust and careless clients or friends.
Using Crimps As A Design Element
Learning to crimp will open up an amazing array of design possibilities. Crimping is, foremost, a means to secure and finish your jewelry. But, once you have mastered your crimping skills, you can now use this talent as a tool. Explore new ways to use crimps as a design component. Illusion jewelry is one fun way to explore this skill. Illusion jewelry is using crimps to 'float' beads on your beading thread or wire. If you use a subtle wire that is difficult to see from a distance, floating your beads on this wire will make them appear to hover in place. It is a stunning way to showcase your beads. You can also use a color wire that complements the beads and stands out.
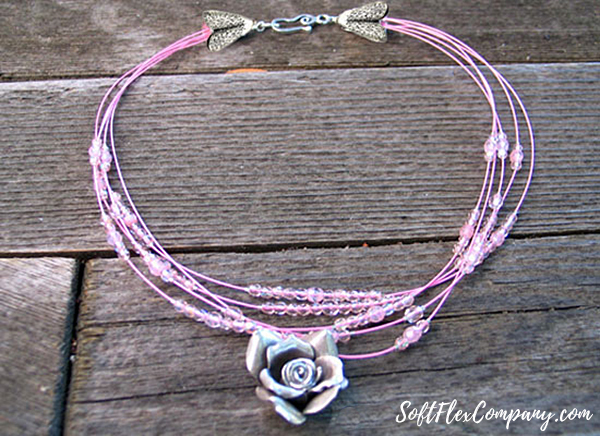
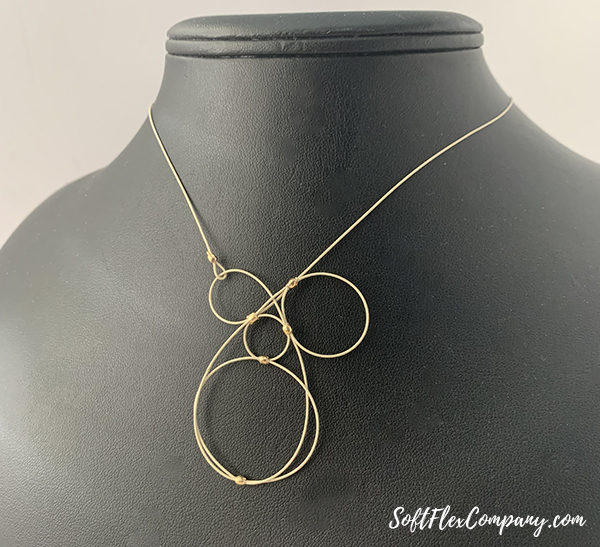
You can also use your crimps to create loops in your beading wire. This can be fun for linked pieces. You can do this for a beading wire chain on a choker necklace or use a single loop or two as a dangling earring. Crimping will give you a new way to control the way your beading wire drapes and flows.
You can even explore crimps as a means to just manipulate your beading wire. This design truly showcases the wire. It becomes a focal piece and really draws the eye. The design possibilities are endless. Do you want to learn to master your wire and beads? Become a confident beader by mastering crimping pliers!
How To Open And Close Jump Rings
Jump rings are not an essential tool but they offer fun new ways to evolve and enhance your jewelry designs. You can use jump rings to lengthen a design. You can use them to connect pieces of your design. You can also use them as spacer beads and focal pieces. If you want to take your jewelry to the next level, it is good to learn how to use jump rings.
Watch the video below to see how Kristen uses a jump ring to connect two macraméd strands of wire to a clasp. You can also watch the findings video at the top of the blog for more instruction on how to open and close your jump rings.
Opening and closing a jump ring is simple.
Two pairs of chain nose pliers are ideal for the job. They have a smaller head as it lengthens into a point. The jaws of chain nose pliers are smooth and not going to mar the surface of your metal findings. But, you can always improvise and just use whatever pliers are at hand. Sara and Kristen often use a pair of chain nose pliers and a pair of crimping pliers.
Step 1 - Turn the opening of your jump ring so it faces up. Clamp down on one side of the jump ring so it runs parallel with the opening. Clamp down on the opposite side of the jump ring with your second pair of pliers. If you clamp down on a good section of the jump ring, you will have more control than if you just clamp down with the tip of your pliers.
Step 2 - Gently twist one side away from you and one side toward you. This opens the jump ring side to side. You do not want to pull the jump ring open like it is a mouth. Twist the sides, do not pull open or you will ruin your jump ring.
Step 3 - Slide your clasp or cord on to your jump ring. Then clamp your pliers back on to the sides like before, with the opening of the jump ring facing up. Twist the two sides so they close again. That's it! Do not smash down on the jump ring, this will not make it more secure, smashing the ring will only work harden the metal and make it brittle.

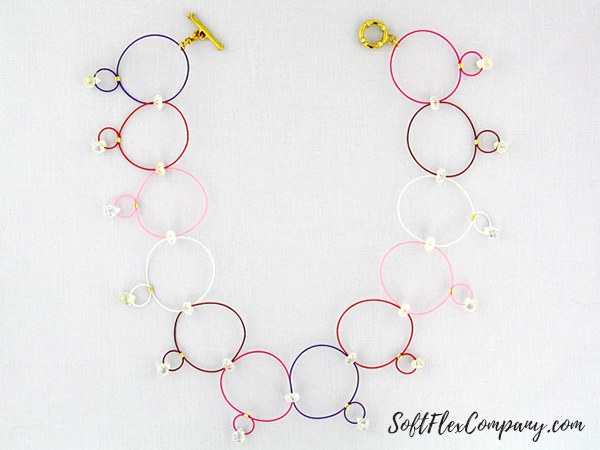
Jump rings are perfect for connecting a clasp, ear wire or pendant to your necklace, bracelet, anklet or earring. If you are a creative type, consider thinking outside the box and doing something unusual, they can be bunched together on a design to create a 'loose focal bead' and more.
Jump Rings can lengthen or shorten a design. They can be used to add a different clasp. They can be used to enhance a piece of jewelry and even make chain. Jump Rings offer a lot of flexibility when designing. There are two different styles of Jump Rings – open and closed. Closed Jump Rings are permanent on a design, there is no opening. Open Jump Rings can be opened and closed.
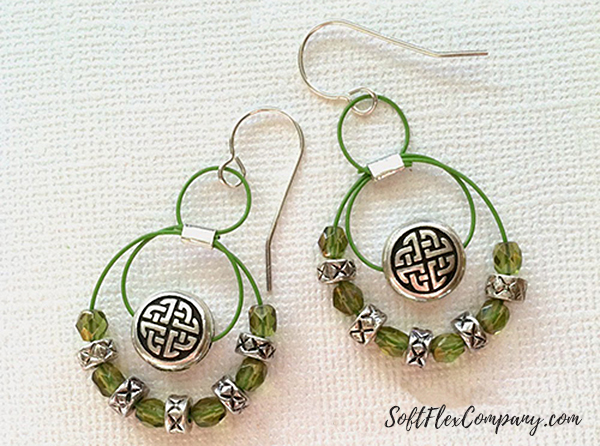
Jump rings are great for earrings. They add flavor and an interesting contrast to the strung beads. You do not have to include jump rings on your designs, but when you know how to use them, they can look amazing. Learn how to design this stunning pair of earrings. Kristen used remnant beads to make something wonderful. Remnant beads are the leftovers from larger designs. There are not usually enough of them to fit on a new necklace, but you can string them on smaller designs.

Forget the rules. Jump rings are also great additions as beads. In the design below, Kristen uses jump rings as spacer beads. Know that you know how to open and close your jump rings, you can explore their use as design components.
How To Use Head Pins And Eye Pins
Head pins and eye pins are wonderful tools when you want to direct the movement of a bead. If you would like to dangle a bead from a necklace or earring. Both are a great choice. If you would like to showcase a single bead, you can use an eye pin to make it stand out. You can also chain your beads with eye pins. Simply insert the pin and loop the open end. The bead will be contained between two loops. If you want to control the flow of your beads as well as you control your beading wire, make sure you have these pins in your toolkit.
Head pins look like long slender nails. They have a flat head at the top that is great for keeping a bead in place. Eye pins look similar but they are crowned with a loop. This loop is great for adding dangles or chaining beads together. This design component is great for beads that are oddly drilled. You may have a larger focal bead in your collection that is top drilled and cannot be strung conventionally. Placing a pin through this hole will allow the bead to dangle from a necklace or earring.
Head Pins

Head pins have a flat head on the top. This head can be used to stop a bead and hold it in place. The flat surface of the head is flush with the bottom of the bead and is not distracting. It is a great component to use to suspend a focal bead in place. To finish, simply loop the opposite end to close it, this will keep your bead in place. Head pins are perfect for making earring dangles, drops, and pendants.
Eye Pins

Eye pins are pins with a loop on one end. They can be used to create chained jewelry links or components. You can chain single beads or multiple beads with an eye pin.Eye pins are also used in multi-strand pieces. Crimp each strand to the eye of the eye pin and pull through a cone. Connect the other end of the eye pin to your clasp by wire wrapping.
You do not need to add head pins or eye pins to your beading toolkit. They are not essential. But if you want to try a new technique, it is well worth your time to explore adding each and making your jewelry really stand out.
How To Make Homemade Ear Wires
Ear wires are not particularly expensive. But if you want to have a hand in as much of your jewelry creation as you can, it is good to learn how to create your own ear wires at home. Making your own ear wire will also give you opportunities to make distinctive pieces. You can make conventional ear wires or add length and bends. You can turn your ear wire into a stunning design element.
Check out our ear wire selection to see how varied ear wire can look if purchased. And then imagine how unique your own personal ear wires could look.

Ear wires are great for making quick earrings. Simply make a dangle with a head pin and attach to the loop at the bottom of the Ear Wire. Or, if you are feeling daring make a chain by linking components made with eye pins. The possibilities are infinite.
Ear wires can be elaborate or simple. They all work the same way, basically. Ear wires can be purchased or created with Soft Flex Craft Wire if you would like to personalize your earrings. Posts are similar to ear wires but do not dangle. There are also leverback ear wires for people that lose their earrings a lot. The leverbacks close so the earring cannot slip off.
How To Make Ear Wires Using Soft Flex Craft Wire On A WigJig
WigJig jig boards are fantastic for creating homemade ear wires. If you use the same pattern on the board, you can be assured that all of your ear wires will be uniform and consistent, regardless of how many you make. If you want to create more organic and spontaneous ear wires, make sure you check out Kristen's video. She uses pliers to loop the wire into an ear wire.
WigJig boards are our preferred jig boards. They are clear, which means you can place them over patterns. Other jig boards are clear, but are made with a flimsy plastic. This plastic widens and opens over time and the pegs slip and do not remain still. WigJig boards are created from the same sturdy material you find in aircraft windows. It is resilient and not going to age like a cheaper crafted jig board.

You are going to love the WigJig Olympus Lite!
The transparent Olympus Lite is the perfect jig for beginning wire designers. Just place the transparent jig on a pattern, trace with the pegs, and wrap the wire to form the design. It's simple to design with wire instantly to make jewelry, home decor, and paper arts projects. Includes jig with 238 holes, 10 metal pegs, and wire designing tips. Wire, jig, Super Pegs, Spiral Maker and nylon spacers are sold separately. WigJig Olympus Lite is 3" x 3".

From
Wonderful, Wearable Wire
Materials
20ga Soft Flex Craft Wire - 5" (2 1/2" per ear wire)
Template on page 65 of
Wonderful, Wearable Wire
Tools
WigJig Olympus Lite
6 Metal Pegs or 1 Super Peg and 2 Metal Pegs
Cutters
Nylon Jaw Pliers
Round Nose Pliers
Wire Whacker
Burr Cup
Instructions
Note: Soft Flex Craft Wire comes in regular and silver plated colors. No other colored wire offers the resistance to scratching, peeling and marring. This is due to the special enameling process used to coat the wire to produce the rainbow of colors we offer. After the enamel is applied, the wire is clear coated to prevent tarnishing. Be aware that the Bare Copper wire is not coated and will tarnish (sometimes this can be a benefit if you want an antique look). Soft Flex Craft Wire is hypoallergenic, so this is especially nice for things like
ear wires.


Step 1: In the book Wonderful, Wearable Wire, you will find an easy to follow pattern on page 65. Place a WigJig on top of the pattern and slide in the pegs.


Step 2: Cut 2 1/2" of 20g Soft Flex Craft Wire from the spool. Use nylon jaw pliers to pull kinks out of the wire. Make a simple loop using round nose pliers.

Step 3: Look at the easy to follow number guide provided with the pattern to find the starting point. Slide your loop in place. Guide the wire with your hand but turn the WigJig and let the jig do the work. As you turn the WigJig, it will create a nice round shape. You should never pull the wire around the pegs.


Step 4: Remove the ear wire from the WigJig and work harden the wire by using a Wire Whacker.

Step 5: Use a burr cup on the tip of the wire to file it down and make it smooth.
Step 6: Repeat Steps 1-5 to create a second ear wire.

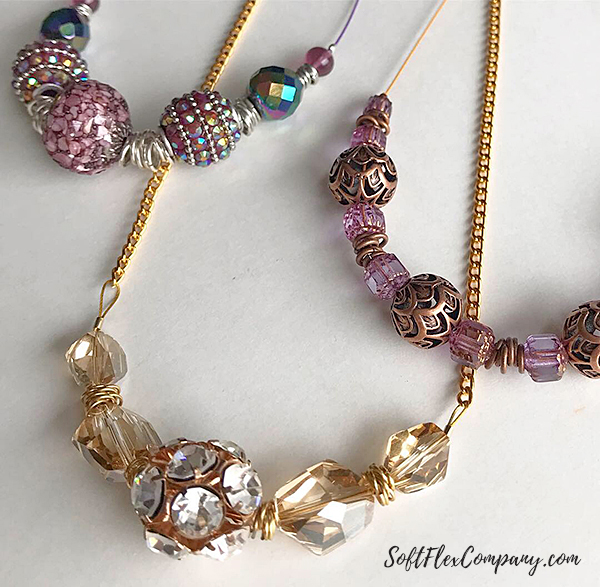
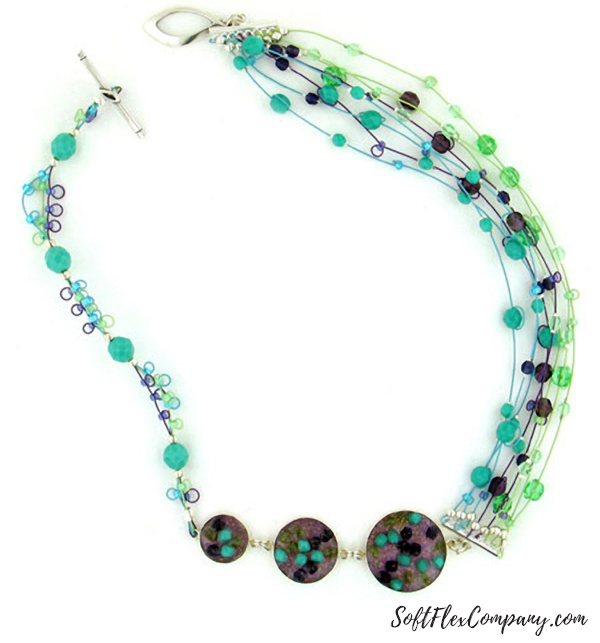
How To String Multi-Strand Necklaces And Bracelets
Let's look at one more technique today. If you are only designing single strand jewelry, you are limiting your options. Adding multiple strands to your designs will make a piece lush and full. Multi-strand designs are dramatic and eye-catching. We are not besmirching the timeless look of the single strand design. But we are encouraging you to become an explorer and see how far you can push your talents.
Single strand bracelets and necklaces look amazing. They are classic and will never go out of style. They are unisex and can be as quiet or full of bravado as you please. But staying focused on them will lead to stagnation. Let's saddle up and see what a multi-strand design entails.
Multi-Strand Connectors and Clasps
In this video, Kristen shows us how she strings a multi strand necklace. She goes in depth on the tools she uses and the process. She had even sketched out her design prior to stringing the beads. If you would lie a road map, sketching out your jewelry designs will keep you focused and on track. Our friend, Nealay Patel, is also a big advocate of drawing a design out on paper before commencing his work.
To marshal and guide multi strand designs, one easy way to finish is to use a multi strand clasp. For this design, Kristen uses our extravagant Crystal Squaredelles. She uses a 3 strand toggle. Each strand of the necklace she designs is looped into the toggle. This makes everything super easy!

Our line of Squaredelles is simply stunning. With spacer beads and matching clasps, you can create perfect designs. If diamonds are a girls best friend, crystals must be the runner up. These findings and beads are available in 3 finishes: black, gold and silver and a huge assortment of colors. Enjoy.
Look how dramatic and detailed adding multiple beading wire strands can be. This necklace is the best of all worlds. Jamie Hogsett's Egg Hunt Necklace is an elegant piece that is perfect for Easter. To guide all of her wires, she opted for an 8-strand connector.
Multi-strand jewelry looks so full and amazing. Make your next necklace dramatic and full of eye-catching beads.

Using Cones To Guide And Finish A Multi-Strand Design
Cones are another way of corralling all of your wires on a multi strand jewelry design. They are great for a wire dense project like a knitted bracelet or braided kumihimo design. The cone can conceal a large crimp or strands of wire connected to eye pins. To finish a multi strand design, look for 3x3mm or larger crimps. Use Mighty Crimping Pliers to finish your larger crimps. You can cut the dense pack of crimped wires so there is only a single wire and pull that through the cone and onto a clasp.
In the video above, Kristen makes some handcrafted cones. You can do this with a tool, like a Lazee Daizee, or you can make a messy wrap with Soft Flex Craft Wire and your fingers. You can use pliers to finish and tighten your messy wrap. Messy wraps are great for organic looking jewelry. They are assymmetrical and free spirited.

If you do not like the look of a messy wrapped cone of homemade cone, you can purchase a cone. You can find designer cones or simple cones. There is a wide range of them available and you are certain to find one that makes your jewelry amazing.

These hammered cones have a wonderful handmade look to them. They look stunning on the end of a braided design created with a kumihimo disk. They are a great way to finish finer knitted wire or a very fine Viking Knit design. These cones are great for smaller more delicate designs like micro macrame made with Soft Flex Beading Wire. Finish your next multi-strand design with these beautiful cones!
Cones can be a dazzling addition to your jewelry. Don't overlook them!

We hope you take away some great techniques from our blog. We think learning is an important step in any craft. We are a company that loves to educate as well as provide high quality materials. If you have any questions about any of our jewelry tools, components, or beading wire, please feel free to contact us. We would love to make sure your questions have solutions.
Make sure you follow us on Facebook and YouTube. We have a bunch of weekly videos that are incredibly informative. We guarantee that you will become a better jewelry designer if you follow along!
Join our Facebook group – VIB. Stay in the know. Stay up to date. From our bead shows to our video shows and sales, you can stay in touch with us. The community is full of artistic and helpful beaders and crafty people. Inspire and be inspired. Share your pictures and get the beading bug from others!
Visit the
Soft Flex Company YouTube Channel!


Blog contributor Thomas Soles loves Jazz Age writers and crunchy french fries. His favorite gemstones are Lapis and Pietersite. His favorite hobby is day dreaming. And his favorite mustache is Freddie Mercury's. As you can see, he has a healthy (or possibly unhealthy) sense of humor. You can write to him at Thomas@SoftFlexCompany.com