We wish you a Merry Christmas! If you enjoy our free beading project ideas, you are going to love this collection of crafty Christmas ideas. We have Sara’s delicious cookies up first. This recipe is amazing. Sara is an artist with beads and a wizard around the oven. We follow that up with gift ideas – beautiful boxes, tags, and garlands. We also included an ornament in the mix. There is a little bit of everything here. Make this Christmas amazing!
We would love to see your Christmas creations, if you create any Soft Flex inspired ornaments or gift garnishes – please post your handiwork in our Facebook group – VIB. We would love to see what you made.
We hope your holidays are warm and bright and you are surrounded by friends and family!
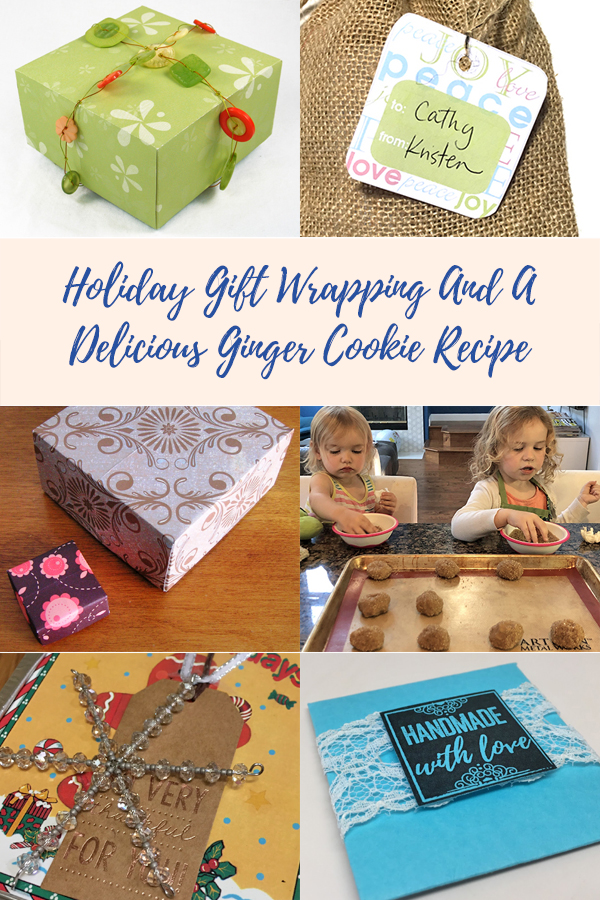
Handmade For Christmas - Delicious Ginger Cookie Recipe

Baker: Sara Oehler
I was making out my Christmas present list a week or so ago, and I realized that I barely buy gifts any more. Between baking and crafting, I have most everything covered pretty handily. This year, I made holiday ornaments using Soft Flex Craft Wire, sewed pot holders and baked (will still bake) a ton of tasty treats. One of my favorite holiday recipes are my ginger cookies. I thought that you might enjoy the recipe too.
Chewy and delicious, these cookies are giants in both size and snappy ginger flavor.
Prep: 20 min.
Bake: 11 min. per batch
Oven: 350 degrees
Makes: about 24 cookies
4 1/2 c. flour
4 tsp. ground ginger
2 tsp. baking soda
1 1/2 tsp. ground cinnamon
1 tsp. ground cloves
1/4 tsp. salt
1 1/2 c. shortening
2 c. sugar
2 eggs
1/2 c. molasses
3/4 c. sugar in the raw
Mix together flour, ginger, baking soda, cinnamon, cloves & salt; set aside. In a large bowl, beat shortening with a mixer on low speed for about 30 seconds; add the sugar and beat until combined; add eggs & molasses and beat until combined. Using mixer, add half of the flour mix. Add the remaining flour mix and knead with your hands until all ingredients are combined. This can be messy...I always seem to get cookie dough all over the place between the mixer and the kneading. Wear and apron!
Pour the sugar in the raw on a plate. Roll 2 in. balls of dough in your hand and then roll in the suar in the raw until the ball is coated. Place on an ungreased cookie sheet and gently push flat.
Bake at 350 degrees for 11-13 minutes. Cool on cookie sheet for a few minutes before transferring. They are very soft when they come out of the oven and fall apart easily. So definitely let them sit for a few.
These babies are delicious! Happy Holidays! Click here to download the recipe.
Button Garland
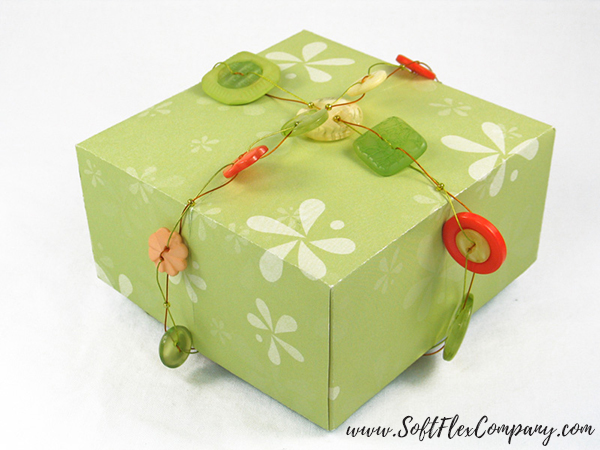
Designer Jamie Hogsett
Skill Level Beginner
Materials
Soft Flex Econoflex Wire, Spring Green Color, .019 Diameter - 45"
Soft Flex Econoflex Wire, Autumn Brown Color, .019 Diameter - 45"
2x3mm Gold Filled Crimp Tubes - 2 pcs
Size 11° Seed Beads in Sulphur Green - 24 pcs
10mm-25mm assorted Glass Buttons (with two holes, four holes, or a shank) - 26 pcs
Tools
Cutters
Crimping Pliers
Instructions
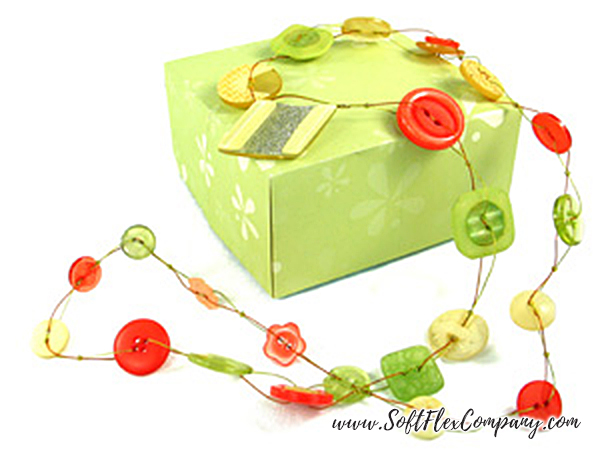
Step 1: Arrange the buttons in the order you want them on your garland. For the garland pictured here larger buttons were used at the ends, graduating to smaller buttons near the center.
Step 2: Use one wire to string 1 button to the center of the wire. If using a button with two holes, pass the wire through one hole and back through the other hole. If using a button with four holes, use diagonal holes. Use the other wire to string the same button to the center, stringing the button holes from the opposite direction. If using a button with a shank, use both wires to string the button.
Step 3: Use both wires to string 1 seed bead.
Step 4: Repeat Steps 2 and 3 for the length of the garland, until about 4" of wire remains. Use the tail ends of one end of the garland to string 1 crimp tube and 1 shank button. Pass back through the tube and crimp. Click here to see crimping instructions. Use the remaining tail ends to string 1 crimp tube. Pass both wires back through the tube, forming a loop large enough to fit around the button at the other end of the garland.
Holiday Gift Wrap Idea - Use Beading Wire Instead Of Ribbon

Embellish your Holiday Gift Wrap with Econoflex.
Here is a fun way to use our Econoflex Beading Wire to spruce up the handmade boxes from yesterday's blog post, adding an extra special holiday feel!
3 Free Holiday Packaging Ideas
One of my favorite things about giving gifts is wrapping them! I love using lots of different materials. I've put together a few ideas for how I have made some packages extra special recently.
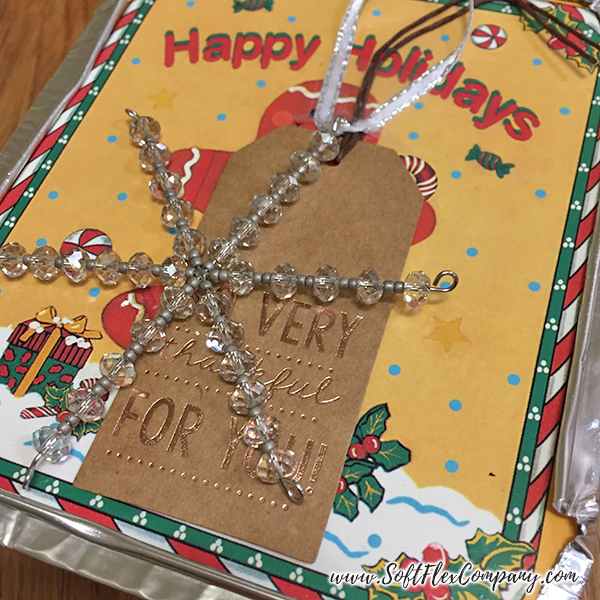
1. Add an ornament! I make a lot of baked goods over the holidays. It makes them feel extra special when I attach a handmade ornament like the snowflake shown above. Look below in this blog to learn how to make the snowflake ornament!
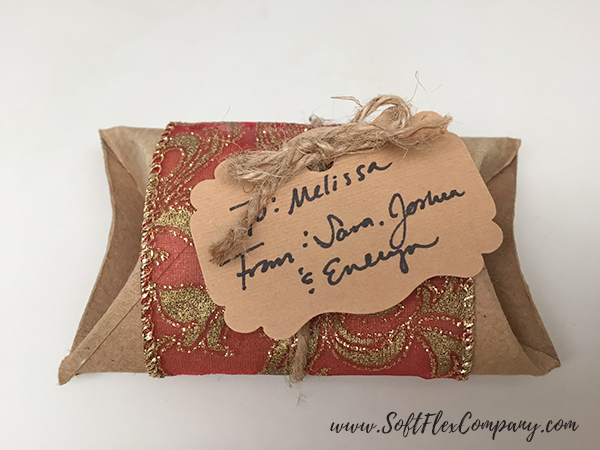
2. Would you believe that this package is made from a toilet paper roll? It is! I folded in the two sides to close up the ends. Then, I just attached a thick, beautiful ribbon around the middle to make it sparkle. You can add a gift tag and smaller ribbon to finish it off. This is a perfect size for jewelry gifts!
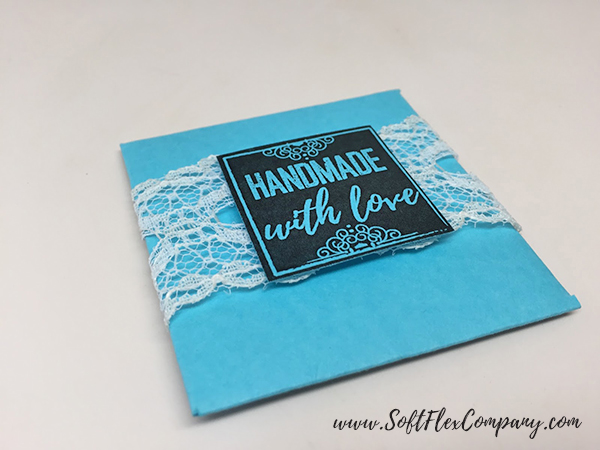
3. My co-worker Kristen designed these awesome, printable, petal boxes this year. I used the tag that she included but spiced it up with a little bit of left over lace ribbon that I had laying around. I love how this turned out. Again, this is a the perfect size for jewelry. Click here to print out a petal box.
The moral of the story is that you don't have to spend a lot of money or time to make a package feel special. In fact, you can often find really awesome things in your junk drawer of crafting supplies that you can use to dress up a package. Grab a pair of left over beads and tie them to the end of a ribbon. Or, braid some Soft Flex and wrap it around a small package to add some color with a modern feel. Whatever you do, make it handmade!
Click here to download Holiday Wrapping Paper!
Beaded Holiday Ornament Using Snow Flake Wire Forms And Magical Crimpers
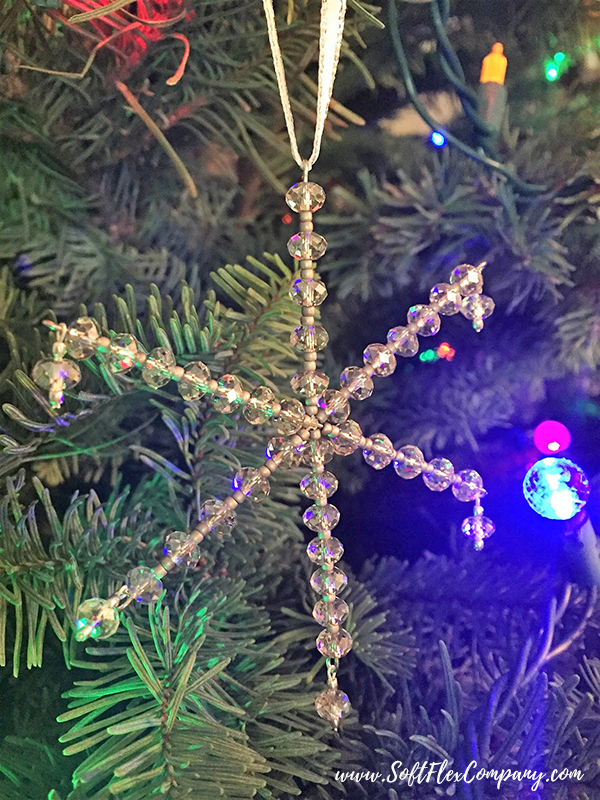
Designer Sara Oehler
These snowflakes are SUPER EASY and super pretty too! I found the Beadsmith snowflake forms at my local bead shop.
Materials
Soft Flex Extreme Beading Wire, 925 Sterling Silver Plated, .019 Diameter - 15 inches
2x2mm Crimp Tubes - 10 crimps
11/0 Seed Beads
4x6mm Swarovski Crystal Rondelle Beads - 41 beads
Snowflake Wire Form
Ribbon
Tools
Magical Crimping Pliers
Cutters
Chain Nose Pliers
Round Nose Pliers
Instructions
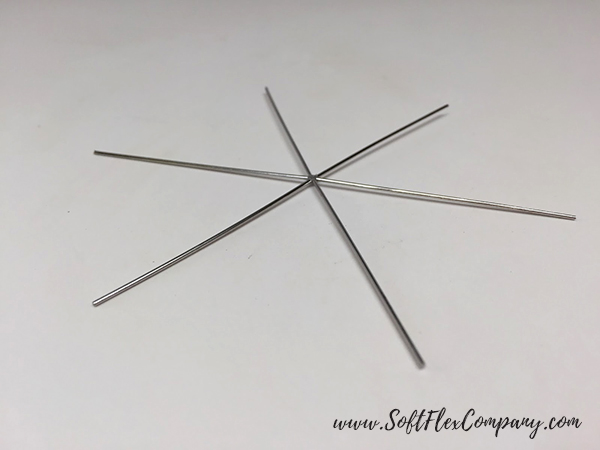
Step 1: The photo above shows what the snowflake wire form looks like to begin.
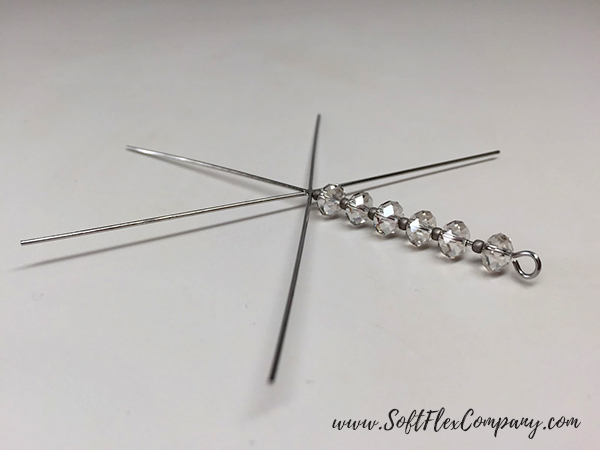
Step 2: On one leg, string a repeating pattern of a seed beads and a crystal, with a total of six of each type of bead. Use chain nose pliers to bend the wire leg just above the last crystal. Use the round nose pliers to create a basic loop (like and eye pin).
Step 3: Repeat Step 2 on every other leg, for a total of 3 legs.
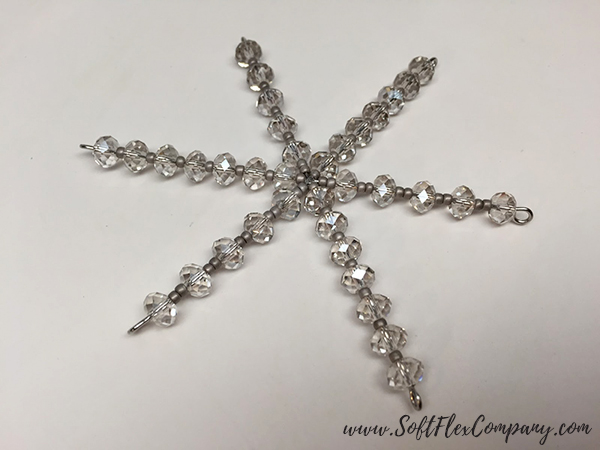
Step 4: String a pattern of two seed beads and a crystal, with a total of ten seed beads and five crystals. Use chain nose pliers to bend the wire leg just above the last crystal. Use the round nose pliers to create a basic loop (like and eye pin).
Step 5: Repeat Step 4 on the two remaining legs.
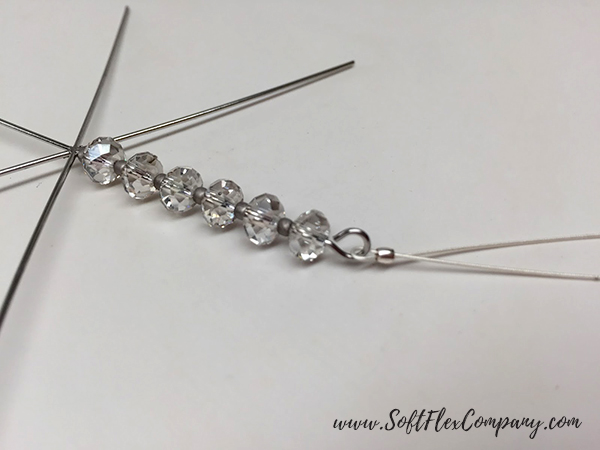
Step 6: Use 3 inches of beading wire to string a crimp tube. Pass the wire through a loop at the end of one wire leg and back through the crimp tube. Crimp the tube. Click here for Magical Crimping Pliers instructions.
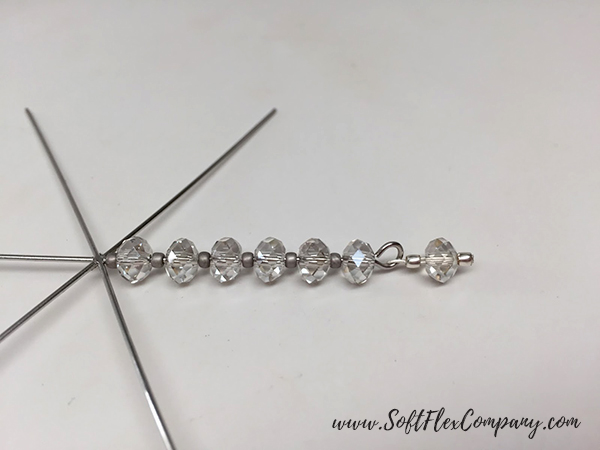
Step 7: Using both wires, string a crystal and a crimp tube. Crimp the tube and trim the excess wire.
Step 8: Repeat Step 7 on four more legs.
Step 9: Add a ribbon to hang the ornament on the last leg.
I hope that you enjoy making these sweet ornaments as much as I did. I am attaching them to packages of baked goods for some of my extended family as an extra treat. They will make the package really sparkle and shine. Happy Holidays and Merry Christmas!
Free Printable Gift Tags For Handmaid Holidays
Designer Kristen Fagan
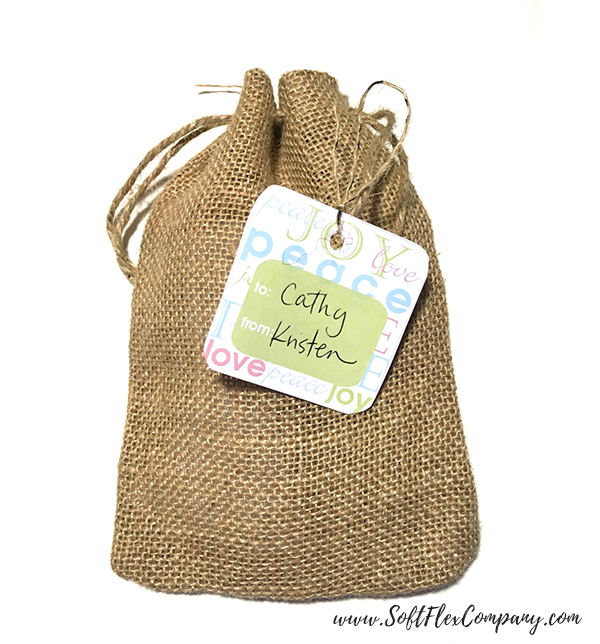
A pretty holiday gift tag is sometimes all you need to dress up a gift. This soft hued gift tags pairs nicely with kraft boxes and burlap baggies for an earthy simple holiday vibe. I also made some pretty snowflake tags and classic handmade tags to choose from.
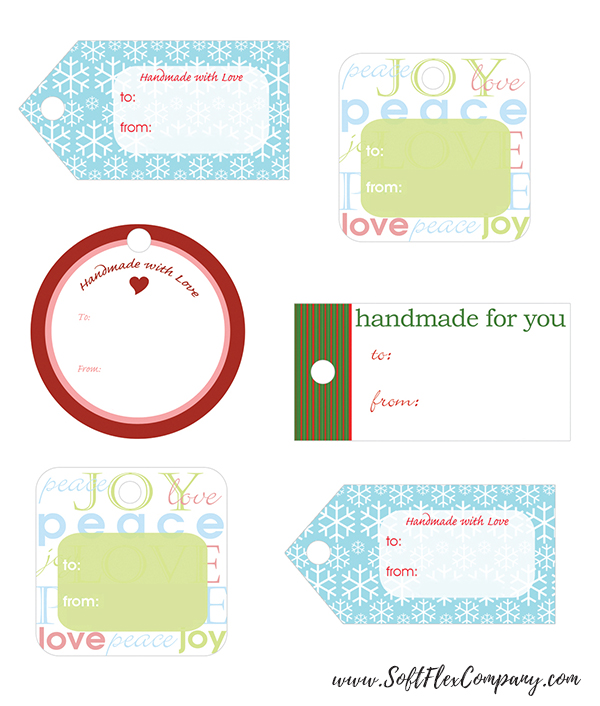
Download the file with the the link below and print out on heavy paper and attach to your gift boxes or bags. Happy Handmade Gift Giving!
Click here to download the Free Printable Gift Tags.
Paper Boxes For Holiday Gifts
Designer Jamie Hogsett
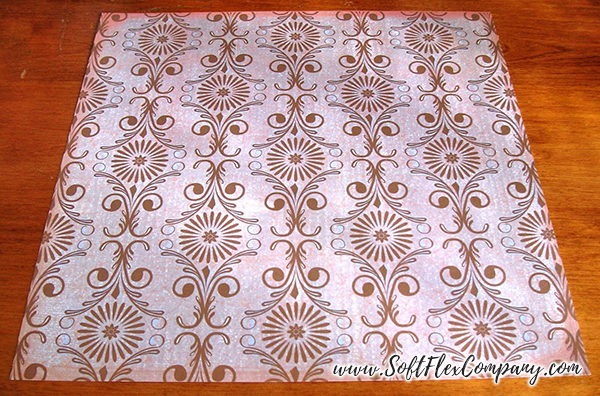
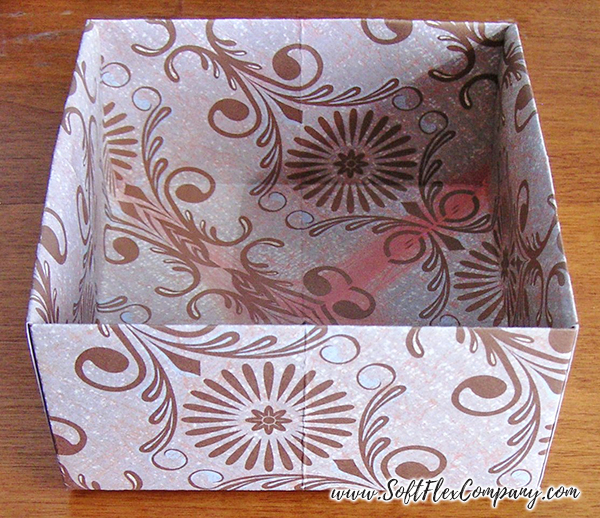
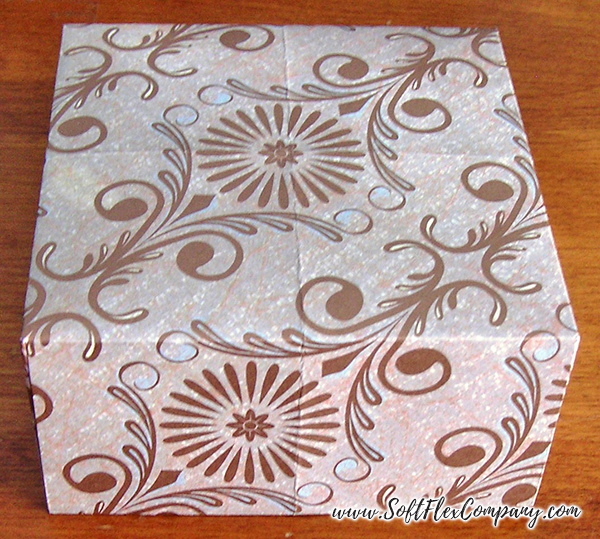
Learn to make paper boxes for a completely handmade holiday. Years ago, my grandma taught me how to make boxes using only paper and scissors, and my cousins and I made lots of paper boxes to hold our treasures. I'd forgotten all about them until a couple of years ago. Somehow my brain still remembered how to make them and I made several to use for gift-giving as I have a rather large stash of patterned papers. I gave Sara a box full of brass findings and I think she was most excited about the box as she's asked me multiple times for instructions on how to make them. Here you go, Sara, just in time for this year's holiday season. Enjoy! To make a box, you'll need scissors and two pieces of square patterned paper. The paper can be pretty much any size, as long as it's square. I've made boxes using paper as large as 12"x12", as small as 4 1/2"x4 1/2", and several sizes in between. The example shown here is with 12" paper.
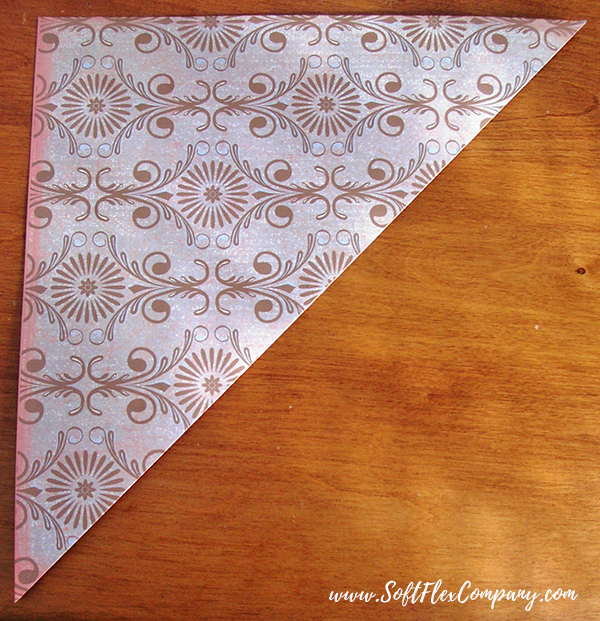
Turn the paper patterned side down and fold it diagonally in half. Unfold.
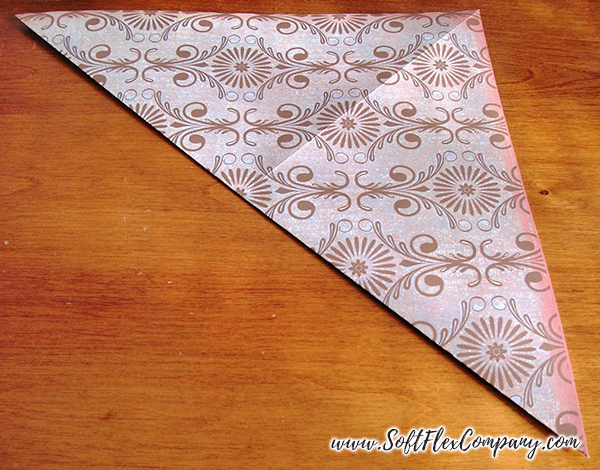
Fold in half diagonally again in the other direction. Unfold. There are now lines running diagonally from corner to corner.
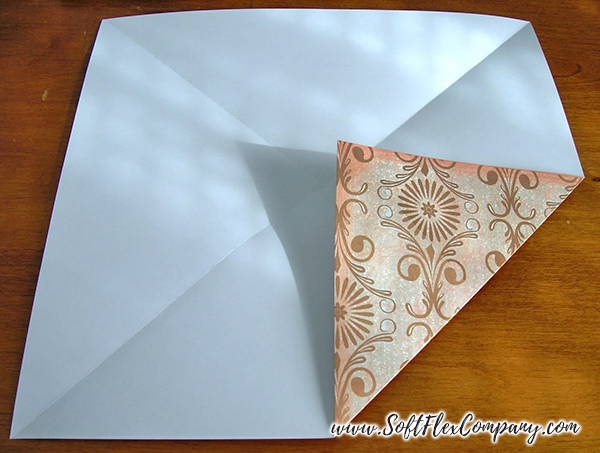
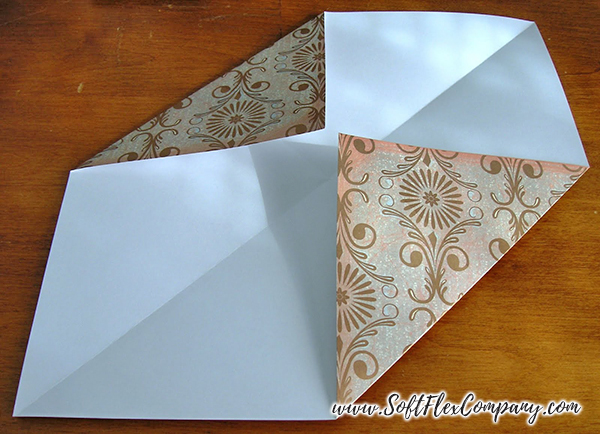
Place the point of one corner to the center of the paper and fold.
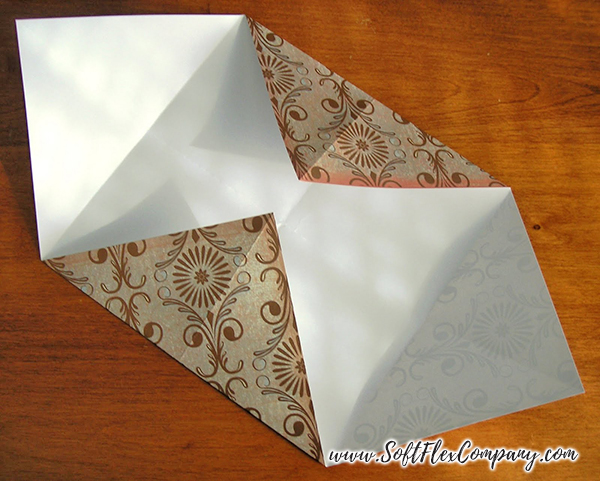
Repeat for the opposite corner. Unfold both folds.
Repeat with the two remaining corners. Unfold. There are now lines that form a square in the center of the paper.
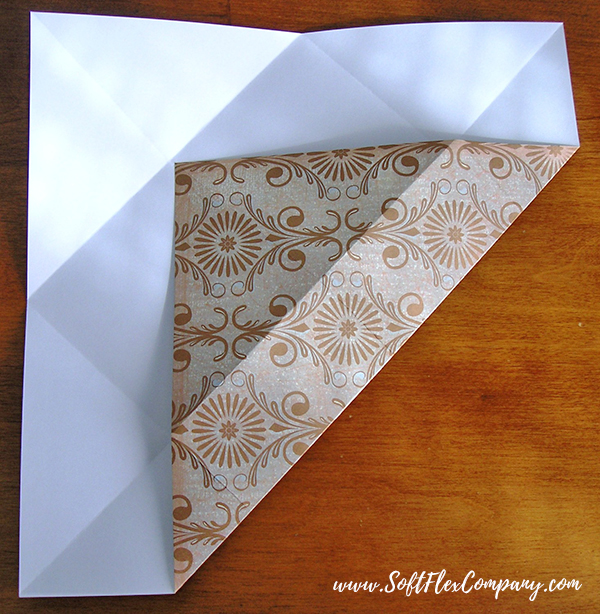
Place one corner to the center of the square line opposite the center of the paper. Unfold.
Use the same point and place it to the center of the closest square line. Unfold.
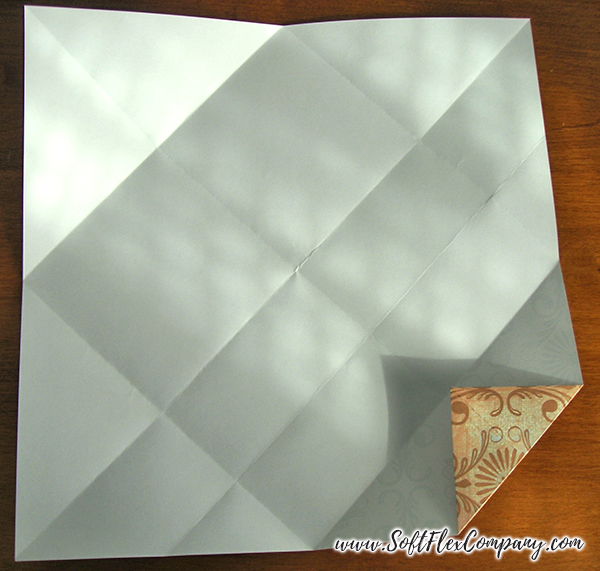
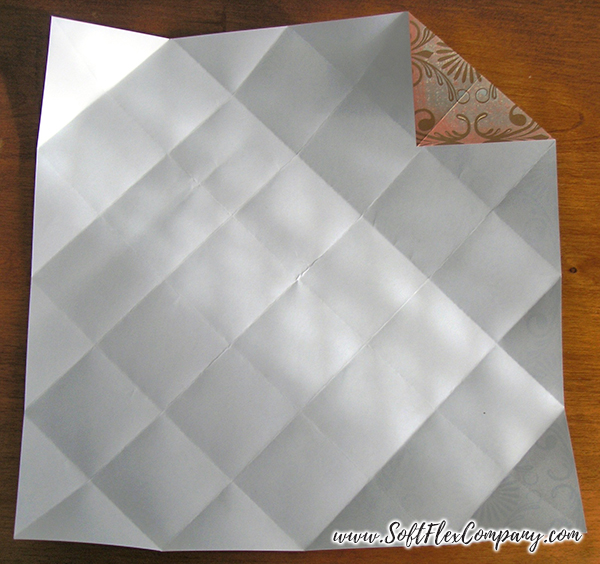
Repeat the previous two folds for each corner of the paper. The folds will form a grid of small squares on the paper. All folding from here until the box is complete will be refolding the same folds, so you won't be making any additional creases in the paper.
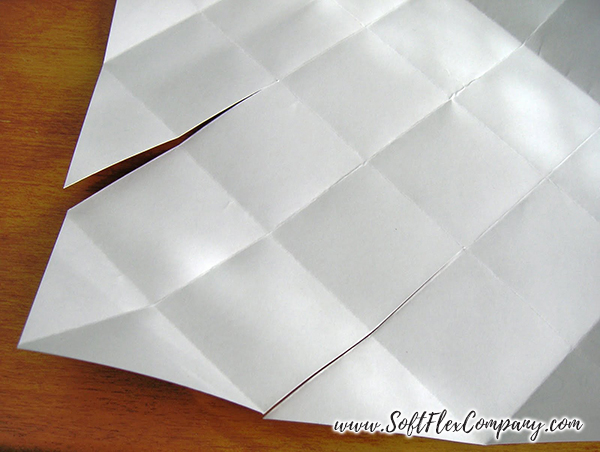
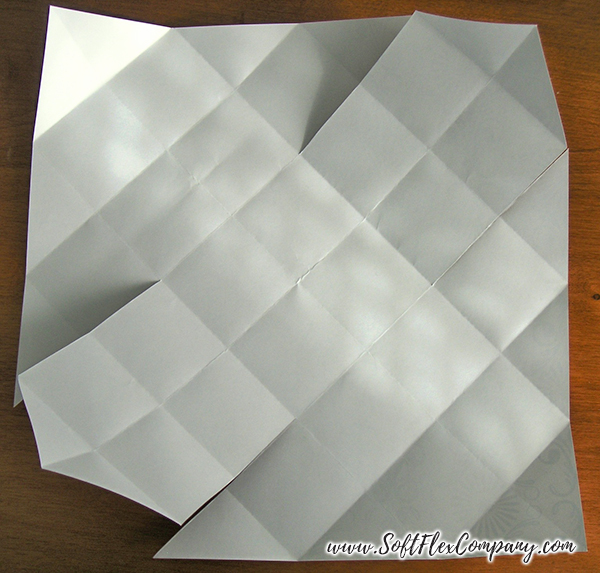
Use the scissors and one corner of the paper to cut two complete small squares up from both the lines right of the corner and left of the corner, as shown below.
Repeat the cuts on the opposite corner.
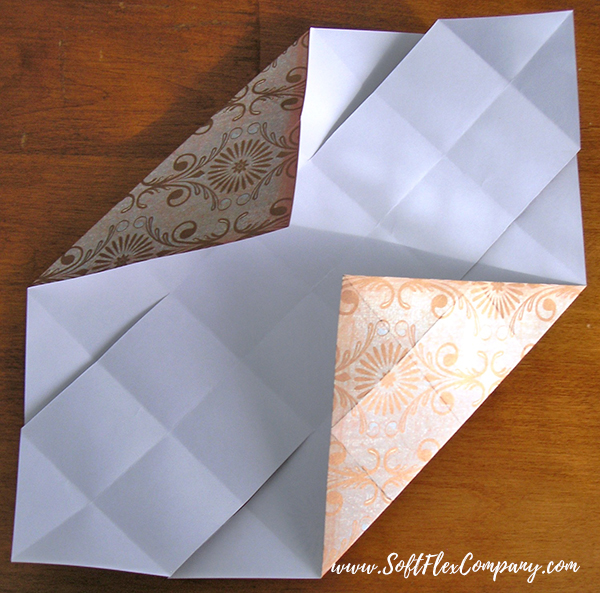
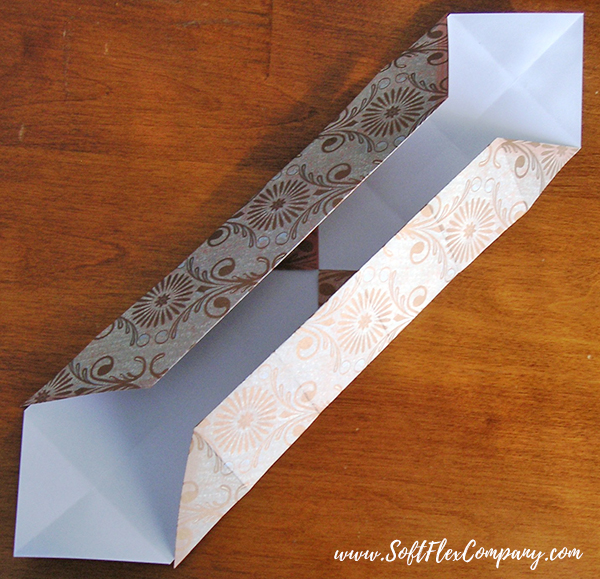
Fold the two uncut corners to the center of the paper.
Fold the paper in to the center again.
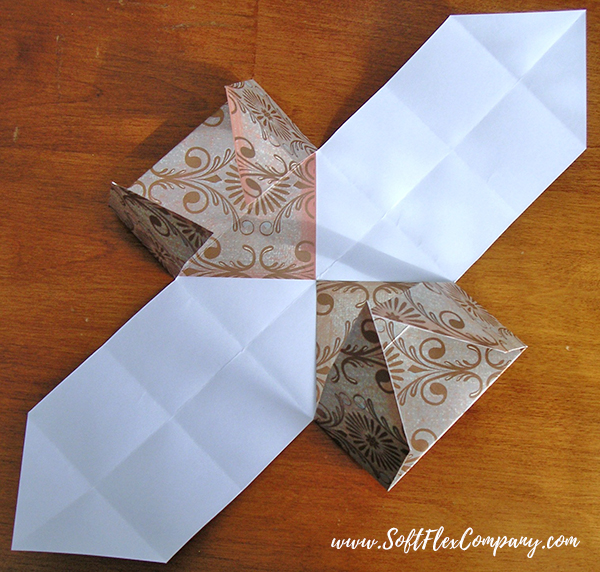
Unfold the previous fold. Fold the points of the paper in.
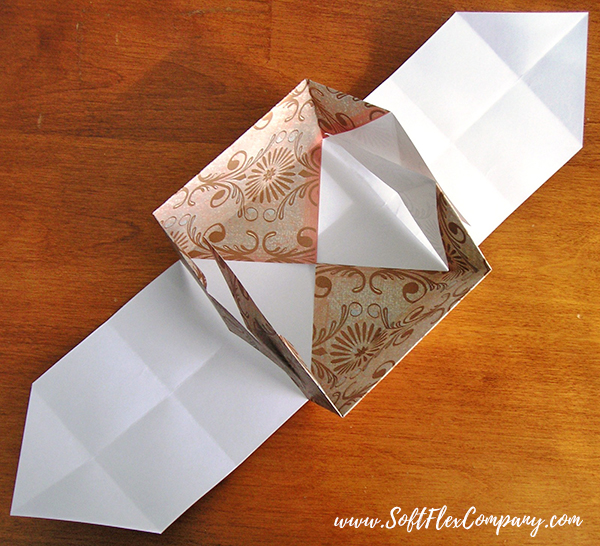
Stand the two sides of the paper up so that they are perpendicular to the work table.
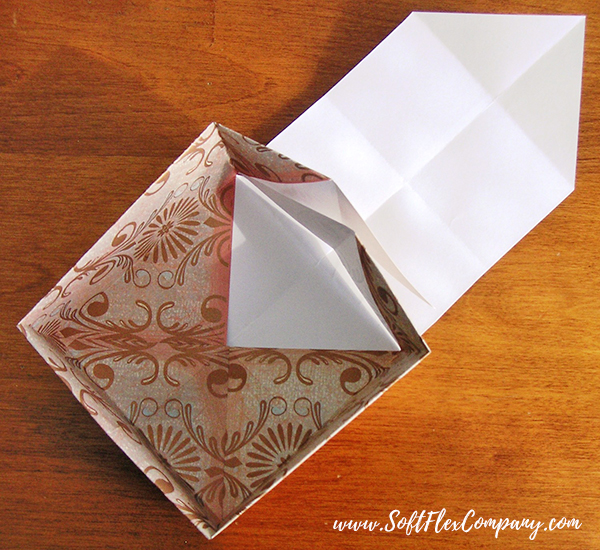
Hold the paper so that all corners are at 90 degree angles. Take one of the remaining corners and fold it up and over the folded in points. It is important to make sure the corners are at 90 degree angles so that the fold will properly and tightly hold.
Repeat with the last corner. Place one edge of the box down on the work table and firmly press down to help secure the box and all the folds of paper. Repeat with the other three sides. You may use a bone folding tool for this if you have one, but it isn't necessary.
Now one half of the box is complete!
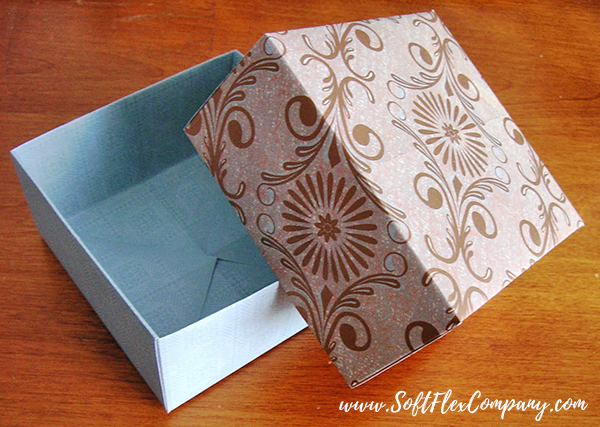
Repeat using a contrasting, coordinating paper to make the bottom half of the box.
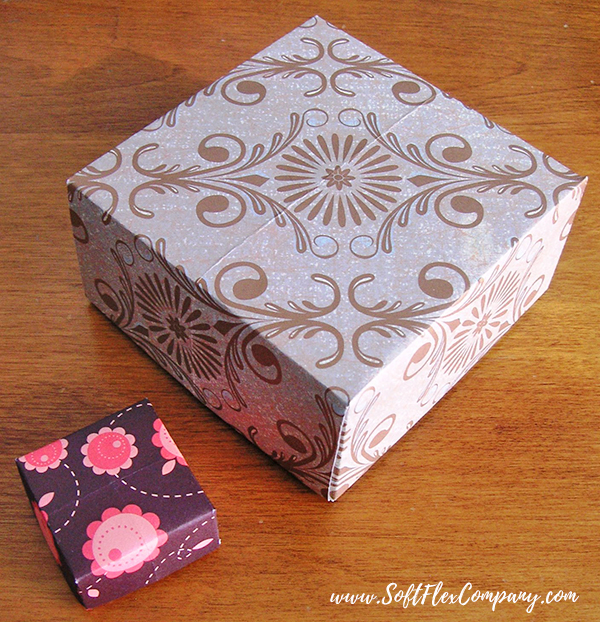
Have fun making these boxes in all sorts of sizes. The large box below was made with 12"x12" paper and has a finished size of 4 1/4" wide and 2 1/8" deep, perfect for necklaces. The small box was made with 4 1/2"x4 1/2" paper and has a finished size of 1 5/8" wide and 13/16" deep, perfect for a pair of earrings.
Join the fun in our VIB Facebook Group today! Stay in the know. Stay up to date. From our bead shows to our video shows and sales, you can stay in touch with us. The community is full of artistic and helpful beaders and crafty people. Inspire and be inspired. Share your pictures and get the beading bug from others!
Visit the Soft Flex Company YouTube Channel!
Blog contributor Thomas Soles is the Trade Show Coordinator for Soft Flex Company. His favorite stones are Lapis and Pietersite. His favorite hobby is day dreaming. And his favorite mustache is Tom Selleck's. As you can see, he has a healthy (or possibly unhealthy) sense of humor. You can write to him at Thomas@SoftFlexCompany.com


