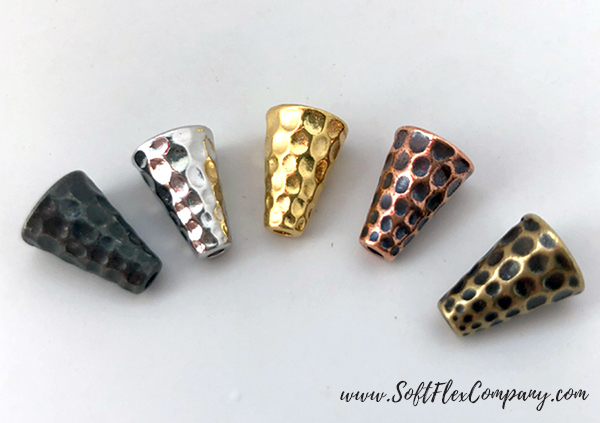
What do you know about beading cones? If you are a beginner beader, this may be an introduction. If you are a seasoned jewelry designer, you have probably used them many times and even made your own. Today we will look at three jewelry designs finished using cones before the clasp. We also have some videos for you to get a better idea of how they function. Let's learn about cones!
Beading cones are primarily used on multi-strand jewelry designs. As the multiple strands of beading wire converge near the crimp, you might be left with a messy intersection of wire. With a cone, you can conceal the gathered wire and crimps with a professional finding.
Beading cones can be used as a decorative element to earrings. They can be used to gather the end of a knitted design. They can even be used with chain, simply anchor the chain to an eye pin and add the cone.
Beading cones can add to the drama of your designs as they come in all shapes, sizes, and unique looks. You can finish your work with a high end cone or you can make your own. Making your own gives you options - you can create a tight coil with Soft Flex Craft Wire or you can make a loose, organic look with a messy wrapped cone. Whatever you choose, cones are a great way to personalize a jewelry piece.
These hammered cones have a wonderful handmade look to them. They look stunning on the end of a braided design created with a Kumihimo Disk. They are a great way to finish finer knitted wire or a very fine Viking Knit design. These cones are great for smaller more delicate designs like micro macrame made with Soft Flex Beading Wire. Finish your next multi-strand design with these beautiful cones!

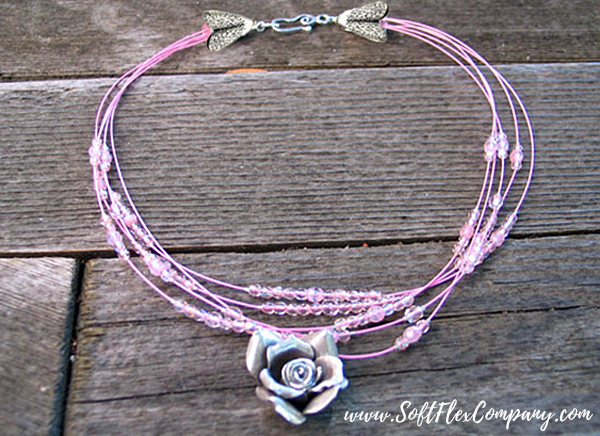
Pretty In Pink Necklace
Designer Sara Oehler
Skill Level Intermediate
Materials
Pink Rhodochrosite Soft Flex Beading Wire .019 diameter - 8'
Sterling Silver Spiral Hook
Clasp - 1 set
1x1mm Sterling Silver Crimp Tubes - 50 pcs
2x2mm Sterling Silver Crimp Tubes - 10 pcs
18 gauge Non-Tarnish Silver Soft Flex Craft Wire - 1 spool
Thai Silver Small Rose
Pendant - 1 pc
Large Sterling Silver
Cones with crease - 2 pcs
3mm Baby Pink Fire Polished
Beads - 85 pcs
4mm Baby Pink Fire Polished
Beads - 25 pcs
Tools
Chain Nose Pliers
Cutters
Round Nose Pliers
Crimping Pliers
Micro Crimping Pliers
Instructions
Step 1: Cut 5 lengths, each 20 inches long, of Pink .019 Soft Flex Wire.
Step 2: On first length, center flower; crimp a 1mm crimp tube on either side of flower using Micro Crimping Pliers.
Click here for crimping instructions. Add 1 - 3mm bead, 1 - 4mm bead, and 1 - 3mm bead on each side. Crimp again using 1mm crimp tubes on both sides.
Step 3: Center 1 - 3mm bead, 1 - 4mm bead, and 1 - 3mm bead on the 2nd length of wire.
Step 4: Crimp a 1mm crimp tube on either side using Micro Crimping Pliers.
Step 5: Measure .5 inch from last crimp on this length of wire.
Step 6: Repeat step 4. Add 1 - 4mm bead on both sides. Repeat steps 4 and 5.
Step 7: Repeat step 4. Add 1 - 3mm, 1 - 4mm and 1 - 3mm bead. Repeat steps 4 and 5.
Step 8: Repeat steps 6 and 7.
Step 9: Center 3 - 3mm beads, 1 - 4mm bead, and 3 - 3mm beads on the 3rd length of wire.
Step 10: Repeat steps 4 and 5.
Step 11: Repeat step 4. Add 1 - 3mm, 1 - 4mm and 1 - 3mm bead. Repeat step 4.
Step 12: Center 5 - 3mm beads, 1 - 4mm beads, and 5 - 3mm beads on the 4th length of wire.
Step 13: Repeat steps 4 and 5.
Step 14: Repeat step 4. Add 3 - 3mm beads, 1 - 4mm bead, and 3 - 3mm beads. Repeat step 4.
Step 15: Repeat step 12 on the 5th length of wire.
Step 16: Repeat step 4 and 5.
Step 17: Repeat step 4. Add 3 - 3mm beads, 1 - 4mm bead, and 3 - 3mm beads. Repeat steps 4 and 5.
Step 18: Repeat step 4. Add 1 - 3mm bead, 1 -4mm bead and 1 - 3mm bead. Repeat step 4.
Step 19: Cut 2 inches of Soft Flex Craft Wire; create a
wire wrapped loop. Crimp each strand of Pink Soft Flex to the loop using a 2mm crimp tube and Regular Crimping pliers.
Step 20: Repeat step 19 on the opposite side of the design.
Step 21: Pull Soft Flex Craft Wire through Sterling Silver cone. Wire wrap each end to either side of the clasp.
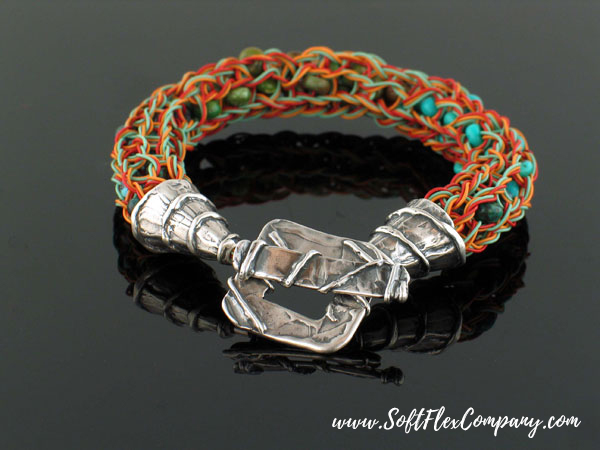
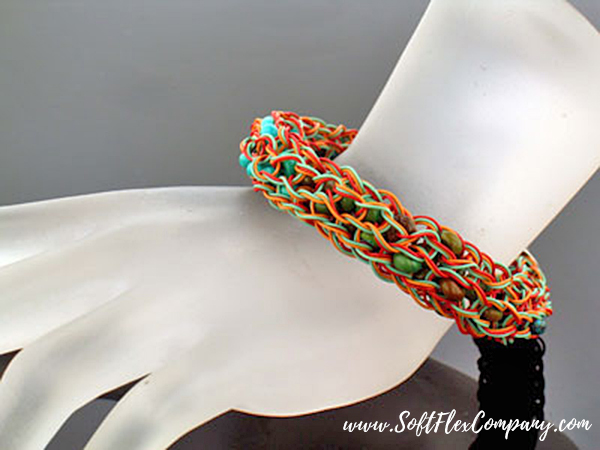
Knitted Turquoise Cuff
Designer Jamie Hogsett
Skill Level Intermediate
Materials
Fluorite Soft Flex Beading Wire .019 diameter
Red Jasper Soft Flex Beading Wire .019 diameter
Citrine Soft Flex Beading Wire .019 diameter
21mm Sterling Silver Square
Toggle Clasp - 1 set
14mm x 18mm Sterling Silver
Cone - 2 pcs
3x3mm Sterling Silver Crimp Tubes - 2 pcs
5mm x 3mm Turquoise Rondelles - 1 strand
Tools
3-Pin Knitting Spool and Stylus
Cutters
Mighty Crimping Pliers
Instructions
Finished Size: 8 1/4"
Step 1: Without cutting any wire from the spool, use the Red Jasper wire to string the entire strand of turquoise rondelles.
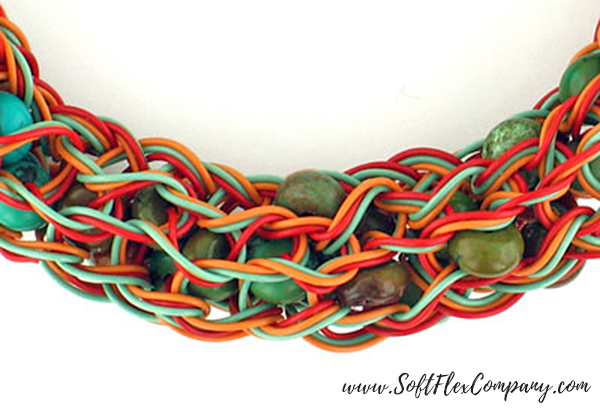
Step 2: Without cutting any wire from the spools, use all three wires and the Knitting Spool to knit a 7" length of knitted wire using
Style 1, making sure to leave 3" of wire at the beginning of the knitted wire and moving 1 turquoise rondelle up and between pegs for every other stitch. Cut the wire from the spool, leaving a 3" tail. Set aside.
Step 3: Use all three wires on one end of the knitted piece to string 1 cone, 1 crimp tube, and one half of the clasp. Pass back through the tube, snug the beads making sure the cone covers the end of the knitted wire, and crimp. Click here for crimping instructions. Trim the wire ends.
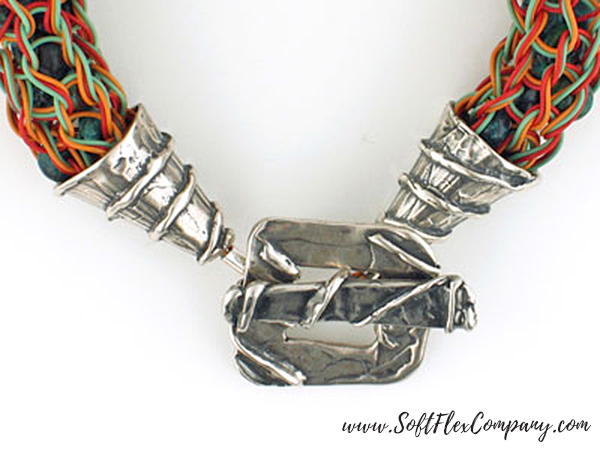
Step 4: Repeat Step 3 for the other end of the bracelet.
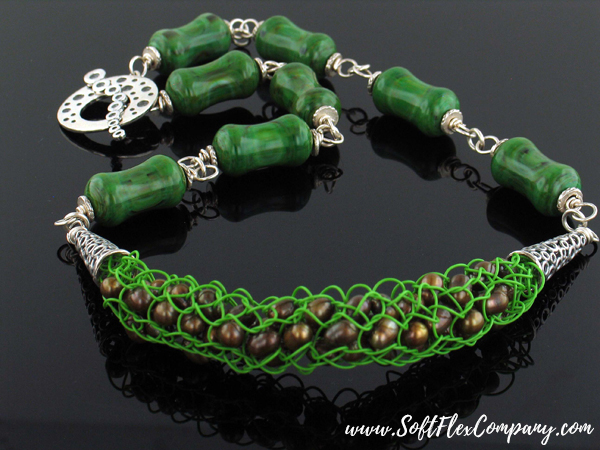
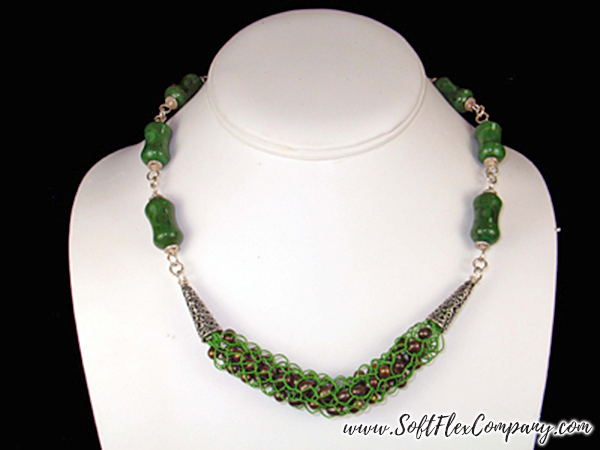
Evergreen Necklace
Designer Jamie Hogsett
Skill Level Intermediate
Materials
Peridot Soft Flex Beading Wire .019 diameter
20 gauge Non-Tarnish Silver Soft Flex Craft Wire
24mm Sterling Silver
Toggle Clasp from
Somerset Silver - 1 set
9x24mm Sterling Silver
Cones from
Somerset Silver - 2 pcs
6mm Sterling Silver Heishi
Spacers - 15 pcs
5mm Silver Filled Soldered Jump Rings - 8 pcs
5mm Silver Filled Open Jump Rings - 2 pcs
2x2mm Sterling Silver Crimp Tubes - 2 pcs
5x6mm Bronze Drop
Pearls - 1 pcs
12x22mm Moss Green Lucite
Beads - 8 pcs
Tools
4-Pin Knitting Spool with Stylus
Cutters
Crimping Pliers
Chain Nose Pliers
Round Nose Pliers
Instructions
Step 1: Use the Peridot wire (do not cut any wire from the spool) to string all the pearls. Use the wire and the Knitting Spool to knit a 4" length of knitted wire using
Style 1, making sure to leave a 3" tail of wire at the beginning of the wire and adding 1 pearl to each knitted stitch. Cut the wire from the spool, leaving a 3" tail. Set aside.
Step 2: Use 2" of 20-gauge wire to
form a wire wrapped loop. Use one end of the beading wire to string 1 crimp tube and the wrapped loop just formed. Pass back through the tube and crimp. Click here for crimping instructions. Use the 20-gauge wire to string 1 cone (wide end first). Snug the cone onto the knitted wire and form a wire wrapped loop that attaches to 1 soldered jump ring. Repeat entire step for the other end of the knitted wire piece.
Step 3: Use 4" of 20-gauge wire to form a wire wrapped loop that attaches to the previous jump ring. String 1 heishi spacer, 1 Lucite bead, and 1 heishi spacer; form a wire wrapped loop that attaches to 1 soldered jump ring.
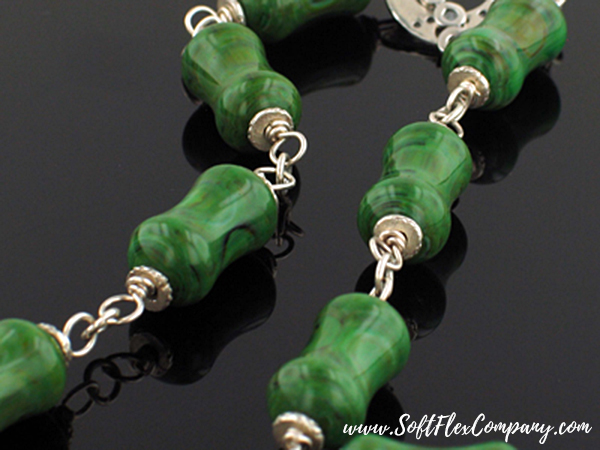
Step 4: Repeat Step 3 twice. Repeat Step 3, omitting the soldered jump ring. Use 1 open jump ring to attach the previous wire wrapped loop to one half of the clasp.
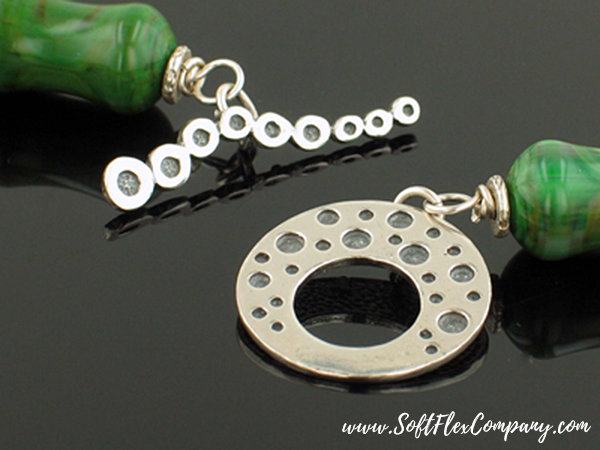
Step 5: Repeat Steps 3 and 4 for the other half of the necklace.
Jewelry Videos Featuring Cones
As Seen On Beads Baubles And Jewels: "Southwest", Episode 2704
New Products & Closing Off A Kumihimo Braid Made With Soft Flex
How To Finish A Viking Knit Jewelry Design
Make Tassel Earrings With Harvest Moon Trios And Cones
Join the fun in our VIB Facebook Group today! Stay in the know. Stay up to date. From our bead shows to our video shows and sales, you can stay in touch with us. The community is full of artistic and helpful beaders and crafty people. Inspire and be inspired. Share your pictures and get the beading bug from others!
Visit the Soft Flex Company YouTube Channel!

Blog contributor Thomas Soles loves Jazz Age writers and crunchy french fries. His favorite gemstones are Lapis and Pietersite. His favorite hobby is day dreaming. And his favorite mustache is Freddie Mercury's. As you can see, he has a healthy (or possibly unhealthy) sense of humor. You can write to him at Thomas@SoftFlexCompany.com


