

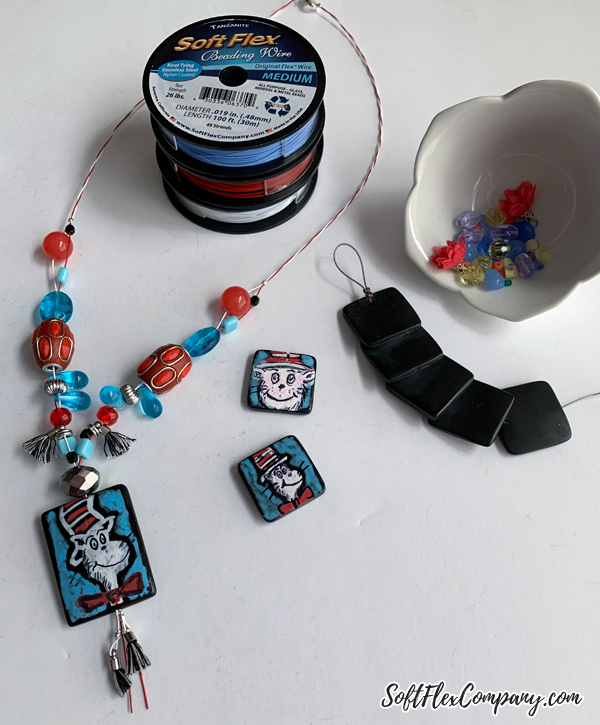
This week on Free Spirit Beading with Kristen Fagan, we paint a Cat in the Hat bead pendant and make a necklace with our Whimsical Beadtastical Bead Mix and Trios! Using your own hand painted beads is a great way to express your own personal style. Since Whimsical Beadtastical was inspired by Dr. Seuss it was only fitting to pay homage to The Cat in the Hat with this hand painted pendant!

Paint a Cat in the Hat Pendant & Make a Beaded Necklace
Today, I'm combining my two creative loves: painting and beading! While unveiling our Whimsical Beadtastical design kit on the Soft Flex Company Facebook Page, Sara challenged me to paint the large matte onyx bead included in the kit. And ... challenge accepted!
Supplies:
Soft Flex Whimsical Beadtastical Trios Beading Wire Pack
Soft Flex Exclusive Whimsical Beadtastical Bead Mix
2x2mm Crimp Tubes in Sterling Silver
Posca Paint Pens
Fine Point Permanent Marker
Mod Podge
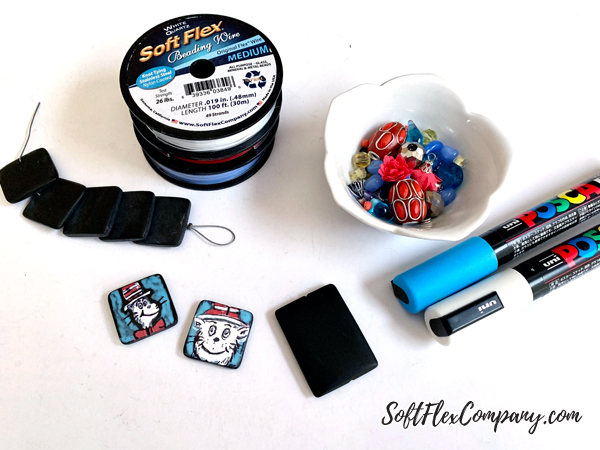
I'm using beads from our exclusive Whimsical Beadtastical bead mix made for Soft Flex Company by Jesse James Beads paired with our Whimsical Beadtastical Trios beading wire pack, and a large matte onyx bead pendant that was included in our Whimsical Beadtastical design kit.
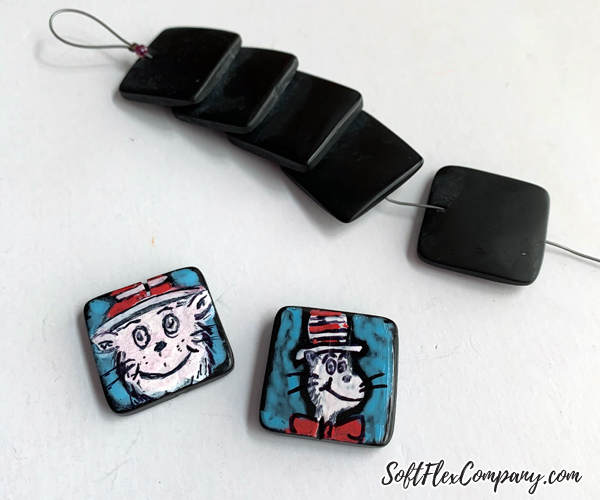
I first tested some ideas out on our matte onyx square beads available online to make sure the paint pens worked. I'm sure you could also use regular acrylic paint or craft paint with brushes as well but I loved how the examples with the paint pens turned out so, I stuck with that method. Once the paint is dry, you can add in black details with an untra fine tip black permanent marker. Lastly, varnish over the painted side with Mod Podge. I used the gloss version.
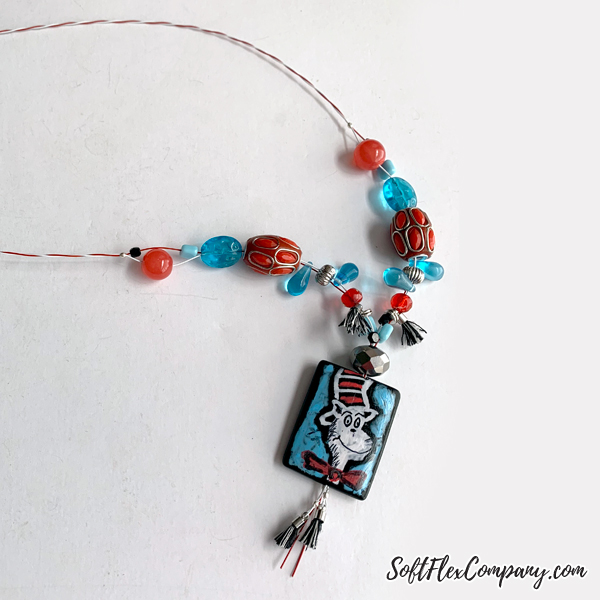
Once your pendant is done, you can begin stringing! I started with 2 strands of red and 2 strands of white beading wire. I threaded it down the pendant, held it in place with a bead stopper and then turned to those on the live video to help me choose beads.
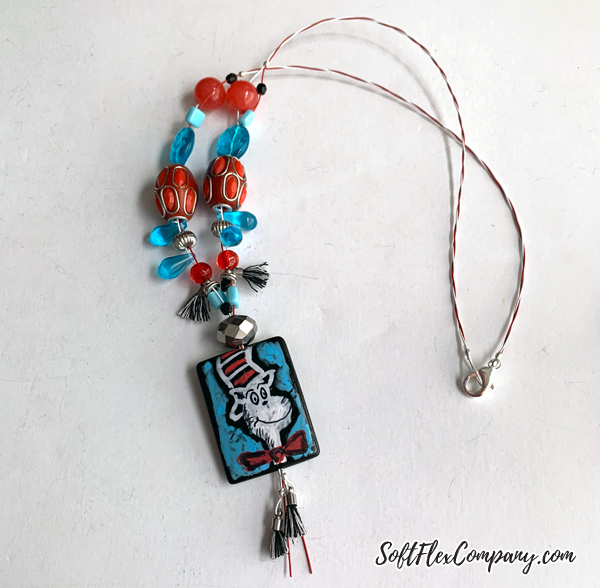
If the beads fit through both strands, I strung them through both. If not, I strung it on one strand and allowed the color of the second strand to peek through. It added to the whimsy! Once I used up all my beads, I crimped the two wires together to hold the beads in place and twisted the wire in a candy cane pattern up the back to the clasp & repeated this on the other side. Crimp the clasp and loop and you are done! Beadtastic indeed!

If you like this idea, you may like these other project ideas that use the Whimsical Beadtastical Trios and Bead Mix:
Make Earrings At Home Using Beading Wire
Learn How To Make Earrings At Home With A Jewelry Making Kit for Beginners
How to Make Bugle Bead Fringe Tassel Earrings with Soft Flex
Join our Facebook group – VIB. Stay in the know. Stay up to date. From our bead shows to our video shows and sales, you can stay in touch with us. The community is full of artistic and helpful beaders and crafty people. Inspire and be inspired. Share your pictures and get the beading bug from others!
Visit the Soft Flex Company YouTube Channel!


Kristen Fagan is the Website Graphic Designer and a Jewelry Making Educator for Soft Flex® Company. She is the co-author of Seed Bead Revolution, an artist and creativity guide. She currently lives in Arizona with her husband, their two sons and two dogs. When she's not painting, drawing or beading, she enjoys reading, yoga, exploring the outdoors and traveling. Her favorite stones are Opal, Turquoise, and Quartz and she can't bead without Bead Stoppers. You can email her at Kristen@softflexcompany.com or visit her Website | Facebook | Instagram