Fluttering happy hearts filled with love. Valentine's Day is a great time to create some adorable jewelry for your sweetheart or loved ones. Bright vivid colors bouncing out of your jewelry supply box. Giddy beads dancing on the necklace you're stringing. It is a time to feel loved and give love. It's a time to honor our passion and embrace our soulmates. Let's make some jewelry that will express our devotion and appreciation.
Don't miss our other holiday jewelry ideas. Follow our blog and check out our Free Beading Project Ideas. Subscribe to our YouTube channel for more tips. Visit our Facebook page if you want to catch our live shows and sales. And join our Facebook group – VIB, if you want to join a friendly community or jewelry designers and all around creative people. We would love to see your Valentine's Day jewelry. Post pictures on our VIB group!

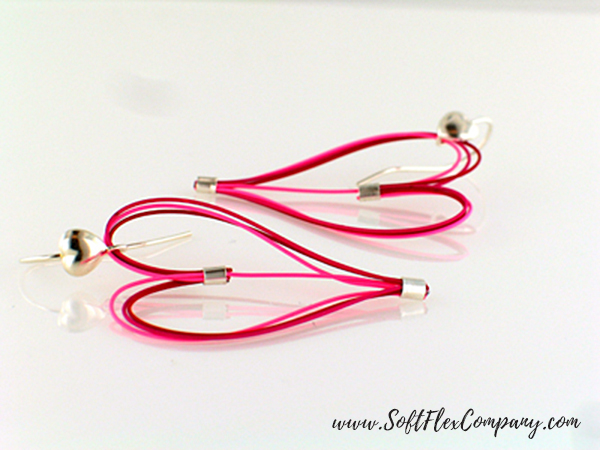
Be My Earrings
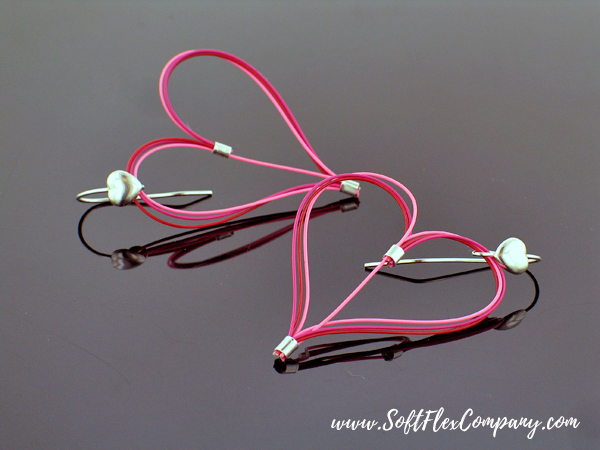
Designer Sara Oehler
Skill Level Beginner
Materials
Be My Valentine Trios Beading Wire Set (Spinel, Pink Rhodochrosite and Pink Tourmaline) - 20" each color
3x3mm Sterling Silver Crimp Tubes - 4 pcs
Sterling Silver Heart
Ear Wires - 1 pair
Tools
Cutters
Mighty Crimping Pliers
Instructions
Finished Size: 2"
Step 1: Cut 4 five inch lengths of wire in each of the 3 colors. Arrange the wires into 4 piles containing 1 strand of each color. Choose 2 piles of wire and set the other 2 piles aside.
Step 2: Hold all 6 wire ends together and use them to string 1 crimp tube. Adjust the wires and crimp about 1 1/2 inches from the end.
Click here for crimping instructions. Trim 5 of the 6 wires at the crimp.
Step 3: Bend 3 wires to the left and 3 wires to the right to create the heart shape. Use 3 of the wires to string 1 ear wire.
Step 4: Use all 6 wire ends and the uncut strand from Step 2 to string 1 crimp tube. Adjust the crimp so that there is about 2 1/2 inches of wire on each side of the heart and the one strand in the middle is about 1 inch. Crimp the crimp tube and trim the excess wire.
Step 5: Repeat Steps 2-4 for a second earring.
Valentine Cards

Art by Damien Shay and Kristen Fagan
Click here to download the Valentine Cards.
Valentine Gift Wrap Sheet 8x10

Art by Damien Shay and Kristen Fagan
Click here to download the Valentine Gift Wrap Sheet.
Be My Valentine Necklace
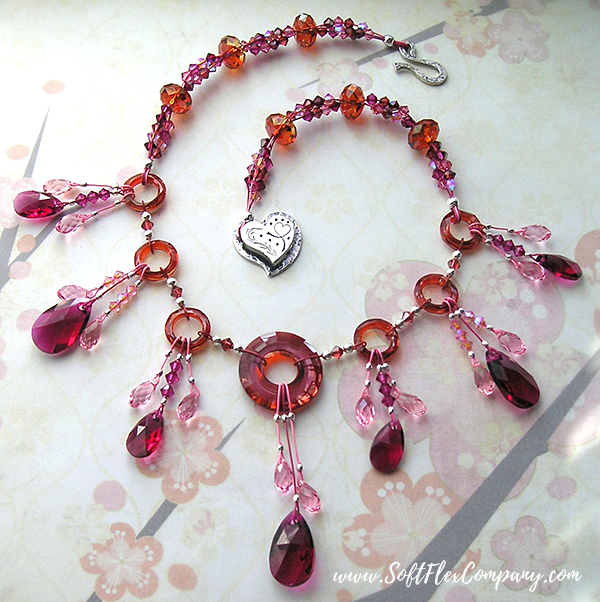
Designer Jamie Hogsett
Skill Level Intermediate
Materials
Be My Valentine Trios Beadling Wire Set (Pink Rhodochrosite, Pink Tourmaline, Spinel)
Sterling Silver Heart Hook and Eye
Clasp - 1 set
2x2mm Sterling Silver Crimp Tubes - 54 pcs
3x3mm Sterling Silver Crimp Tubes - 4 pcs
3mm Sterling Silver Crimp Covers - 12 pcs
4mm Sterling Silver Crimp Covers - 4 pcs
25mm Crystallized Swarovski Elements Red Magma Disk Pendant - 1 pc
14mm Crystallized Swarovski Elements Red Magma Cosmic Rings - 6 pcs
12x22mm Crystallized Swarovski Elements Ruby pear-shaped Pendant - 3 pcs
9x16mm Crystallized Swarovski Elements Ruby pear-shaped Pendant - 4 pcs
5x10mm Crystallized Swarovski Elements Light Rose trip-drilled Drop - 14 pcs
12x8mm Crystallized Swarovski Elements Red Magma Rondelles - 6 pcs
4mm Crystallized Swarovski Elements Rose Bicones - 20 pcs
4mm Crystallized Swarovski Elements Light Rose Bicones - 28 pcs
4mm Crystallized Swarovski Elements Ruby Satin Bicones - 20 pcs
4mm Crystallized Swarovski Elements Padparadscha Satin Bicones - 26 pcs
4mm Crystallized Swarovski Elements Fuchsia Bicones - 30 pcs
Tools
Cutters
Crimping Pliers
Mighty Crimping Pliers
Magical Crimping Pliers
Instructions
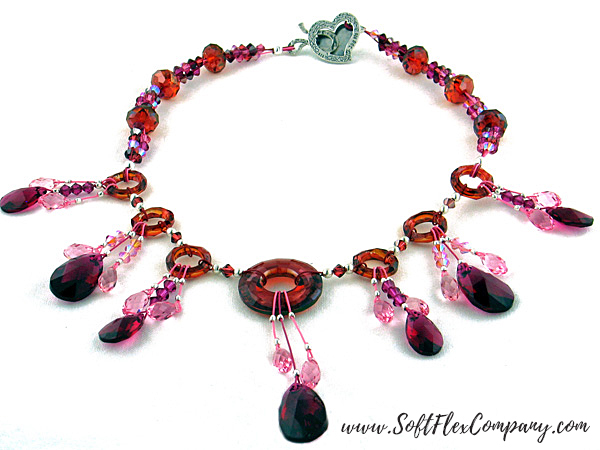
Finished Size: 17 3/4"
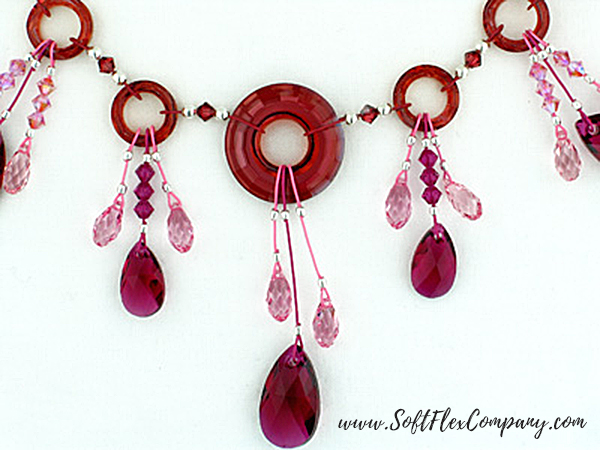
Step 1: Use 3" of Pink Tourmaline wire to string one 2mm x 2mm crimp tube and the Disk Pendant. Pass back through the crimp tube, snug the tube against the Disk Pendant, and crimp using Magical Crimping Pliers.
Click here for Magical Crimping Plier instructions. Use the other end of the wire to string one 2mm x 2mm crimp tube and one 12x22mm pear-shaped Pendant. Place the crimp tube 1" from the previous crimp tube, pass the wire back through the tube, and crimp using Magical Crimping Pliers. *Use 3" of Pink Rhodochrosite wire to string one 2mmx2mm crimp tube and the Disk Pendant, on one side of the Pink Tourmaline wire. Pass back through the crimp tube, snug the tube against the Disk Pendant, and crimp using Magical Crimping Pliers. Use the other end of the wire to string one 2mm x 2mm crimp tube and one 5x10mm Light Rose top-drilled Drop. Place the crimp tube 1/2" from the previous crimp tube, pass back through the tube, and crimp using Magical Crimping Pliers. Repeat from *, on the other side of the Pink Tourmaline wire, and leaving 1/4" of wire between the two crimp tubes. Set aside.
Step 2: Use 3" of Pink Tourmaline wire to string one 2mm x 2mm crimp tube and 1 Cosmic Ring. Pass back through the crimp tube, snug the tube against the Cosmic Ring, and crimp using Magical Crimping Pliers. Use the other end of the wire to string 1 crimp tube and one 12x22mm pear-shaped Pendant. Place the crimp tube 1/2" from the previous crimp tube, pass the wire back through the tube, and crimp using Magical Crimping Pliers. *Use 2 1/2" of Pink Rhodochrosite wire to string one 2mm x 2mm crimp tube and the Cosmic Ring, on one side of the Pink Tourmaline wire. Pass back through the crimp tube, snug the tube against the Cosmic Ring, and crimp using Magical Crimping Pliers. Use the other end of the wire to string 2 Light Rose 2XAB Bicones, one 2mmx2mm crimp tube, and one 5x10mm Light Rose top-drilled Drop. Pass back through the tube and crimp using Magical Crimping Pliers. Repeat from *, on the other side of the Pink Tourmaline wire, using 3 Light Rose 2XAB Bicones. Set aside. Repeat entire step using a second Cosmic Ring.
Step 3: Use 3" of Pink Tourmaline wire to string one 2mm x 2mm crimp tube and 1 Cosmic Ring. Pass back through the crimp tube, snug the tube against the Cosmic Ring, and crimp using Magical Crimping Pliers. Use the other end of the wire to string 3 Fuchsia Bicones, 1 crimp tube and one 9x16mm pear-shaped Pendant. Pass the wire back through the tube, and crimp using Magical Crimping Pliers. *Use 2 1/2" of Pink Rhodochrosite wire to string one 2mm x 2mm crimp tube and the Cosmic Ring, on one side of the Pink Tourmaline wire. Pass back through the crimp tube, snug the tube against the Cosmic Ring, and crimp using Magical Crimping Pliers. Use the other end of the wire to string one 2mmx2mm crimp tube, and one 5x10mm Light Rose top-drilled Drop. Place the tube 1/4" from the previous tube, pass back through the tube and crimp using Magical Crimping Pliers. Repeat from *, on the other side of the Pink Tourmaline wire. Set aside. Repeat entire step three times.
Step 4: Use 3" of Spinel wire to string one 2mmx2mm crimp tube and the Disk Pendant. Pass back through the tube and crimp. Cover the tube with a 3mm crimp cover. String 1 Padparadscha Satin Bicone, one 2mm x 2mm crimp tube, and one Cosmic Ring used in Step 3. Pass back through the tube and crimp.
Click here for crimping instructions. Cover the tube with a 3mm crimp cover. Repeat to attach the Cosmic Ring to one Cosmic Ring used in Step 2. Repeat to attach the Cosmic Ring from Step 2 to one Cosmic Ring from Step 3. Repeat entire step to attach three Cosmic Rings to the other side of the Disk Pendant.
Step 5: Form two piles of Crystal Bicones, with each pile containing 9 Light Rose 2XAB Bicones, 10 Rose Bicones, 9 Fuchsia Bicones, 10 Ruby Satin Bicones, and 10 Padparadscha Satin Bicones. Mix the Bicones together and use them as bead soup in the following step.
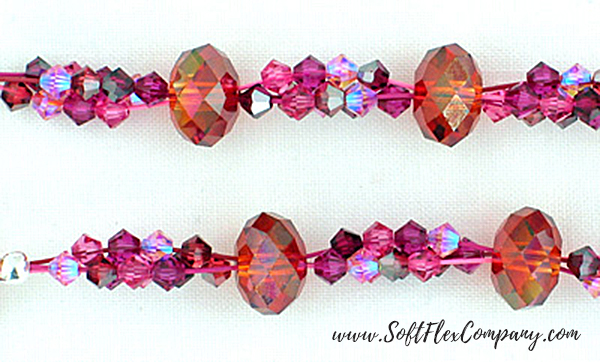
Step 6: Cut 9" of Spinel wire, 9" of Pink Tourmaline wire, and 9" of Pink Rhodochrosite wire. Use all three wires to string one 3mm x 3mm crimp tube and one of the end Cosmic Rings in the center section. Pass back through the tube and crimp.
Click here for crimping instructions. Cover the tube with one 4mm crimp cover. *Use the Spinel wire to string 4 Bicones from one pile of bead soup formed in Step 5. Repeat using the Pink Tourmaline wire. Repeat using the Pink Rhodochrosite wire. Use all three wires to string 1 Red Magma Rondelle. Repeat from * three times, omitting the final Rondelle. Use all three wires to string one 3mm x 3mm crimp tube and one half of the clasp. Pass back through the tube and crimp. Cover the tube with a 4mm crimp cover. Repeat entire step for the other end of the necklace, using the other half of the clasp.
Straight from the Heart Dangle Earrings

Designer Virginia Magdaleno
Skill Level Beginner
Materials
Silver Plated Ear Wires - 1 pair
22 Gauge 1.5"
Sterling Silver Eye Pins - 6 pcs
Sterling Silver Rose
Crystal Charms - 6 pcs
Tools
Chain Nose Pliers
Round Nose Pliers
Cutters
Instructions
Step 1: Use Soft Flex Professional Round Nose Pliers to attach 1 charm to the end of each eye pin.
Step 2: Use Soft Flex Professional Flush Cutters to trim 1/4 of an inch from the end of two eye pins.
Step 3: Use Soft Flex Professional Flush Cutters to trim 1/2 of an inch from the end of two eye pins.
Step 4: Use Soft Flex Professional Round Nose Pliers to form a simple loop on the end of each eye pin.
Step 5: Attach 1 eye pin of each of three lengths to 1 ear wire.
Step 6: Repeat Step 5 to form a second earring.
Join the fun in our VIB Facebook Group today! Stay in the know. Stay up to date. From our bead shows to our video shows and sales, you can stay in touch with us. The community is full of artistic and helpful beaders and crafty people. Inspire and be inspired. Share your pictures and get the beading bug from others!
Visit the Soft Flex Company YouTube Channel!
Blog contributor Thomas Soles is the Trade Show Coordinator for Soft Flex Company. His favorite stones are Lapis and Pietersite. His favorite hobby is day dreaming. And his favorite mustache is Tom Selleck's. As you can see, he has a healthy (or possibly unhealthy) sense of humor. You can write to him at Thomas@SoftFlexCompany.com


