

Let's learn how to make beaded jewelry! Designing necklaces and bracelets is a great way to tap into your creative side. Consider this your beginner's guide to basic bead stringing. We have everything you need to know to kickstart your favorite new hobby. Whether you would like to design some classic jewelry, craft some boho-chic or add some VSCO Girl jewelry to your collection, we can show you how to get the tools you need to get going. This blog is your free online beading course to professional handmade jewelry.

This blog is a great resource for the beginner beader. Everybody has to start somewhere! We will discuss basic bead stringing supplies. We will tell you all about the tools needed to begin your craft. We have tips on how to find inexpensive materials to add to your toolkit. We will discuss how to use your tools for a basic jewelry project. And we will conclude with everything you need to know to master your first steps and become a seasoned jewelry designer.

Check out our beading kits. They include everything you need to get started.
This Bead Stringing Starter Kit includes a Bead Mat, 2 red tip Bead Stoppers, Regular Crimping Pliers, Bead Nipper, 20 count package of 2x2mm Crimp Tubes, Ear Wires, Lobster Clasps, a 10ft spool of Soft Flex .019 Medium Beading Wire in your choice of color and a FREE package of Beads. (Bead colors vary and will be based on your wire color choice).
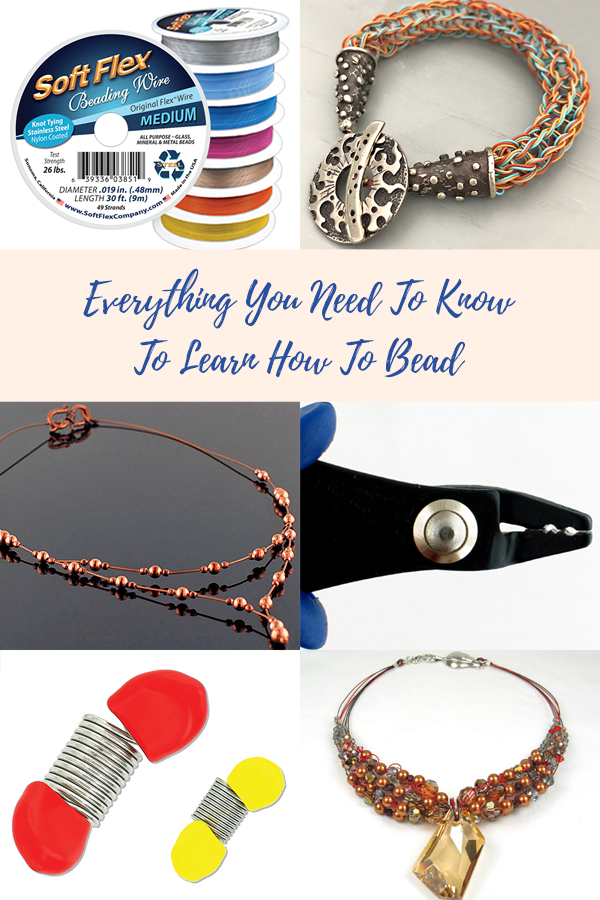
Everything You Need To Know To Learn How To Bead
Basic bead stringing supplies
Let's discuss your first purchases. You are going to need a couple of tools on hand to get started. Nothing extravagant, some crimping pliers and some cutters are a good foundation. You are going to need some sparkly things to string together. Buying the beads is the best part. You can really explore how you want to create jewelry to fit your persona. You are going to need some beading wire or stretchy cord to get going. We will look at different options. Beading wire is going to be great for jewelry that lasts and withstands punishment. But cord and fiber can be a good way to make an inexpensive design that is economical and instructive, even if it is not durable.

Your first necklace will likely be a single strand design, like Damien's Bamboo Copper Necklace. You can add beads throughout and then crimp the ends to a clasp. It is going to be so much easier than you think. Crimping the beads to finish will be the first hurdle to jump. But don't sweat it. Crimping is simple if you follow the instructions.
Check out our instructional crimping page - All About Crimps.


Once you have mastered your first single strand designs. The fun really begins. You can start adding a strand or two for a multi-strand design. You can start getting playful with your beads and creating illusion jewelry. You can start adding loops and braids. Beading wire is liquid. It is meant to be shaped and controlled. You will learn the sky is the limit as your follow your creative instincts.

Jewelry, like Sara's Effortless Copper Necklace (above), can be finished with just the basics. This is a great choice for a second or third design, once you get the hang of how to string and finish your jewelry. Sara added some beads to a copper colored wire. She then crimped the beads to hold them in place. This is called an illusion necklace. You can use a neutral beading wire that blends in with the beads (our Satin Silver is a great choice), or choose a wire that stands out and complements the beads. Crimp covers conceal the beads and a clasp finishes the design. This might be a little challenging as a first necklace, but it will be a snap for a second or third!
Beading tools
There are two tools that you will always have in your beading toolkit: crimping pliers and cutters. For basic bead stringing, these are the essentials. Almost everything else is unnecessary, to start. Once you move on to more intermediate and advanced jewelry designing projects, you will need to acquire a larger collection. But these two simple tools are the fundamental additions to your jewelry box.
Just for fun, we will also introduce you to Bead Stoppers. This handy tool is just amazing. They are not essential for the beginner but they can make all of your bead stringing so much easier. Bead Stoppers basically clip on to your beading wire so you do not risk beads falling off. Trying to manage two ends of an unfinished jewelry design can be a real challenge for a beginner. This will make everything easy to keep organized and secure.


Crimping pliers are a must if you want to finish your jewelry like a professional. Once you master your crimping pliers, every crimp is uniform and secure. Trying to smash your crimps with a pair of regular pair of pliers means your crimps will be irregular and prone to slipping. Crimping pliers allow for your design to be secure with a crimp bead that looks and feels smooth. Easy to follow instructions can be found in our Tips and Tricks section.

Regular crimping pliers work with 2x2mm crimps or 2x3mm crimps. 2x2mm crimps are the most common crimps you will have in your kit. They work with .014 fine and .019 medium diameter wires. 2x3mm crimps are going to be ideal if you want to make sure your .024 heavy diameter designs are secure.

These bead nippers are wonderful for a beginner. These are cost effective for someone who does not do a lot of cutting. They are not intended to be used for anything but cord and soft wire. Once you start designing more jewelry and cutting more wire, you will find that you may need to replace your nippers as the blades dull over time.

We love Bead Stoppers. Bead Stoppers clip on the end of an unfinished jewelry design so you do not lose your strung beads before the piece is crimped and finished. You can clip your wire and leave knowing your design is secure until you return. They can hold wire in place while you string. You can use them to organize wire when working on various projects, like Kumihimo or macrame. Bead Stoppers can hold multiple wires and cords. So versatile and awesome!
Beads and gemstones
Beads and gemstones are the reason most of us have become bead stringers and jewelry designers. Beads have been a part of human history since the beginning. Beads have given us creativity, identity, and beauty. They have been worn to declare elevated levels of society and have also been a symbol of solidarity. Every part of society has adorned themselves.
There are boundless options when choosing beads for your first jewelry project. What do you want to convey? Do you want to show people your favorite colors? Do you want to create an accent for that dress you adore? Do you want a beach vibe VSCO Girl bracelet or Instagram inspired necklace to post on your social media? The staggering number of choices ensures that whatever jewelry you are creating, it will be one of a kind. You can mimic another piece, but your jewelry will always have your signature finish.

Beads is the catch-all name for anything you are going to string on a cord or beading wire. Beads can be artisan glass from Italy or the Czech republic. Beads can be earthy and natural - think bone, shell or antler velvet. Beads can be recycled elements like bicycle chain, washers, bottle caps, or even bullet casings. And, of course, beads can also be fun and created for the sole purpose of stringing on a necklace or bracelet.

Gemstones are the most decadent beads. Prized for eons for their luster and shape. They have been discovered in the wild and synthesized by man. Some are rare and found in only singular regions on the planet. Others are abundant and although, not as highly valued, they are every bit as beautiful. Gemstones are sought for their aesthetic beauty and some also seek them out for their healing properties. You can design for beauty, metaphysical enlightenment, or even find a porous stone and take your favorite aromatherapy scents with you. Make sure you check out our collection of semi-precious stones.
Beading wire
For your first designs, we will look at basic beading threads and wires. You do not need to worry about the fancy stuff just yet. Simple is better until your get your sea legs. There is an ocean of differences between your stringing options. For a beginner, basic is best, but you are going to want to figure out what is optimal as you progress.

Beading wire is going to be your best bet for durability and a professional look. Beading wire is designed to withstand the abuse jewelry gets. For instance, if you have a bracelet, it is going to rock back and forth on the wrist. If the channels inside your beads have an abrasive surface, those beads are going to eat into the wire as you wear it. If you are designing a bracelet or are a little bit rough with your jewelry – you are going to want to make sure it is on something secure.
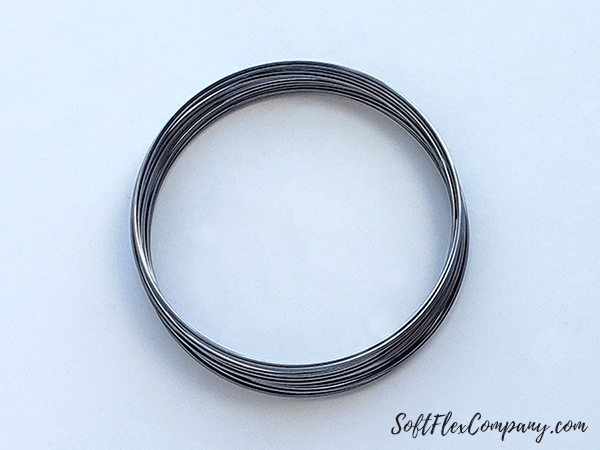
Soft Flex Beading Wire is the designer's choice in bead stringing wire. Soft Flex Wire is a lead-free beading wire for designers that demand strength and durability. Soft Flex Wire is a superior beading wire, created by beaders for beaders. It is supple enough that it can be knotted and comes in a wide variety of colors. We recommend Soft Flex Wire for designers that want their pieces to last and eliminate the frustration of restringing.

We carry premium beading wire, we carry wire for designers of all stripes. And we carry a fantastic economy wire for the beginner or hobbyist. Check out our Econoflex Beading Wire line for a pocket friendly solution for your first projects. It does not have the professional drape or strength our Soft Flex Beading Wire does – but it is a perfect wire to practice with and you can also create lovely household crafts with it. And it is a fraction of the cost of regular beading wire!

Stretchy cord is fantastic option for bead stringing beginners. It is forgiving and easy to string. This stretchy beading cord is durable and can take the abuse that a bracelet gets as it rocks back and forth on the wrist. It will last a long time. All a beginner needs to start out with stretchy cord is some beads, scissors or a bead nipper, and some glue and they have everything necessary for a jewelry design.
Memory Wire is perfect for a beginner, as long as you have the cutters to cleanly cut it. Memory Wire is a hard steel wire. Memory Wire comes packaged in coiled loops. The wire holds this shape. If you want to design a bracelet, simply cut the wire at the selected number of coils. Just remember, adding beads will make the design expand, three coils will look larger with beads added. Once you have added your beads, you can loop the end of the wire and add a dangle to finish. The finished design will slip over your wrist. You do not need a clasp to finish your Memory Wire design. So easy!
Note: Memory Wire is a very hard steel. Using flush cutters or bead nippers on Memory Wire will result in dulled or broken tools. Make sure you use the right tool for the right job. Make sure you use Memory Wire Cutters as they are specifically designed to cut through this wire.
- Monofilament
Monofilament is a solution for beaders that do not want a visible cord. Monofilament is made from a single fiber of plastic. This cord is inexpensive and typically mass produced as a fishing cord. The beading community embraced it as an option because it is durable and easy to find in local shops and department stores. It does not stand out and is great for illusion style jewelry. It is a great option for beginners, but is not going to have the drape and strength of stainless steel beading wire.
- Thread
Thread is a great choice if you are interested in working on a loom, weaving, or stitching. It is not going to be the most durable option for jewelry. It can be used for stringing small seed beads but there are stronger options available. It is sometimes fun to use on Kumihimo disks, with other thicker cord, as it can change the texture of a braided design. It can also be used to tie off a braided design. At Soft Flex Company, we have a diameter – very fine .010 – that is a wonderful beading wire replacement for thread.
Beading wire options
At first glance, beading wire can be a really confusing design element. One look at the label and you are presented with a ton of alien verbiage: size diameter, strands, test strength. What in the world is all of this information?!? You just want to string a necklace, not solve the Riemann hypothesis! Thankfully, this is all simple enough to digest and you will be reading labels in short order.

Click the image above to check out our exhaustive blog on how to choose the best beading wire for every jewelry design. We take a deep dive into everything beading wire. From the brands to the diameters. Everything you need to know to master beading wire is in that link.
You can also check out this wonderful and easy to follow video. Sara explores beading wire labels. She tells you what all of the fine print is on that spool you just bought. She shows off our beading wire diameters and shows you the kind of jewelry you can create using that diameter. This short video will make you an expert on beading wire.

As a beginner, we are going to want to focus on diameters. The diameter of wire is a good indicator of the type of project it is useful for. Here is a quick chart:
.010 Very Fine - Ideal for embellishing, weaving, crocheting and stringing very small beads. We suggest finishing with 1x1mm crimps.
.014 Fine - Ideal for soft materials, seed beads and fresh water pearls. We suggest finishing with 2x2mm crimps.
.019 Medium - Ideal all purpose wire. Great with glass, mineral, and metal beads. We suggest finishing with 2x2mm crimps.
.024 Heavy - Ideal for abrasive materials, large stones, lamp work and bracelets. We suggest finishing with 2x3mm crimps.
For the majority of your projects, .019 Medium is likely to be your best option. It is an all-purpose wire. It fits through most beads and is strong enough to withstand a lot of punishment. If you solely work with very small beads, you can drop down a diameter. If you work with chunky, abrasive stone, like Turquoise, you may want to consider our Heavy diameter.
One solid rule of thumb is to use the largest diameter that will fit through your beads once. This will ensure the entire piece is strong.
Where to find cheap jewelry making supplies
OK. Now we have a good idea what kind of tools and beading wire we need to use for our first project. We may even have some beads already picked out. Let's figure out how to acquire all of our tools and supplies without breaking the bank.
First, we need to ask ourselves, is this a hobby I am going to pursue? Or am I just going to make a couple necklaces and quit? If you are planning on making this a new pastime, you are going to want to invest in good tools. There may be some sticker shock at first. But you really get what you pay for. If you invest in poor quality tools, you are going to be replacing them frequently. If you buy professional tools, they will last years and save you money in the long run. If you buy poor quality supplies, like crimps, you are going to be dealing with broken jewelry. Buying high quality jewelry making supplies will ensure that your designs are strong and durable.
Let's look at some places to find economical jewelry making supplies. Just because we want quality, it doesn't mean we need to blow out our wallet.
Local bead stores
Local bead stores are amazing. Not only are you going to find some great discounts, but you can network and find new beading friends. Depending on where you live, your local bead store may be a good place to find a bead society or art guild to join. Not only that, but you can touch and see beads up close. Shopping online is fun, but nothing beats the texture and look of beads in hand. Your local bead store might have sales and coupons you can take advantage of and sales people that want to offer you a bargain. Don't be afraid to be talkative at a bead store. You might learn a new technique!
Bead shows
Bead shows are phenomenal. They often have vendors from all over the globe converging on a single point and sharing their wares. This is an ideal place to find rare goods and beads – African trade beads, Czech glass, artisan glass, vintage – there is something for everybody. Bead shows are a great place for discounts. Shop with a friend and buy in bulk, there are tons of exhibitors that offer big discounts on bulk sales. Some booths may have show specific coupons (at the show and even online, if you cannot visit the show). Strike up a conversation with the vendors. They appreciate a customer that enjoys their beading supplies. You may get a discount just for being a friendly face.
Online
Online shops are ideal for high quality tools and supplies. Stores like ours – SoftFlexCompany.com – have high quality tools, findings, and beading wire. We offer big sales, coupons, and more. We want you to purchase affordable high quality materials that will stand the test of time. We also offer free beading projects and tons of tips and tricks. We aim to educate as well as offer great prices and items. We want you to be comfortable with your new pair of crimping pliers. We have a storefront online as well as an active social media and community. Join our Facebook Group – VIB and make new friends and meet new mentors!
If you are looking to add some gently used tools or amazing beads, don't forget places like Ebay and Etsy. You will often find some amazing deals on these sites. YouTube is a great place to search for designers and shops too. You might find an amazing channel full of great instructions and then see that they sell online. Follow the rabbit hole!
Goodwill, garage sales, and used clothing shops
Goodwill, thrift stores, and garage sales can be a good spot for jewelry. You are not likely to find any tools or supplies that are going to last, but you can find some great jewelry. One man's trash is another man's treasure. Scoring some jewelry at one of these spots means you can take it home and break it down. Repurpose the beads you found. You can dismantle an ugly necklace with great beads and make a new and stunning necklace with elements from the one you tore down. Once you began you bead stringing jewelry, dismantling an ugly piece to make an amazing design is going to become second nature. Don't settle for second best when you have the tools to make something elegant.
Recycled goodies
Your friends and family may have old stashes of jewelry that they are never going to wear or look at. Why not ask and see if they would mind parting with their forgotten loot. You can repurpose their jewelry just like a visit to Goodwill. You can also restring anything that is beautiful but fragile and give it a second life. Old jewelry can always be saved with the right supplies.
Check out our blog on Recycled Jewelry Art.

Watch Steampunk Bracelet by Poet Summer
Consider making jewelry with unique recycled beads. A walk in the park may reveal common stones that could find a place on a necklace as a pendant. An old watch with hands can be dismantled for the cogs and wheels inside – this would make an awesome Steampunk jewelry design. Don't be afraid to look at everything with a new critical eye. You can make a bead out of anything that pleases you.
Check out our blog - Reduce, Reuse, Restyle.
How to use your jewelry tools
Now we have our tools for beading and our beading supplies. We are ready to make our first jewelry design. Let's take a look at our tools. We are going to need to learn how to use them to finish our first design securely. Cutters are fairly self explanatory, but we may need to spend some time with crimping pliers. Crimpers look daunting, but if you follow our instructions, you are going to be a master in minutes. We will also take another look at Bead Stoppers. They are going to be extremely helpful if you want to make sure your beads are held in place on your wire and not going to fall all across the floor.
Cutters or bead nippers
Cutting is simple. Snip your excess wire. For your first necklace, the excess wire will be the wire that is coming out of your finished crimp. You will need to cut the short hank of wire that is sticking out. Make sure you do not cut both wires at the crimp, one is holding your necklace together. Cut the short wire at the crimp. If you cut it nice and close, it will not stick out and irritate the skin. There is an old wives tale that you should leave wire coming out of the crimp and double back through your last bead for extra security. We think this weakens the piece as a whole since you would need a smaller diameter to double back through. We also think if you have mastered your crimping that this would be unnecessary.
Make sure you use the right tool for the job. Scissors are not going to be able to get a clean cut on stainless steel beading wire. Beading wire cutters are not going to be able to cut a hard metal, like Memory Wire. Make sure you have the right cutter for the task at hand. A good pair of economy cutters is great for a beginner. Once you start cutting more often or want a much cleaner cut, you will want to invest in professional cutters. Professional cutters are constructed of a harder metal and allow for a flush cut against a crimp.
Crimping Pliers
This is the tool that will take a little time to figure out. But don't worry, we have a lot of helpful resources and videos. Crimping pliers turn a crimp tube or round crimp bead into a finished crimp that secures your wire and clasp in place. Some people try to smash their crimps with regular pliers when they first start stringing beads. This creates a smashed surface that has irregular edges that can irritate skin and will not be secure. Your jewelry is sure to fall apart at the crimp if you are smashing your crimps with a common pair of pliers.

Your crimping tool has two holes on the top of the head. One is a round hole – the rounder, and one hole has a tooth in the center – the crimper. You are going to be using the crimper first. This puts a divot in your crimp tube. The rounding hole is up next. The round hugs the crimp together. The divot gives it a clam shell appearance, the rounder rounds into a pleasing tube shape that promises a lot of security. One thing to note, you do not have to smash the crimp bead. Just give your crimping pliers a nice firm squeeze, like you were shaking hands with your grandmother. This will mold the crimp tube into a tight finish and will not work harden and weaken the metal.

Step 1 - String a crimp tube and a clasp onto the wire. String the wire back through the crimp tube.
Straighten the wires inside the crimp tube so that they lay side by side.

Step 2 - Using the crimper gently compress the crimp tube, creating a divot.

Step 3 - Using the rounder gently compress the crimp tube. Turn and repeat until it
creates a round shape. Cut off the excess wire at the base of the crimp.
For your first design, we would recommend 2x2mm crimps if you are using our medium diameter wire.
Here is a great reference for crimp sizes and instructional links on how to crimp: All About Crimps
Bead Stoppers
Bead Stoppers are not a necessity. But boy are they a life saver if you are worried about your beads slipping off of your necklace or bracelet. Simply pinch the Bead Stopper to open the coils and slide it on your wire. This will stop any beads from slipping. This is perfect if you are working on a piece of jewelry that you do not have time to finish. This will allow you to secure your beads in place and leave your unfinished beading wire. This is a godsend if you have pets. Your kitty cat can no longer spill your beads all over the tile.
Bead Stoppers are great for so many projects. You can use them as bobbins to organize your wire when braiding or knotting. You can use them to keep projects neat and orderly as you go. You do not need one in your beading toolkit – but you are going to love them if you get them.
Finish your first jewelry design
Let's design our first necklace. Gather your supplies and tools. You can opt for a bead mat or bead board if you want to get fancy and measure your pieces before hand. But let's just assume you have not purchased those materials yet.
Supplies:
Beads
Soft Flex Beading Wire - .019 medium diameter is a wonderful all purpose wire.
Clasp
Crimps - 2x2mm is perfect for .019 medium diameter wire.
Tools:
Cutters
Crimping Pliers
Bead Stoppers
Directions:
Step 1: Lay out your beads on a surface that is not conducive to rolling beads. A towel is a good choice if your table is smooth. This will allow you to measure the piece before you even start it and get an idea how the colors and shapes will flow when the design is strung. If you are feeling adventurous and are not concerned about the length of your necklace, you can string it freehand and skip any bead boards or mats.
Step 2: Cut your Soft Flex Wire to the desired length. You can place it on your neck for an idea of the length you plan to design. For the sake of this exercise, we suggest using .019 diameter, it is good for the majority of your projects - not too big, not too small, but very strong.
Step 3: This is the fun part. Time to string your first necklace. We can go two ways here, freehand or a symmetrical design.
- If a freehand approach is what you seek, grab a Bead Stopper and clip an end of the wire. The Bead Stopper will secure that end of the wire and none of your beads will escape and hide under furniture.
- If symmetry is the order of the day, leave your wire on top of your surface and string each side as you go. String a bead onto one side of the wire and the corresponding bead on the opposite end. If you are adding a focal bead, string that first and go from there.
Step 4: Once your design is strung, you need to finish up and crimp your clasp into place. Open your clasp so that is two pieces. Now take one end of your wire and add a crimp bead (2x2mm crimp beads are ideal with .019 diameter wire). Place one of the clasp pieces on the wire. Loop the wire back through the same crimp bead. Now tighten the loop so the clasp end is secure, but has a little room to play, if it is too taut, there will be extra wear on the wire. Make sure the wires inside the crimp are parallel. If the wire is criss-crossed, this will weaken the security of the crimp and it may slide. Place the crimping hole on your crimping pliers on the crimp (this is the hole with the tooth in it). Using firm pressure, squeeze the pliers and give your crimp a divot (don't smash the pliers, this will work-harden the crimp and make it brittle - use as much pressure as you would shaking your grandmothers hand). Now move the rounding hole on the pliers over the crimp. Using the same squeeze as before, round the crimp, turn it ninety degrees and round it again - repeat this process five or six times until the crimp is well rounded and has a nice, secure finish.
Step 5: Repeat step four for the other end of the wire. Make sure you use crimping pliers, they will ensure that every finished crimp has a uniform look. If you smash your crimps with regular pliers, every crimp will look different and none will have the security that crimping pliers can provide. Crimping is often the most frustrating part of the process for the beginner beader, if you need further instruction or would like to see pictures as well as an easy to follow guide, check out our
tips section.
Step 6: Make sure your crimped necklace has some breathing room. You don't want to crimp too close to the beads. Leave a little room so the beads can move freely. If you crimp right next to your beads, your necklace will not drape properly and the wire will be strained. Once your crimps are finished, cut the excess wire. We suggest cutting all the way up to the crimp bead for a more professional look.
Victory! That was not so hard, was it?
Note: It won't be long before you have mastered the one strand necklace. There is a whole world of options after that - multiple strand necklaces, stitching, lariats. Think outside the box and get creative!
Your next jewelry design
The world is your oyster now. That first single strand design was easy. Way easier than you expected, right? Jewelry making is much simpler than it looks. Now you can explore more complicated and wire dense designs. Don't be afraid to experiment and try something new. There are no rules. Now you can feel free to expose the beading wire, make an illusion necklace, add a pendant– get creative!

Multi-strand designs are a great project after you have gotten your feet wet with single strand necklaces. You will need the appropriate materials – crimps that accommodate more wire, Crimping pliers designed for larger crimps and multi-strand clasps. You can find those tools and findings on our website – SoftFlexCompany.com.

Get creative! Make some loops with your beading wire. You don't just have to make single strand and multi-strand designs. Crimp your beading wire into any pleasing shape you wish. You can sculpt the wire as you see fit. Now that you know how to shape the wire, you can make it work for you.

Earrings are a cinch with Soft Flex Beading Wire. You need so few supplies and tools. You can create hundreds of handmade earrings on a shoestring budget. You can crimp your wire into loops, hoops, or just dangle the wire straight down. Secure your wire into an ear wire with a crimp and you are all set! Earrings are so quick and simple, you can create a pair for every single outfit you own. Or just make a set in minutes before an evening out.

Turn your loops into an interlocking chained necklace. There are so many possibilities with beading wire. Don't settle for a single strand necklace if you want to aim for the skies. Change up the beads. Change up the color. There is no end to the design choices.

Beading wire is incredibly adaptable too. Knitting, stitching, weaving, and embellishing are all possible with beading wire. Soft Flex Beading Wire is knottable and flexible. You can make mini macrame or braid on your Kumihimo disk.
Jewelry Design School
Continue your education with our School of Design. It is like a free beading course online. We have a lot of instructional literature and videos. You can learn how to make jewelry with ease on our site. We have beginner videos for simple necklaces and we have advanced videos showing Viking Knit, wire wrapping, beaded Kumihimo designs, and more.
We have holiday projects, earrings, illusion jewelry, knit jewelry, and so much more. You will find step by step instructions or videos. They are all easy to follow. You can create the jewelry we show or change up the colors and beads and make them your own designs.
Our blog is updated multiple times a week. It is a great resource for free beading project ideas. You can find weekly video recaps of all of our shows each week. You can find information about upcoming shows – Tucson, Milwaukee, and more. You can find details about our sales and specials. You can see what we are planning for future design kits. Our blog is the nexus for up to date beading information. Stay in the know with us!
What is the best knot to use to secure Soft Flex Beading Wire? How do I crimp using Magical Crimping Pliers? What size seed beads will fit on my .019 medium diameter wire? We have answers to all of these questions and much more in our Tips and Tricks section. The next time you need to know what crimps to use on what diameter, follow our Tips and Tricks link and get a quick answer. Need a quick chart to reference? You can print some helpful ones out and add them to your beading toolkit.
We film multiple videos every week. We offer live demonstrations on how to make the hottest jewelry designs. We unbox packages from our favorite vendors and local bead stores. We have shows, like Free Spirit Beading and Conversations in Wire, that follow a staff designer on their jewelry making journeys. The majority of our videos are filmed live. This makes it easy to add your voice. Let our designers know what you would like to see or ask a question about a technique that has you stumped. We will answer everything and point you in the right direction!
Join our Facebook group – VIB. Stay in the know. Stay up to date. From our bead shows to our video shows and sales, you can stay in touch with us. The community is full of artistic and helpful beaders and crafty people. Inspire and be inspired. Share your pictures and get the beading bug from others!
Visit the
Soft Flex Company YouTube Channel!


Blog contributor Thomas Soles loves Jazz Age writers and crunchy french fries. His favorite gemstones are Lapis and Pietersite. His favorite hobby is day dreaming. And his favorite mustache is Freddie Mercury's. As you can see, he has a healthy (or possibly unhealthy) sense of humor. You can write to him at Thomas@SoftFlexCompany.com