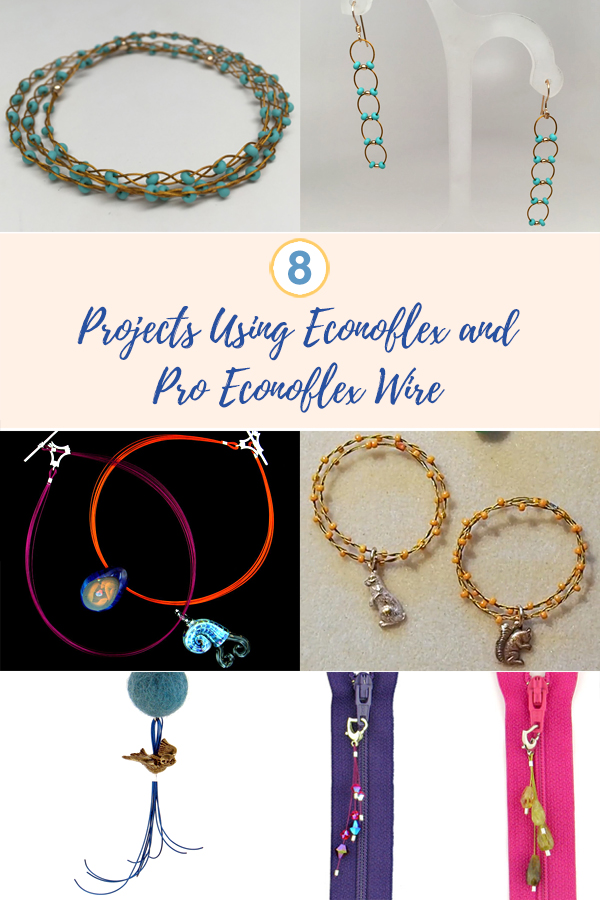
Shhh. We have a secret. Have you heard of our Econoflex or Pro Econoflex Wire? We don't talk about it as often as we would like. We are so fond of our Soft Flex Beading Wire that we forget that we have such a wonderful wire for hobbies, arts, and crafts. Well, today we are going to SHOUT about it. Econoflex and Pro Econoflex are the finest wires you will find for your next handmade project.
Our Econoflex and Pro Econoflex Wire is a bargain and perfect for your next DIY home craft. Do you like adorning throw pillows with beads? Do you like adding beads to your lampshades? Wouldn't your key chain look nice with a beaded fob? Decorate your zipper pulls with funky beads and fun wire! Econoflex is the best wire for the job. You can also use both for macrame or jewelry. Read on, we will tell you a little about why you should be using Econoflex and Pro Econoflex with your next craft or jewelry project. We also have some easy free beading project ideas to help you get started!
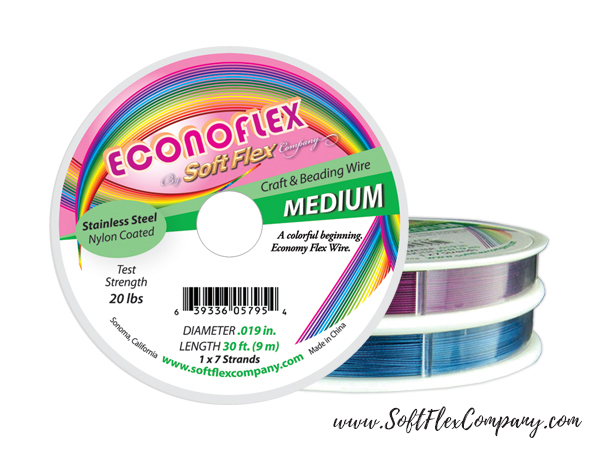
Econoflex is wonderfully inexpensive and perfect for projects. Everybody loves a bargain and that is what Econoflex is – a big, beautiful bargain. Econoflex costs about a third of price of our regular Soft Flex Wire. Econoflex comes in a spectrum of rich and vibrant colors that you will love.
How did we keep the cost down? Econoflex is our only wire that is not made in the United States. As a veteran of the United States military, I am a strong advocate of buying locally and supporting local businesses. But I also appreciate a sale. When we opted to provide a discounted wire for crafters and beginners, we realized that we would need to outsource this one so we could keep the cost low.
Who is this wire for?
You.
If you are a beginner, you need this wire for practicing. Econoflex will not hurt your wallet and you can afford to make mistakes with it. It is great for children that have moved beyond string and macaroni necklaces. If you love arts and crafts, this wire will let you get creative. If you build models or love toy trains, you need this wire for ship rigging and utility poles. If you are a seasoned jewelry designer, this wire is great for macrame, earrings, and jewelry that leans to the crafty side!
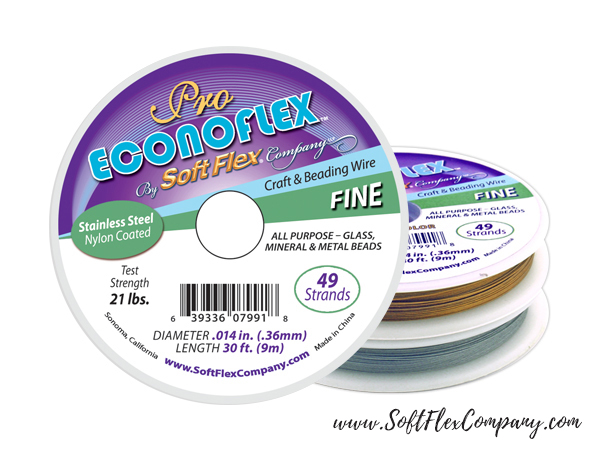
Pro Econoflex is the next level. Pro Econoflex is much more durable. Our Fine diameter in our Pro Econoflex line is the only 49 strand .014 diameter we carry – across all of our lines. If you need strength and a tiny wire that will creep into the smallest bead channels, Pro Econoflex .014 is a great option.
Pro Econoflex also comes in a gold color that is affordable. We heard a lot of people asking for a gold wire that was a color and not plated like our Extreme Flex 24K Gold. Our Extreme Flex Beading Wire is divine, but the cost of gold means that this wire is usually reserved for the most precious projects. Pro Econoflex is our response to those designers that wanted a gold color and not the real deal.
---------------------
barbie (Amazon customer)
May 24, 2017
5 stars
I make jewelry and I love using the product.
Pro Econoflex Holiday Napkin Rings
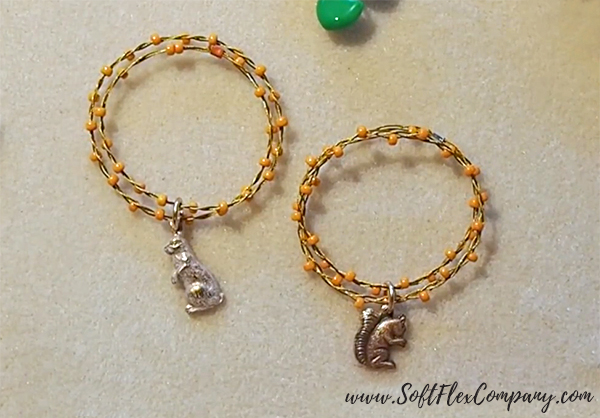
Look at these delicious napkin rings. Sara made these with Pro Econoflex. You can make your dinners magical with handmade projects like this. Make your next holiday dinner amazing. Be sure to watch the video and learn how she does it.
Pro Econoflex Dangles
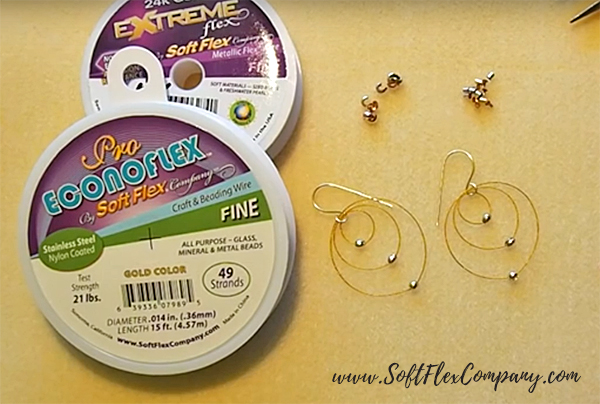
Sara made some stunning earrings with Pro Econoflex Gold Color. She loves the rich, darker gold look. She thinks this color is a great match with Tierracast products and brass findings. Watch the video for easy instructions on how to make these earrings. You can also use any of the Econoflex colors if you want a bolder color.
---------------------
Geri M. (Amazon customer)
October 8, 2015
5 stars
I have used this wire for my jewelry making exclusively for several years now and I am totally satisfied with the quality!
Pro Econoflex Summer In The Sun Bangle Bracelets
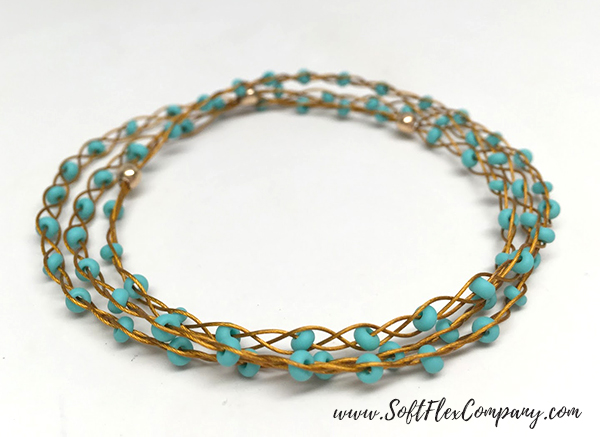
Designer Sara Oehler
Skill Level Beginner
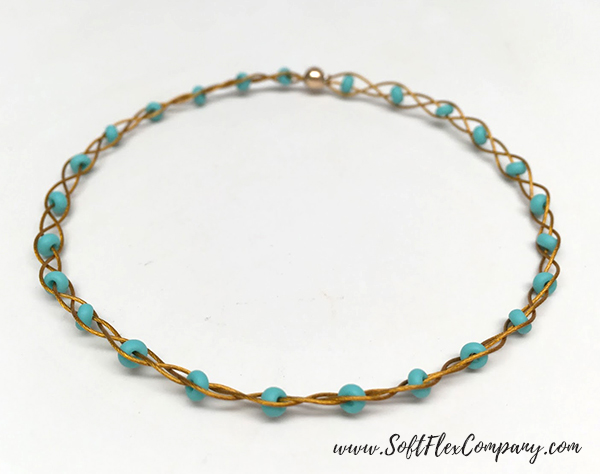
I've always loved Jamie Hogsett's Summery Braided Bangles Project. So, I was excited to recreate it in my own fashion using our new Pro Econoflex in the gold color. These bracelets look great in multiples. I have made three so far (shown above), but I think that I may make a few more to complete the set. Isn't the gold colored wire pretty? I love it! If you want, you can even change out the color of the seed beads for each bracelet or use just one color like I did. ~ Sara
Materials (based on one bracelet)
Pro Econoflex .019 Gold Color - 45"
11/0 Seed Beads - 25 pcs
3x3mm Crimp Tube - 1 pc
4mm Crimp Cover - 1 pc (You can also use craft wire to cover the crimp.)
Tools
Mighty Crimping Pliers
Cutters
Chain Nose Pliers
Bead Stoppers
Instructions
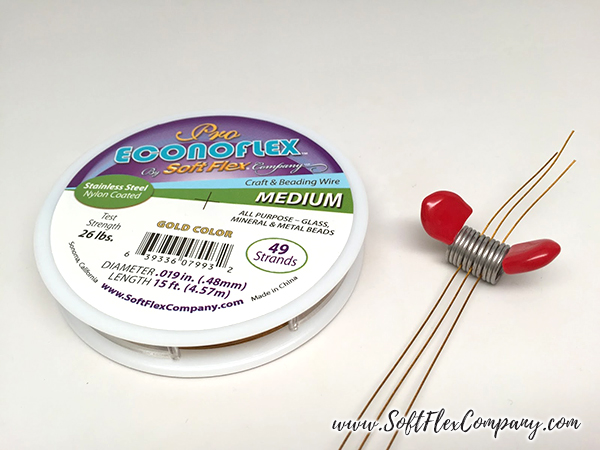
Step 1: Clip three 15" pieces of wire together with a bead stopper.
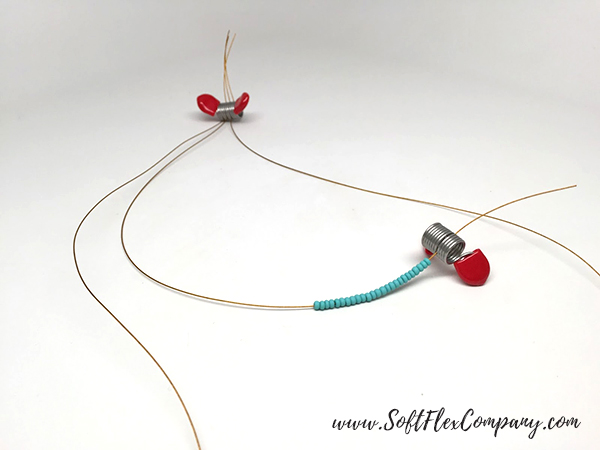
Step 2: Use the middle strand to string 25 seed beads. Clip the seed beads onto the wire using another bead stopper.
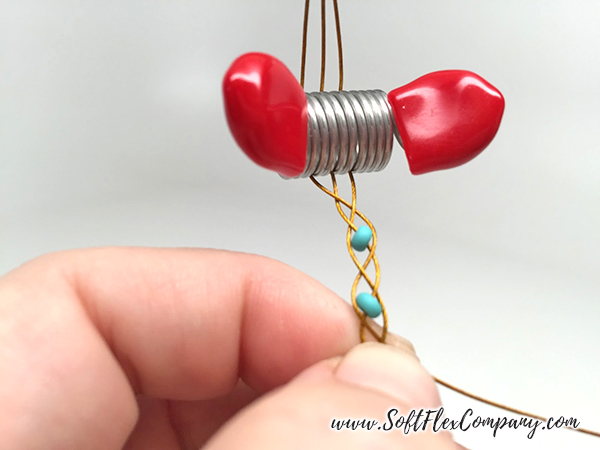
Step 3: Braid the wires together. Every time the wire with the beads lands in the middle of the braid, slide one bead up into the braid. Continue braiding the wires for about 6 1/2 – 7", adding or subtracting beads as necessary. The finished result needs to slide over your hand.
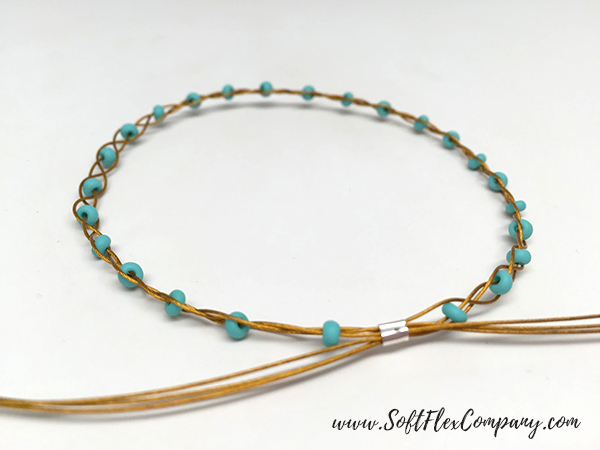
Step 4: Use all three strands of wire to string a crimp tube. Pass all three strands of wire from the other side through the crimp tube in the opposite direction, creating a circle. Pull tight and crimp the tube. Click here for crimping instructions. Cover the tube with a crimp cover.
Pro Econoflex Earrings
Designer Sara Oehler
Skill Level Beginner
Materials
Pro Econoflex .019 Gold Color - 12 inches
11/0 seed beads - 20
2x2mm crimp tubes - 10
Ear wires - 2
Tools
Magical Crimping Pliers
Cutters
Instructions
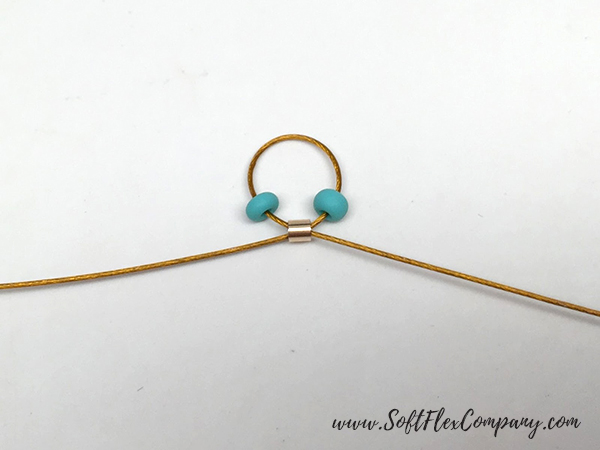
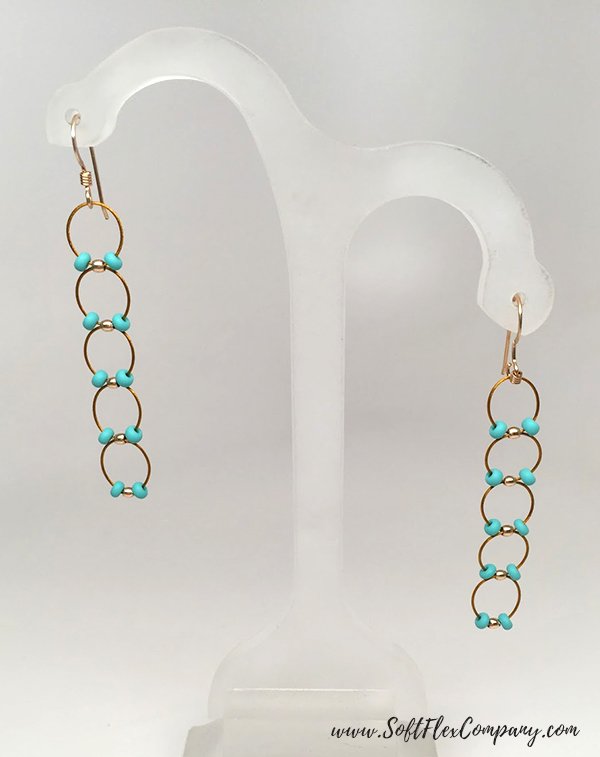
Step 1: Using 6 inches of beading wire, string two seed beads and a crimp tube. Pass the wire back through the crimp tube, creating a 10mm ring. Crimp the tube with crimping pliers. Click here for Magical Crimping Pliers instructions.
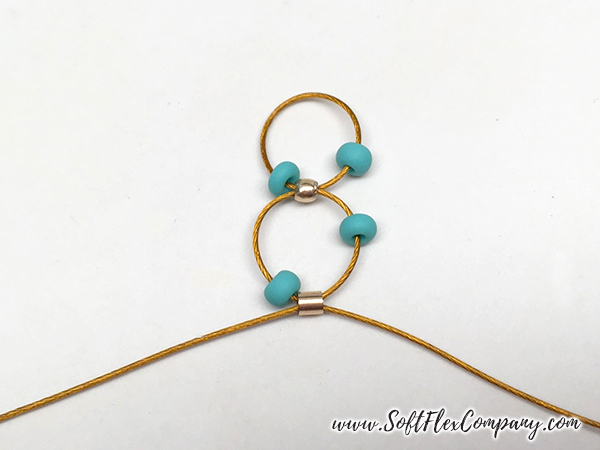
Step 2: Using each wire, string a seed bead. Pass each wire through a crimp tube in opposite directions, creating another 10mm ring. Crimp the tube with crimping pliers.
Step 3: Repeat Step 2 three more times for a total of five rings. Trim the excess wire.
Step 4: Attach an ear wire to the first ring, between the two seed beads.
Step 5: Repeat Steps 1-4 to create a second earring.
Econoflex Art Deco Macramé Bracelet
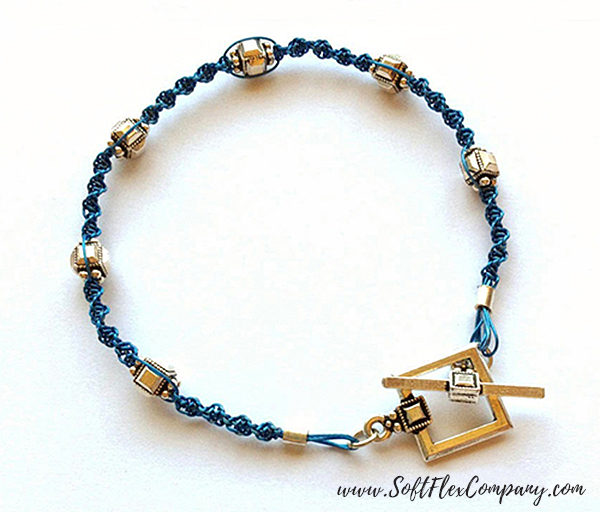
Learn how to make the Art Deco Macramé Bracelet with Econoflex Wire.
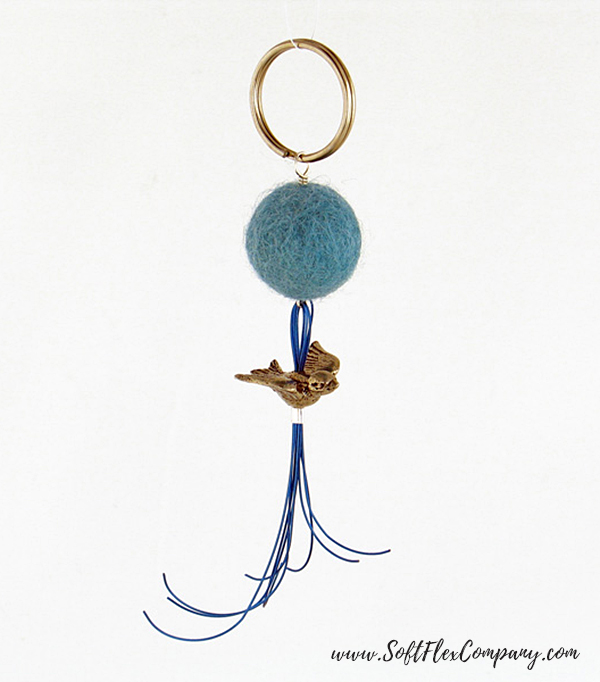
Econoflex Blue Skies Keychain
Designer Jamie Hogsett
Skill Level Beginner
Materials
Steel Blue Soft Flex Econoflex Wire .019 diameter - 24"
3x3mm Sterling Silver Crimp Tube - 1 pc
22 gauge 2" Sterling Silver Eye Pin - 1 pc
20mm Pewter Flying Bird Bead from Green Girl Studios - 1 pc
20mm Blue Wool Felt - 1 pc
20mm Keychain Ring - 1 pc
Tools
Cutters
Mighty Crimping Pliers
Round Nose Pliers
Chain Nose Pliers
Instructions
Step 1: Cut the wire into two 7" pieces and two 5" pieces.
Step 2: String all of the wires through the eye pin, so that the hole of the eye pin is at the center of each wire. Use all eight wire ends to string the Flying Bird Bead from top to bottom. Use all eight wire ends to string the crimp tube, and crimp.
Click here for crimping instructions.
Step 3: Use fingers to gently curl the end of each wire.
Step 4: Use the eye pin to string the felt ball. Form a wire wrapped loop that attaches to the keychain ring.
Econoflex Lampwork Necklace
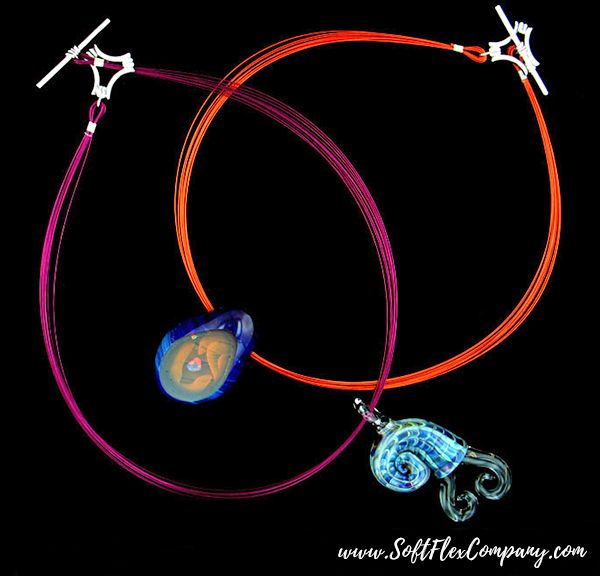
Designer Sara Oehler
Skill Level Beginner
Materials
Soft Flex Econoflex Wire .014 diameter - 15'
Toggle Clasp - 1 set
3x3mm Silver Crimp Tubes - 2 pcs
Lampwork Pendant or Bead - 1 pc
Tools
Cutters
Mighty Crimping Pliers
Instructions
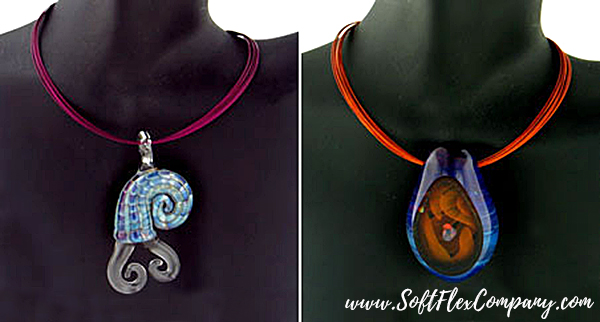
Step 1: Cut the wire into ten 18" pieces (Use one color, or mix and match different colors.). Use all 10 strands of wire to string 1 crimp tube and the toggle. Pass back through the tube and crimp. Click here for crimping instructions.
Step 2: String all 10 strands through the lampwork pendant or bead.
Step 3: There should be about 17" of exposed wire. Use all 10 strands of wire to string 1 crimp tube and the toggle. Pass back through the tube and crimp. Cut off excess wire.
Econoflex Beaded Zipper Pull
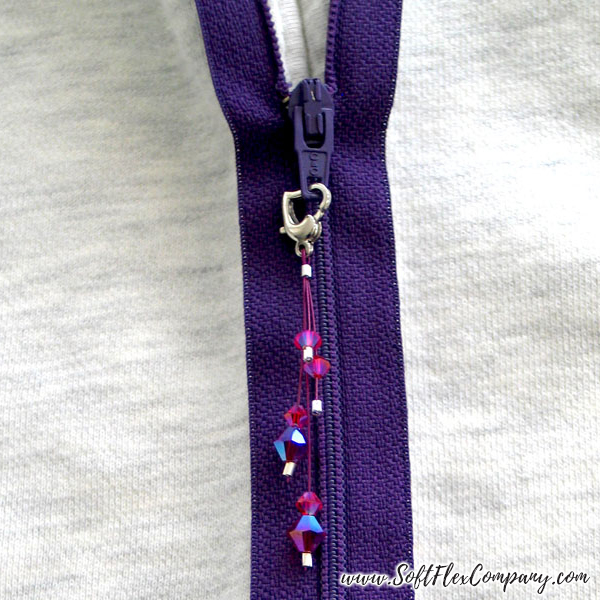
Designer Sara Oehler
Skill Level Beginner
Materials
Econoflex Wire, .014 Diameter - 8 inches
Single strand clasp
2x2mm Sterling Silver Crimp Tubes - 5 pcs
Gemstone Beads
Tools
Regular Crimping Pliers
Cutters
Instructions
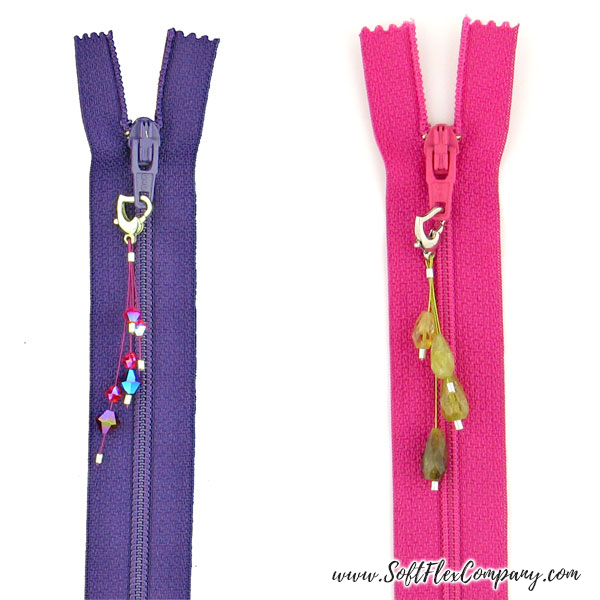
Step 1: Cut the wire into two 4" pieces.
Step 2: Use both wires to string the clasp to the center of the wires. Use all four ends of wire to string 1 crimp tube. Slide the crimp up to the clasp, and crimp.
Click here for crimping instructions.
Step 3: Trim the wires to 4 different lengths: 1/2", 1", 1 1/2", and 2".
Step 4: Use the 1/2" wire to string 1 to 3 beads and 1 crimp tube. Crimp the tube at the very end of the wire.
Step 5: Use the 1" wire to string 1 to 3 beads and 1 crimp tube. Crimp the tube at the very end of the wire.
Step 6: Use the 1 1/2" wire to string 1 to 3 beads and 1 crimp tube. Crimp the tube at the very end of the wire.
Step 7: Use the 2" wire to string 1 to 3 beads and 1 crimp tube. Crimp the tube at the very end of the wire.
Projects not intended for children under the age of 13. The information on this instruction sheet is presented in good faith, but no warranty is given, nor results guaranteed. Soft Flex® Company disclaims all liability from any injury to anyone undertaking the construction of this project as a result of improper safety precautions.
Join our Facebook group – VIB. Stay in the know. Stay up to date. From our bead shows to our video shows and sales, you can stay in touch with us. The community is full of artistic and helpful beaders and crafty people. Inspire and be inspired. Share your pictures and get the beading bug from others!
Visit the Soft Flex Company YouTube Channel!
Blog contributor Thomas Soles loves Jazz Age writers and crunchy french fries. His favorite gemstones are Lapis and Pietersite. His favorite hobby is day dreaming. And his favorite mustache is Freddie Mercury's. As you can see, he has a healthy (or possibly unhealthy) sense of humor. You can write to him at Thomas@SoftFlexCompany.com


