

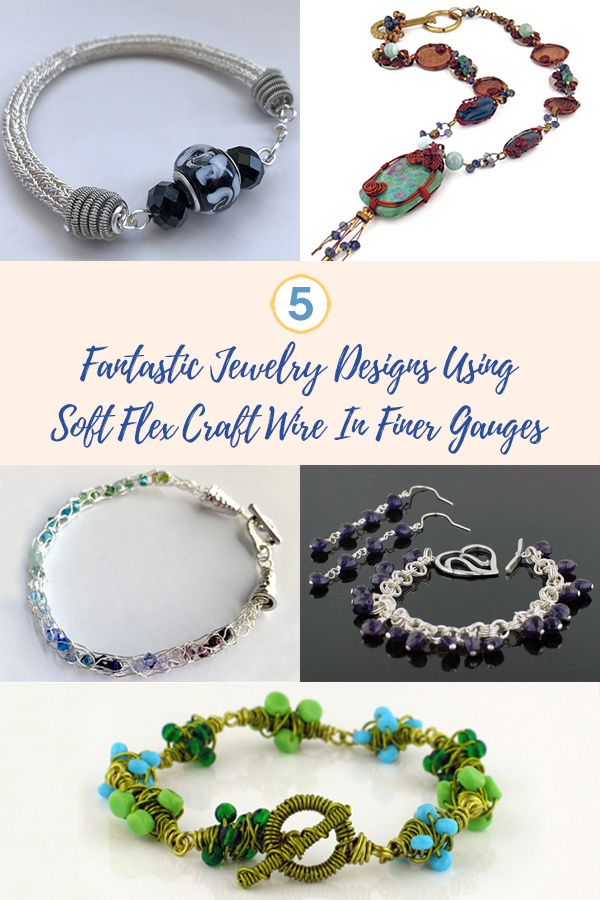
It can be easy to overlook the finer gauges of Soft Flex Craft Wire when you are restocking your jewelry making toolkit. The larger sizes are great for ear wire and eye pins and just have so many varied uses. Sometimes the little guys don't get the love they deserve. Finer gauges of Craft Wire like 24, 26, and 28 gauge may not be the work horses the thicker diameters are, but they are wonderful for making complex wire designs. Let's look at five projects that were created using some smaller wire choices.
Thicker Craft Wire gauges, like 20 gauge and 22 gauge are great for framing your wire wrapped jewelry designs. They provide a solid foundation and structure. Once the groundwork is laid, the smaller gauges are great for adding detail and beads. 24 gauge is a fantastic all around gauge for wire wrapping, coiling or creating connectors. 26 and 28 gauge are great choices if you have beads that are a little too small for the 24 gauge. 26 and 28 gauge are also excellent wire choices for knitting, weaving, and stitching.

Do you need to restock your toolkit? The Craft Wire Starter Kit is a great way to add some tools and supplies. It was designed to give the Craft Wire newbie an easy start, but it is an awesome way to add supplies to an existing collection. If you are a beginner, this kit is exactly what you need to make your own DIY wire work jewelry.
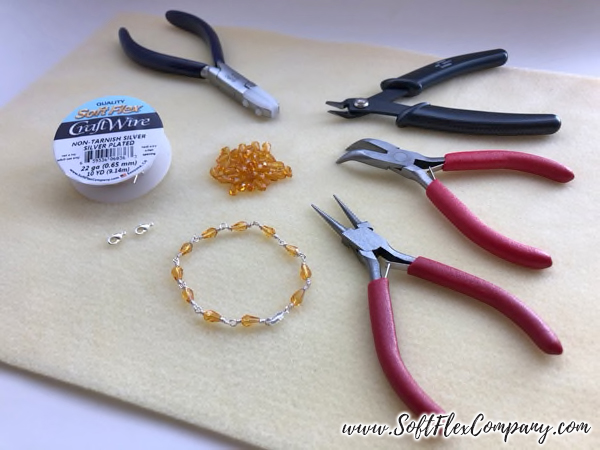
This Craft Wire Starter Kit includes a Bead Mat, Bead Nipper, Nylon Jaw Pliers, Round Nose Pliers, Bent Nose Pliers, Lobster Clasps, a 10 yard spool of 22 Gauge Soft Flex Craft Wire in your choice of metal color and a FREE package of Beads. (Bead colors vary and will be based on your wire color choice).

Viking Knit Double Stitch With The Lazee Daizee
In this episode of Conversations in Wire. James used a different technique with the Lazee Daizee tool. This bracelet was created with a double viking knit stitch. The finish is more wire dense and is not as open as the other design he created.

This design is stunning. He used a bare copper Soft Flex Craft Wire for this bracelet. Bare copper is the only Craft Wire that is not enameled. It will patina since it is a natural copper. It is great for making a piece of jewelry that you would like to look aged or antique. All of our other Craft Wire colors will retain the same sheen and not lose their color.

Supplies:
Soft Flex Craft Wire - 26ga
Lazee Daizee Viking Knit Wire Weaving Tool
Bead Nipper
Nylon Jaw Pliers
Draw Plate
Craft Wire Starter Kit

Here is another bracelet he created with the double stitch. The focal bead really makes this design pop! This bracelet is so sophisticated. You can make this amazing piece of jewelry at home in no time.

Caribbean Dreams Necklace

Designer Diane Zigabarra
Skill Level Intermediate/Advanced
Materials
Copper Color .019 Diameter Soft Flex Metallics Wire
18 Gauge Brown Soft Flex Craft Wire
20 Gauge Brown Soft Flex Craft Wire
26 Gauge Brown Soft Flex Craft Wire
Antique Brass Key and Ring Toggle
Clasp - 1 set
2x2mm Gold Filled Crimp Tubes - 46 pcs
Brass Antique Chain - 10 inches
5mm Brass Jump Rings - 5 pcs
18mm Brass Flat Metal Washers - 4 pcs
Brass Antique Quarter-size Coins - 2 pcs
Brass Antique Penny-size Coins - 2 pcs
28mm x 38mm Ruby Zoisite Flat
Rectangle - 1 pc
6mm Ruby Zoisite
Rounds - 4 pcs
6mm Blue Sapphire
Rounds - 4 pcs
10mm Green/Blue Beryl
Rounds - 4 pcs
3mm
Iolite Faceted Rondelles - 24 pcs
12mm x 25mm
Iolite Nuggets - 2 pcs
6mm Crystallized Swarovski Elements Montana Crystal Bicones - 3 pcs
8mm Crystallized Swarovski Elements Champagne Crystal Bicones - 2 pcs
Tools
Cutters
Crimping Pliers
Chain Nose Pliers
Needle Nose Pliers
Round Nose Pliers
Instructions
Finished Size: 22"
Step 1: Use 8" of 18 gauge Craft Wire to form a frame that fits near the edge of one flat side of the ruby zoisite flat rectangle. Form spirals with the ends of the wire, then twist the wire ends together to secure the shape of the frame. Repeat to make a frame for the other flat side of the rectangle. Use 6" of 26 gauge Craft Wire to connect the two frames on one long side of the rectangle by wrapping the wire back and forth around the frames. Repeat for the other long side of the rectangle. Use 6" of 18 gauge wire to attach the frames at the top of the rectangle and form a simple loop/bail. Form spirals with the ends of the wire. Repeat three times to form a secure bail with several spirals clustered between the bail and the rectangle. Use 6" of 26 gauge wire to attach frames at the bottom of the rectangle by wrapped the wire back and forth around the frames. Use 4" of Copper color wire to string 1 crimp tube. Pass back through the tube, leaving a small loop of wire, and crimp. String 1 beryl round, 1 champagne crystal bicone, the bail, 1 champagne crystal bicone, 1 beryl round, and 1 crimp tube. Pass back through the tube, leaving a small loop of wire, and crimp.

Step 2: Use 2" of Copper wire to string 1 crimp tube and the wires wrapped around the frame at the bottom of the rectangle. Pass the end of the wire through the crimp tube again to form a ring. Adjust the wire ends to form a 5mm ring and crimp the wire. Trim wire ends. Use 2" of wire to string 1 crimp tube and the 5mm copper ring. Pass back through the tube and crimp. Trim the short wire end. Use the long end of the wire to string 1 iolite rondelle and 1 crimp tube. Place the crimp tube near the end of the wire and crimp. Repeat six times for a total of seven fringe pieces, each about 1 1/2" in length. Attach one link of antique chain to the top of the fringe (To disassemble chain, open and close unsoldered chain links as you would a jump ring). Set aside.
Step 3: Use 8" of 20 gauge Craft Wire to form a frame that fits near the edge of one side of 1 iolite nugget. Form spirals with the ends of the wire, then twist the wire ends together to secure the shape of the frame. Use long lengths of 26 gauge wire to decoratively wrap around the frames, securing the frame to the iolite nugget and making sure to do most of the securing on the back side of the nugget. Form spirals with the wire ends and wrap all wire ends together. While wrapping, form loops of wire at the top and bottom of the nugget so that the nugget becomes a link. Repeat to form a second iolite nugget link. Set aside.

Front

Back
Step 4: Repeat Step 3 using the penny-sized coins. Set aside.

Front

Back
Step 5: Repeat Step 3 using the quarter-sized coins. Set aside.

Front

Back
Step 6: Use round nose pliers to hold the center of 5" of 20 gauge wire. Bend the wire in half, leaving a loop of wire at the halfway point. Use the wire to wrap around 1 brass washer, placing the loop of wire at the top of the washer and wrapping the wire ends around the washer three times. Form spirals with the wire ends on the front of the washer. Repeat to add a second wire to the bottom of the washer. Repeat entire step three times for a total of four washer links.

Back
Step 7: Use 4" of Copper color wire to string 1 crimp tube. Pass back through the tube, leaving a small loop of wire, and crimp.
Click here for crimping instructions. String 1 ruby zoisite round, 1 blue sapphire round, 1 ruby zoisite round, and 1 crimp tube. Pass back through the tube, leaving a small loop of wire, and crimp. Repeat to form a second ruby zoisite link. Set aside.

Step 8: Use 4" of Copper color wire to string 1 crimp tube. Pass back through the tube, leaving a small loop of wire, and crimp. String 1 beryl round and 1 crimp tube. Pass back through the tube, leaving a small loop of wire, and crimp. Repeat to form a second beryl link. Set aside.

Step 9: Use 2" of Copper color wire to string 1 crimp tube, 1 iolite rondelle, 1 link of antique chain, 1 Copper wire loop formed at the end of Step 1, and 1 iolite rondelle. Pass through the tube again, forming a ring of wire 8-10mm in size, and crimp.
Step 10: Use 2" of Copper color wire to string 1 crimp tube, 1 iolite rondelle, the link of antique chain used in the previous step, and 1 iolite rondelle. Pass through the tube again, forming a ring of wire 8-10mm in size, and crimp.
Step 11: Use 1 jump ring to attach the previous ring of wire to the bottom loop of 1 iolite nugget link formed in Step 3. Use 1 jump ring to attach the top loop of the iolite nugget to 1 link of antique chain.
Step 12: Repeat Step 10. Use 1 link of antique chain to attach the previous ring of wire to the bottom loop of 1 penny-sized coin link formed in Step 4.

Step 13: Use 2" of Copper color wire to string 1 crimp tube, 1 iolite rondelle, the top loop of the penny-sized coin link, the bottom loop of 1 washer link formed in Step 6, and one loop of wire from 1 ruby zoisite link formed in Step 7. Pass through the tube again, forming a ring of wire 8-10mm in size, and crimp.
Step 14: Use 2" of Copper color wire to string 1 crimp tube, 1 iolite rondelle, the bottom loop of 1 quarter-sized coin link formed in Step 5, the top loop of the washer link used in the previous step, and the other loop of wire from 1 ruby zoisite link formed in Step 7. Pass through the tube again, forming a ring of wire 8-10mm in size, and crimp.
Step 15: Use 1 link of antique chain to attach the top loop of the quarter-sized coin link to the bottom loop of one washer link formed in Step 6 and one loop of wire from 1 beryl link formed in Step 8.
Step 16: Separate one single link and one 4-6 link length of antique chain and set aside. Divide the remaining chain into two equal lengths.
Step 17: Use 1 equal length of chain to attach the top loop of the quarter-sized coin link to the other loop of wire from the beryl link.

Step 18: Repeat Steps 9-15 and 17 for the other half of the necklace.

Step 19: To create the bar half of the toggle clasp: use about 8" of Copper color wire to string 1 crimp tube and the key. Continue to wrap the wire around the key, adding 1 iolite rondelle, 2 blue sapphire rounds, and the 4-6 link length of chain to the wraps. Pass through the crimp tube again to secure all the wraps and beads, and crimp. Use 1 jump ring to attach the open end of 1 chain to 1 link of chain on the wrapped key. To create the ring half of the toggle clasp: Use 2" of wire to string 1 crimp tube and the brass ring. Pass through the tube again to form a ring of wire around the brass ring and crimp. Repeat three times for a total of four rings around the brass ring. Use 4" of Copper color wire to string 1 crimp tube, the open end of the other chain, 1 Montana crystal bicone, the four rings of Copper wire around the brass ring, and 1 Montana crystal bicone. Pass the wire through the chain link and the four rings around the brass ring again. Pass throguh the crimp tube again, and crimp. Attach the remaining single link of antique chain around the wire rings.

How To Knit With Soft Flex Craft Wire And Crystal Beads
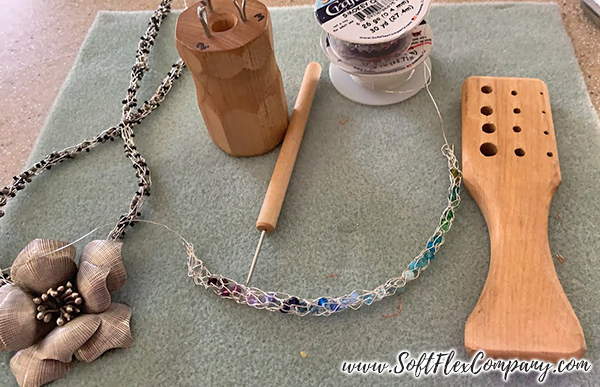
In this YouTube series episode of Free Spirit Beading, Kristen used a knitting spool and Soft Flex Craft Wire to create a stunning bracelet. She has a wonderful eye for color. This bracelet is elegant, but would also look great as a masculine design, too.

From Kristen:
Create a knitted wire bracelet with the 3-pin knitting spool, craft wire and 4mm crystal bicone beads. Knitting on a spool with craft wire is similar technique to knitting beading wire, but it has some different qualities. It’s a lot more rigid so, instead of soft looping knits with some stretch, the design will look a bit more structured with jagged loops and will not stretch. A Draw Plate is needed after you are done knitting to smooth out and condense the wire into a uniform shape. I love how perplexing it is to wrap your head around how it was made. It doesn’t look as easy to make as it actually is!
Supplies:
Soft Flex Craft Wire 26G - Non Tarnish Silver Plated
Approx 30 4mm Crystal Bicone
Beads
3-Pin Knitting Spool
Draw Plate
Eye Pins
Cones
Toggle Clasp
Jump Rings
Cutters
Chain Nose Pliers
Round Nose Pliers
Technique:
Knitting Style 1

From Kristen:
Note on sizing: If you want a 7.5" bracelet - allow 2" for the cones and toggle clasp therefore, you would need 5.5" of knitted wire.

Soft Flex Craft Wire is a fantastic wire for knitting. The designs are firm and wonderful on the wrist. Soft Flex Beading Wire is great if you want your knitted design to be springy and less sturdy. Craft Wire is surprisingly easy to manipulate on a knitting spool. Check out our Lazee Daizee Viking Knit tools if you would like another easy option for knitting with Craft Wire.

Whole Lotta Green Bracelet

Designer Jamie Hogsett
Skill Level Intermediate
Materials
22 Gauge Peridot Soft Flex Craft Wire
24 Gauge Peridot Soft Flex Craft Wire
Turquoise 4x2mm Czech Faceted
Rondelles - 24 pcs
Green 4mm Czech Pressed-Glass
Rounds - 24 pcs
Chartreuse 5mm Czech Pressed-Glass
Coins - 24 pcs
Tools
Cutters
Mini Twist n Curl Set
Chain Nose Pliers
Round Nose Pliers
Needle Nose Pliers
Sharpie marker
Instructions
Finished Size: 8 1/4"
Step 1: Unspool some of the 24-gauge wire from the spool, but do not cut the wire. Use the wire end to string 8 rondelles.
Step 2: Secure the end of the wire in the Twist n Curl tool. Coil the wire on the tool for about 1/2". Coil back over the coil just made. Coil over the coiled wire again, adding beads randomly and evenly around the coiled wire. Cut the wire ends and use pliers to tuck the wire end into the coiled bead. Repeat twice to make a total of three coiled rondelle beads. Set aside.
Step 3: Repeat Step 2 using rounds to make three coiled round beads.
Step 4: Repeat Step 3 using coins to make three coiled coin beads.
Step 5: Use 2 1/2" of 22-gauge wire to
form a wire-wrapped loop. String 1 coiled rondelle bead and form a wire-wrapped loop. Use 2 1/2" of 22-gauge wire to form a wire-wrapped loop that attaches to the previous wire-wrapped loop. String 1 coiled coin bead and form a wire-wrapped loop. Use 2 1/2" of 22-gauge wire to form a wire-wrapped loop that attaches to the previous wire-wrapped loop. String 1 coiled round bead and form a wire-wrapped loop.
Step 6: Repeat Step 5 twice.
Step 7: To make the ring half of the toggle clasp, form a wire-wrapped loop at one end of 10" of 22-gauge wire that attaches to the first wire-wrapped loop formed in Step 5. Wrap the wire around a Sharpie marker three times. Wrap the wire end around the coiled wire at the wrapped loop. Do not cut remaining wire. Use a long length of 24-gauge wire to wrap around the three loops of wire, keeping the wraps tight and close together. Coil the ends of the 24-gauge wire around the coiled wire at the wrapped loop. Use the remaining end of the 22-gauge wire to coil around the wrapped loop wire again. Trim all wire ends and use pliers to tuck in.
Step 8: To make the bar half of the toggle clasp, form a wire-wrapped loop at the center of 8" of 22-gauge wire that attaches to the other end of the necklace. Bend both wire ends 90 degrees from the wrapped loop, in opposite directions. Measure 1/2" from the wrapped loop and bend one end of the wire back onto itself 180 degrees. Repeat with the other end of the wire. Use cutters to trim wire ends, making sure that the bent wires are about 1" long. Use 12" of 24-gauge wire to wrap around the length of the toggle bar, keeping the wire wraps tight and close together. Coil wires back to the wrapped loop and around the wrapped wire. Trim wire ends and use pliers to tuck in.

Amethyst Heart Bracelet and Earrings

Designer Virginia Magdaleno
Skill Level Intermediate
Materials
26 gauge Non-Tarnish Silver Plated Soft Flex Craft Wire - 1 Spool
Sterling Silver Large Heart Toggle
Clasp - 1 set
6mm Sterling Silver
Split Rings - approx. 60 pcs
20 gauge 1.5" Sterling Silver Head Pins - 20 pcs
Silver Filled Ear Wires - 1 pair
Amethyst Heart
Beads -26 pcs
Tools
Cutters
Needle Nose Pliers
Round Nose Pliers
Split Ring Pliers
Instructions
For Bracelet
Step 1: Use the Split Ring Pliers to attach one split ring to the ring (heart) half of the toggle clasp.
Step 2: Use the Split Ring Pliers to attach one split ring to the previous ring(s). Attach two split rings to the previous ring. Repeat entire step 17 times form a chain of rings.
Step 3: Attach one split ring to the previous rings. Use the Split Ring Pliers and one split ring to connect the last split ring of the chain to the bar half of the toggle clasp.
Step 4: Use 1 head pin to string 1 amethyst heart bead. Use Soft Flex Professional Needle Nose Pliers and Soft Flex Professional Round Nose Pliers to
form a wrapped loop that attaches to the first split ring used in Step 2. Repeat entire step to attach beads to each single split ring in the chain (not including the Split Rings that are attached to the toggle) for a total of 18 dangles.
For Earrings
Step 1: Use 3 inches of 26 gauge Soft Flex Craft Wire to form a wire wrapped loop that attaches to one ear wire. String 1 amethyst heart bead and form a wire wrapped loop.
Step 2: Repeat Step 1, attaching the first wire wrapped loop that the last loop formed in the previous step.
Step 3: Repeat Step 2.
Step 4: Use 1 head pin to string 1 amethyst heart bead. Form a wire-wrapped loop that attaches to the last loop formed in the previous step.
Step 5: Repeat Steps 1-4 to make a second earring.
Projects not intended for children under the age of 13. The information on this instruction sheet is presented in good faith, but no warranty is given, nor results guaranteed. Soft Flex® Company disclaims all liability from any injury to anyone undertaking the construction of this project as a result of improper safety precautions.
Join our
Facebook group – VIB. Stay in the know. Stay up to date. From our bead shows to our video shows and sales, you can stay in touch with us. The community is full of artistic and helpful beaders and crafty people. Inspire and be inspired. Share your pictures and get the beading bug from others!
Visit the
Soft Flex Company YouTube Channel!


Blog contributor Thomas Soles loves Jazz Age writers and crunchy french fries. His favorite gemstones are Lapis and Pietersite. His favorite hobby is day dreaming. And his favorite mustache is Freddie Mercury's. As you can see, he has a healthy (or possibly unhealthy) sense of humor. You can write to him at Thomas@SoftFlexCompany.com