

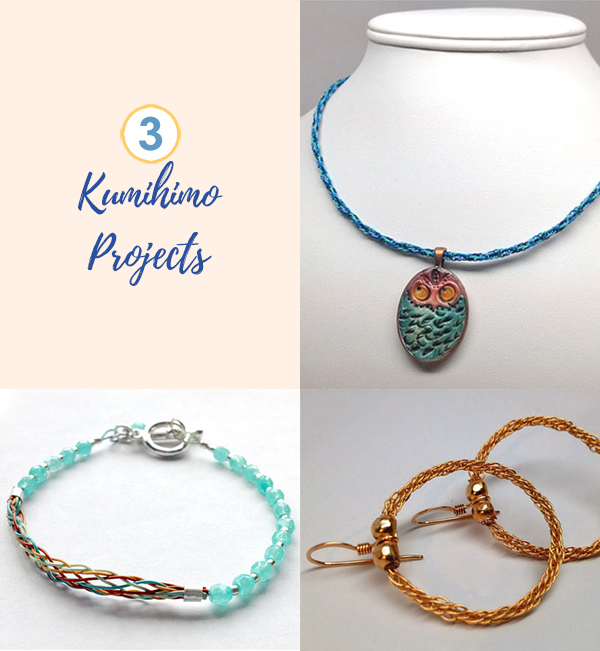
You need to buy a Kumihimo board. If you enjoy knitting and weaving, you are going to love learning how to make Kumihimo braids. Kumihimo is a Japanese art. It means ‘gathered threads’. Kumihimo braids were notably used to link small plates in Samurai armor and adorn Samurai horse armor. The history of Kumihimo is as colorful and fun as the art itself.

Kumihimo braids transcend gender when making jewelry. The designs can be delicate and sophisticated or rugged and functional. Kumihimo work can be done with cord, silk, beading wire, or string. One fun part of Kumihimo designs is using a mixture of cord and thread and seeing how your braids finish. A thin cord mixed with a thicker cord will create a textured and interesting finish. Adding silk or wire will make each piece a signature design. Your finished Kumihimo jewelry can truly be one of a kind.
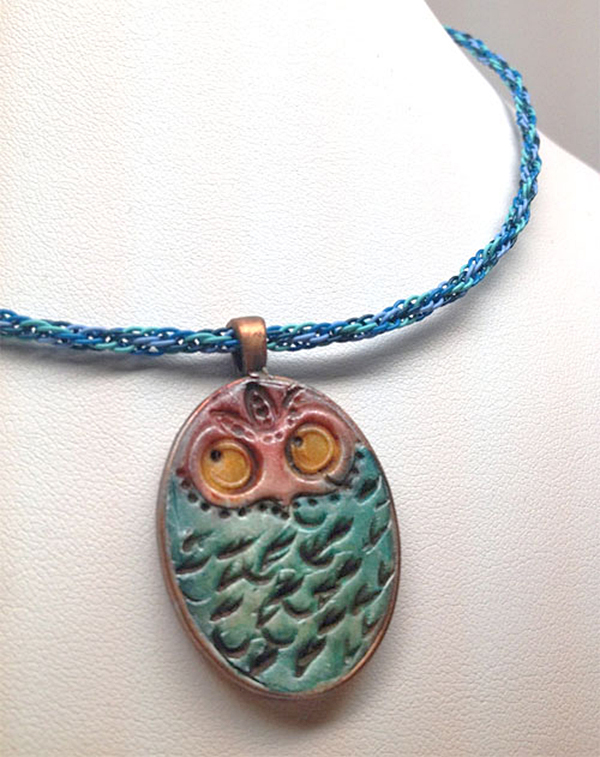
This necklace was created with Soft Flex Beading Wire. Sara used .019 diameter wire to create a colorful necklace and added a focal bead.
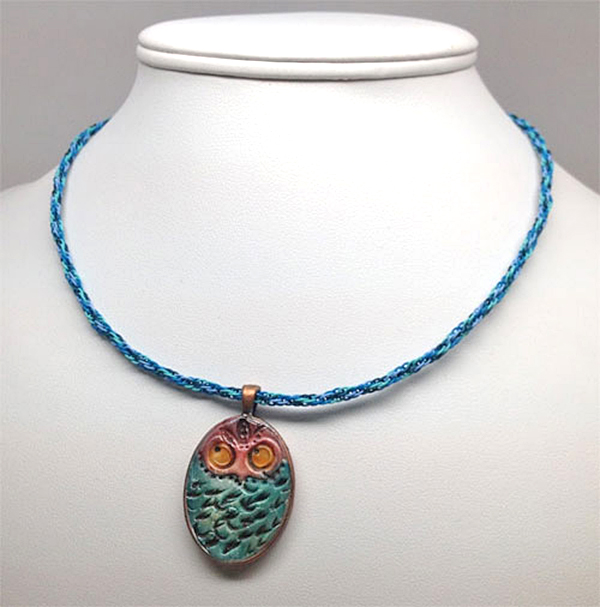
Soft Flex Round Kumihimo Chain
Designer Sara Oehler
Materials
Soft Flex Tranquility Trios - 6ft of each color
Soft Flex Beading Wire, .019 Diameter, Green Turquoise - 6 ft
3x3mm Crimp Tube - 2 pcs
Clasp - 1 pc
Tesori Trovati Owl Pendant - 1 pc
Tools
Double Density Round Kumihimo Disk
Mighty Crimper
Cutters
Bead Stoppers
Instructions
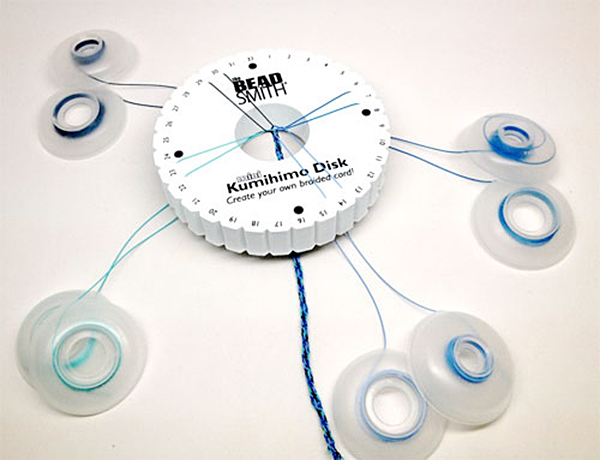
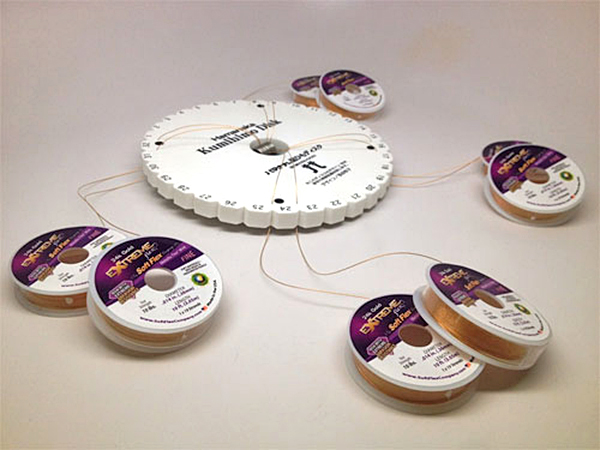
Step 1: Using eight lengths of 3 feet of beading wire to create a Kumihimo braid using the round disk. Click here for step by step round kumihimo instructions.
Step 2: Use all eight wires to string a crimp tube and half of the clasp. Pass the eight wires back through the crimp. Crimp the tube. Click here for crimping instructions.
Step 3: Repeat Step 3 for the second side.
Kumihimo boards are fantastic for earrings. Sara created these fun earrings and used the wire alone. She used a gold plated wire for an elegant look, but if you are feeling playful, you can add color.
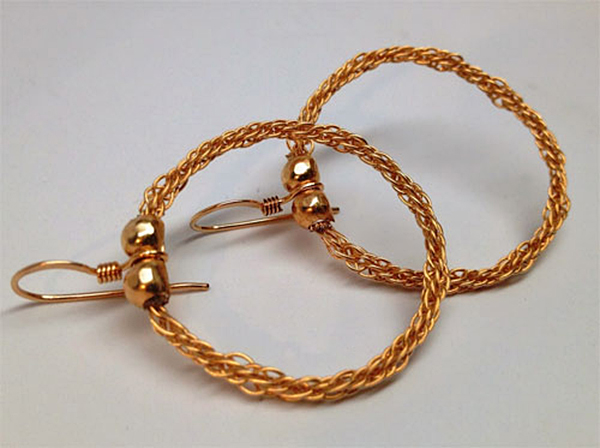
Soft Flex Round Kumihimo Earrings
Designer Sara Oehler
Materials
Extreme 24K Gold Plated Beading Wire, .014 Diameter - 8, 10ft spools
3x3mm Crimp Tube - 3 pcs
4mm Gold Filled Crimp Cover - 4 pcs
Gold Plated Ear Wires - 1 pair
Tools
Round Kumihimo Disk
Mighty Crimper
Cutters
Chain Nose Pliers
Bead Stoppers
Instructions
Tip: I used my 10ft spools of beading wire as the bobbins, making the set up for this project very quick and easy. Also, when you buy 8 spools, you automatically get a 20% discount off of the retail price! Less work and less cost.
Click here for step by step round kumihimo instructions.
Click here for crimping instructions.
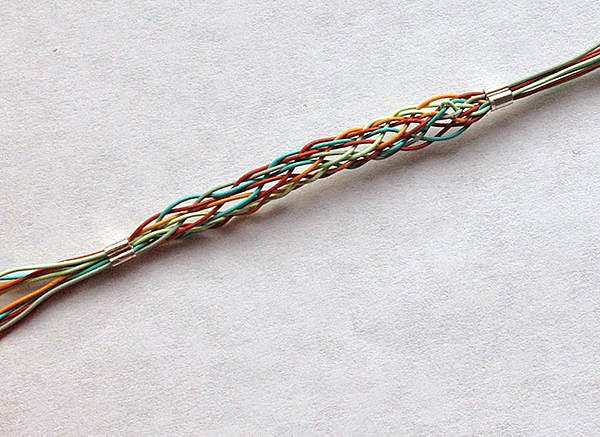
Kristen used a square Kumihimo board to create her bracelet. Square Kumihimo boards will create a flatter finish. Perfect for a bracelet. Square Kumihimo boards are also great for necklaces.
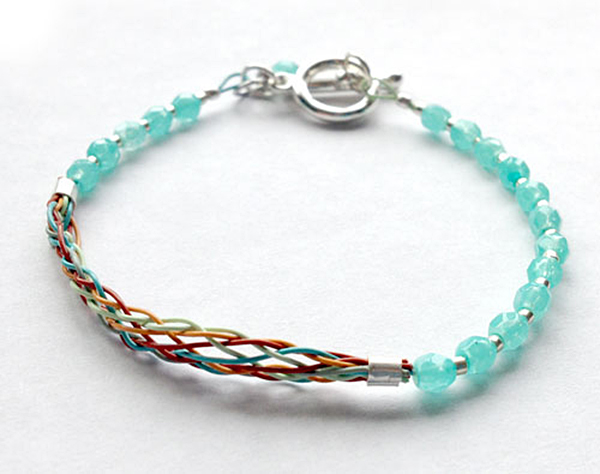
Soft Flex Kumihimo Bracelet
Designer Kristen Fagan
Materials
.019 Soft Flex Beading Wire in colors Fluorite, Citrine, Chrysoprase, Green Turquoise and Spinel - Approximately 20" each
4mm Faceted Light Blue Fire Polished Bead -17 pcs
Size 11 Metallic Silver Seed Bead - 16 pcs
2x2mm Silver Crimp Tube - 2 pcs
3x3mm Silver Crimp Tube - 2 pcs
12mm Silver Toggle Clasp - 1 pc
6mm Silver Jump Ring - 2 pcs
Silver Head Pin - 1 pc
Tools
Magical Crimping Pliers
Mighty Crimping Pliers
Cutter
Square Kumihimo Plate
Instructions
You will need 10 strands of beading wire, approximately 20" length for each strand, in assorted colors. If you have 10ft spools of Soft Flex beading wire you may work directly from the spool otherwise, cut your wire strands. I didn't feel the need to use bobbins with my cut wire strands.
Step 1: Gather your wires and slide a 3mm crimp tube on one end of your cut wires or the end not attached to your spool if working from the spool. Slide your crimp up the wire strands leaving a 4" tail and crimp using your mighty crimping pliers. The crimped wire side will go into the middle of your Kumihimo plate. Click here for crimping instructions.
Step 2: Set your plate up to have 6 beading wire strands across the top and 4 beading wire strands across the bottom.
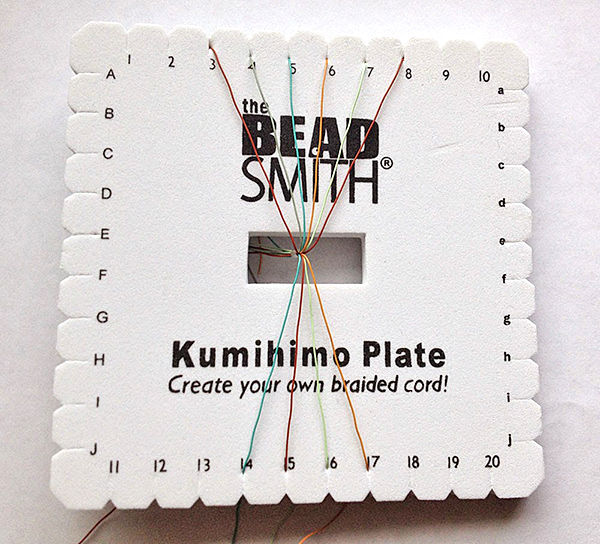
Step 3: Visit our Kumhimo Instructions Page if you need help with Square Kumihimo braiding.
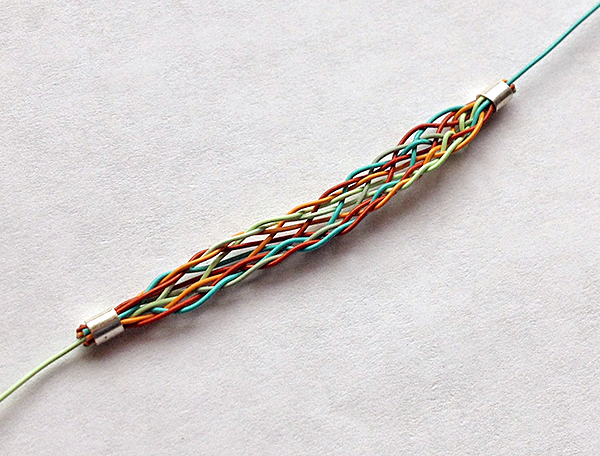
Step 4: Continue braiding until you have about 2" of braided wire and at least 4" of excess wire left. Remove your wire from the Kumihimo plate. If working from the spools you should now cut the wires free from the spools making sure each strand has about 4".
Step 5: Gather the wire and slide on a 3mm crimp tube and crimp using the mighty crimping pliers at the base of your finished braid. Click here for crimping instructions.
Step 6: Choose one wire strand on each side of your braid to be your stringing wire to complete your bracelet. Trim all other wire strands as close to the crimp tube as possible as shown below
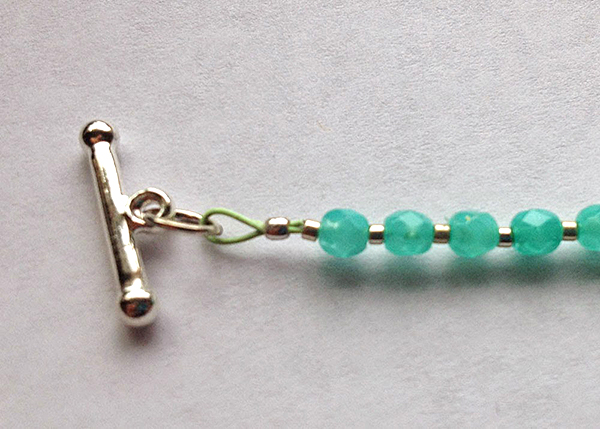
Step 7: On one side of your braided centerpiece, string 1 fire polish bead, 1 seed bead, 1 fire polish bead, 1 seed bead and continue to repeat until you have 8 fire polish beads and 8 seed beads. You may need to adjust the number of beads used based on the final design size needed.
Step 8: Add a 2mm crimp tube and crimp around 1 jump ring using the magical crimper. Attach one side of the toggle clasp to the jump ring. Click here for magical crimping instructions.
Step 9: Repeat you bead stringing on the other side of the braided centerpiece, 1 fire polish bead, 1 seed bead, 1 fire polish bead, 1 seed bead and continue to repeat until you have 8 fire polish beads and 8 seed beads. You may need to adjust the number of beads used based on the final design size needed.
Step 10: Add a 2mm crimp tube and crimp around 1 jump ring using the magical crimper. Attach the other side of the toggle clasp to the jump ring. Click here for magical crimping instructions.
Step 11: Lastly, create a bead dangle using your headpin and 1 fire polish blue bead and attach it to the jump ring connected to your toggle bar. Click here for instructions on how to make a bead dangle.
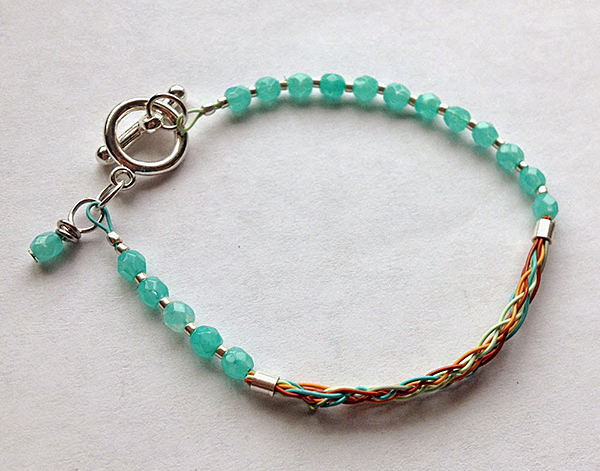
Note: My design had one strand side longer then the other so, my design turned out slightly asymmetrical with on side having 5 fire polish beads and the other 11 fire polish beads.
Join the fun in our VIB Facebook Group today! Stay in the know. Stay up to date. From our bead shows to our video shows and sales, you can stay in touch with us. The community is full of artistic and helpful beaders and crafty people. Inspire and be inspired. Share your pictures and get the beading bug from others!
Visit the Soft Flex Company YouTube Channel!


Blog contributor Thomas Soles is the Trade Show Coordinator for Soft Flex Company. His favorite stones are Lapis and Pietersite. His favorite hobby is day dreaming. And his favorite mustache is Tom Selleck's. As you can see, he has a healthy (or possibly unhealthy) sense of humor. You can write to him at Thomas@SoftFlexCompany.com